.avif)
.avif)
.avif)
How to Measure for Roman Shades: A Delmarva Homeowner's Guide
- Johann Reardon

- Nov 15, 2025
- 8 min read
Updated: Dec 4, 2025
TL;DR: To measure for Roman shades, first decide between an inside mount (within the frame) or an outside mount (on the wall/trim). For an inside mount, measure the width at the top, middle, and bottom and use the narrowest measurement; measure the height at the left, middle, and right and use the tallest. For an outside mount, add 3-4 inches to both the width and height for overlap. Always use a steel tape measure for accuracy down to 1/8 inch. For a guaranteed perfect fit, the experts at Home Blinds & Floors offer free in-home consultations across the Delmarva Peninsula.
Trying to figure out how to get that perfect, custom-fit look for new Roman shades in your Delmarva home? At Home Blinds & Floors, we help homeowners across the Eastern Shore find the perfect balance of style, light control, and privacy, and it all starts with a precise measurement. Getting your measurements spot-on is the secret to ensuring your shades not only look professionally installed but also function flawlessly every single day.
Preparing for Flawless Roman Shade Measurements
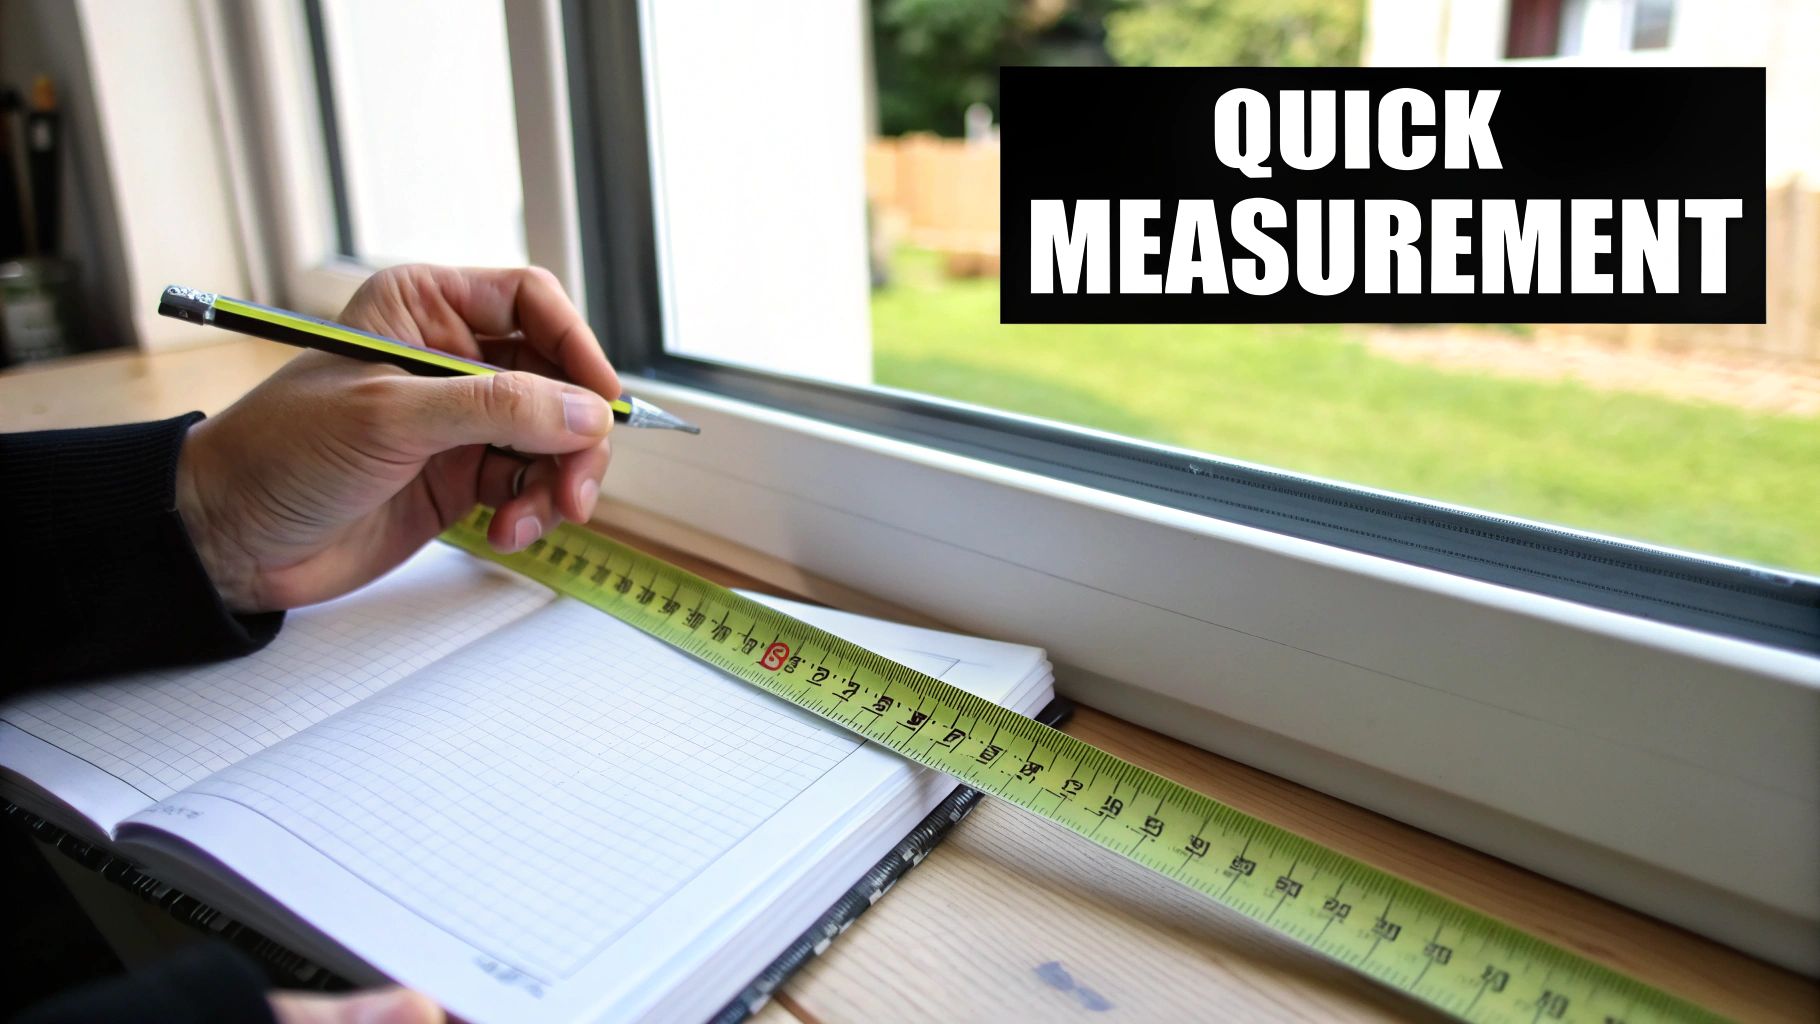
Before you even reach for a tape measure, a little prep work goes a long way. It’s the difference between a frustrating weekend project and a perfect, professional-looking result. The single most important tool you'll need is a steel tape measure. Please, don’t grab that soft, flexible sewing tape. It can easily stretch or sag, throwing off your numbers just enough to ruin a custom order. We're aiming for precision here, and a rigid steel tape is the only way to guarantee it.
Your First Big Decision: Inside vs. Outside Mount
With your tape measure in hand, you need to decide how the shades will hang. This choice changes everything about how you measure, so it's the first box to check.
Inside Mount: This is when the shade fits neatly inside the window casing itself. It creates a clean, built-in look that really shows off your window trim. We see this a lot in coastal homes around Rehoboth Beach, where that crisp, airy aesthetic is so popular.
Outside Mount: This style is installed on the wall or trim above and around the window frame. It's a fantastic solution for making a window appear larger, hiding imperfect trim, or getting the best possible light blockage.
From free in-home consultations to flawless installation, Home Blinds & Floors takes the stress out of selecting window treatments and ensures these foundational decisions are right for your space.
Why Precision Is Everything
The window treatment world is built on accuracy. There's a reason a 1/8 inch measurement tolerance became the industry standard. Market research revealed that a shocking 78% of installation failures stemmed from measurement errors larger than a quarter-inch. This is also why steel tape measures became mandatory; old cloth tapes were blamed for almost a quarter of all mistakes. You can learn more about these precise measurement standards on Blinds.com.
Scout for Obstructions Before You Measure
Your final prep step is a quick scan of the window area. Look for anything that could get in the way of the shade's movement or installation. It’s a simple check that can save you a huge headache.
Keep an eye out for these common culprits:
Window Cranks & Levers: Will an inside-mounted shade have enough depth to clear the hardware as it goes up and down?
Locks & Latches: A protruding lock can stop a shade from closing all the way.
Alarm Sensors: These little boxes on the frame or glass can easily block a snug-fitting shade.
Deep Sills or Tile: In kitchens and bathrooms, a deep windowsill or a tile backsplash can interfere with how an outside-mount shade hangs.
Noting these issues now will help you avoid problems later. For a complete walkthrough and a great tool to keep your numbers organized, grab our guide on creating a perfect window measuring template for Delmarva homes. Nailing these fundamentals is the secret to a professional result—a standard we bring to every job, from Salisbury to Easton.
How to Measure for an Inside Mount
Most people choose an inside mount for their Roman shades, and it’s easy to see why. It gives you that clean, custom, built-in look that really frames your window beautifully. The trick is, achieving that sleek finish requires some seriously precise measurements. Window frames are almost never perfectly square, so our "three-point" measuring method is essential.
Taking Accurate Width Measurements
Grab your steel tape measure. For an inside mount, you’re going to take three horizontal measurements inside the window casing itself.
First, measure the width at the very top of the window opening.
Next, do the same thing across the middle.
Finally, measure across the bottom, right along the sill.
Jot down all three numbers to the nearest 1/8 inch. Now, circle the narrowest one. This is the number you'll use for your order. Why the smallest? It's a crucial step that guarantees the shade won't be too tight. Inside mount installations have a failure rate of just 3.2% when measured at three points, which jumps to a whopping 12.8% when only one measurement is taken. You can see how manufacturers rely on these techniques on JustBlinds.com for a reason.
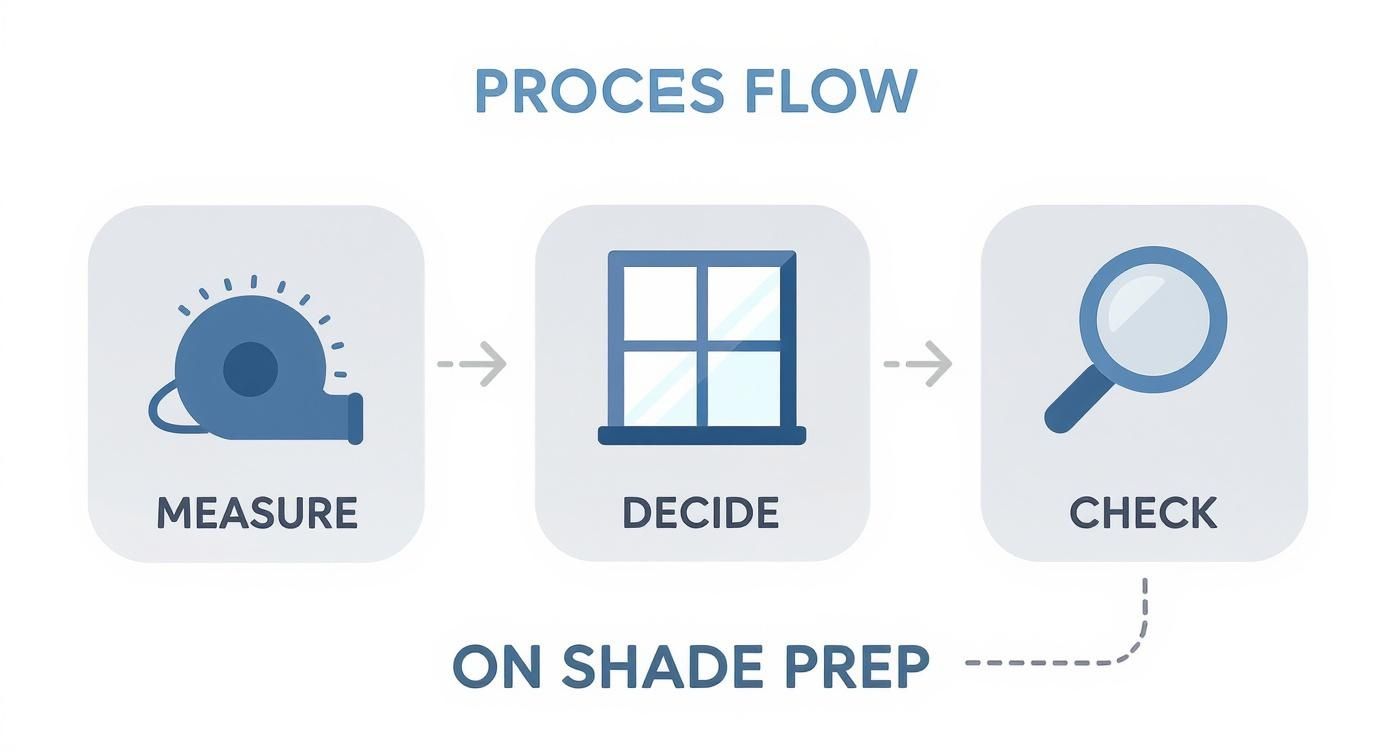
This simple process flow breaks down the key steps for getting ready to measure.
Getting the Height Just Right
You're going to use the same three-point approach for the height.
Measure the height on the far left side of the window, from the top of the frame down to the sill.
Take a second measurement right in the center.
Finally, measure the height on the far right side.
Record all three of these measurements to the nearest 1/8 inch. For height, you need to circle and use the tallest of the three numbers. This ensures your Roman shade is long enough to cover the entire window.
Expert Insight: You don't have to worry about factory deductions. The manufacturer automatically makes a small deduction (usually 1/4" to 1/2") from the width you provide for an inside mount. Your job is to provide the exact narrowest width—let the factory handle the rest.
As a local, family-run business, Home Blinds & Floors provides personal service, competitive pricing, and professional installation throughout Sussex, Wicomico, Kent, and beyond, taking all the guesswork out of this process.
How to Measure for an Outside Mount
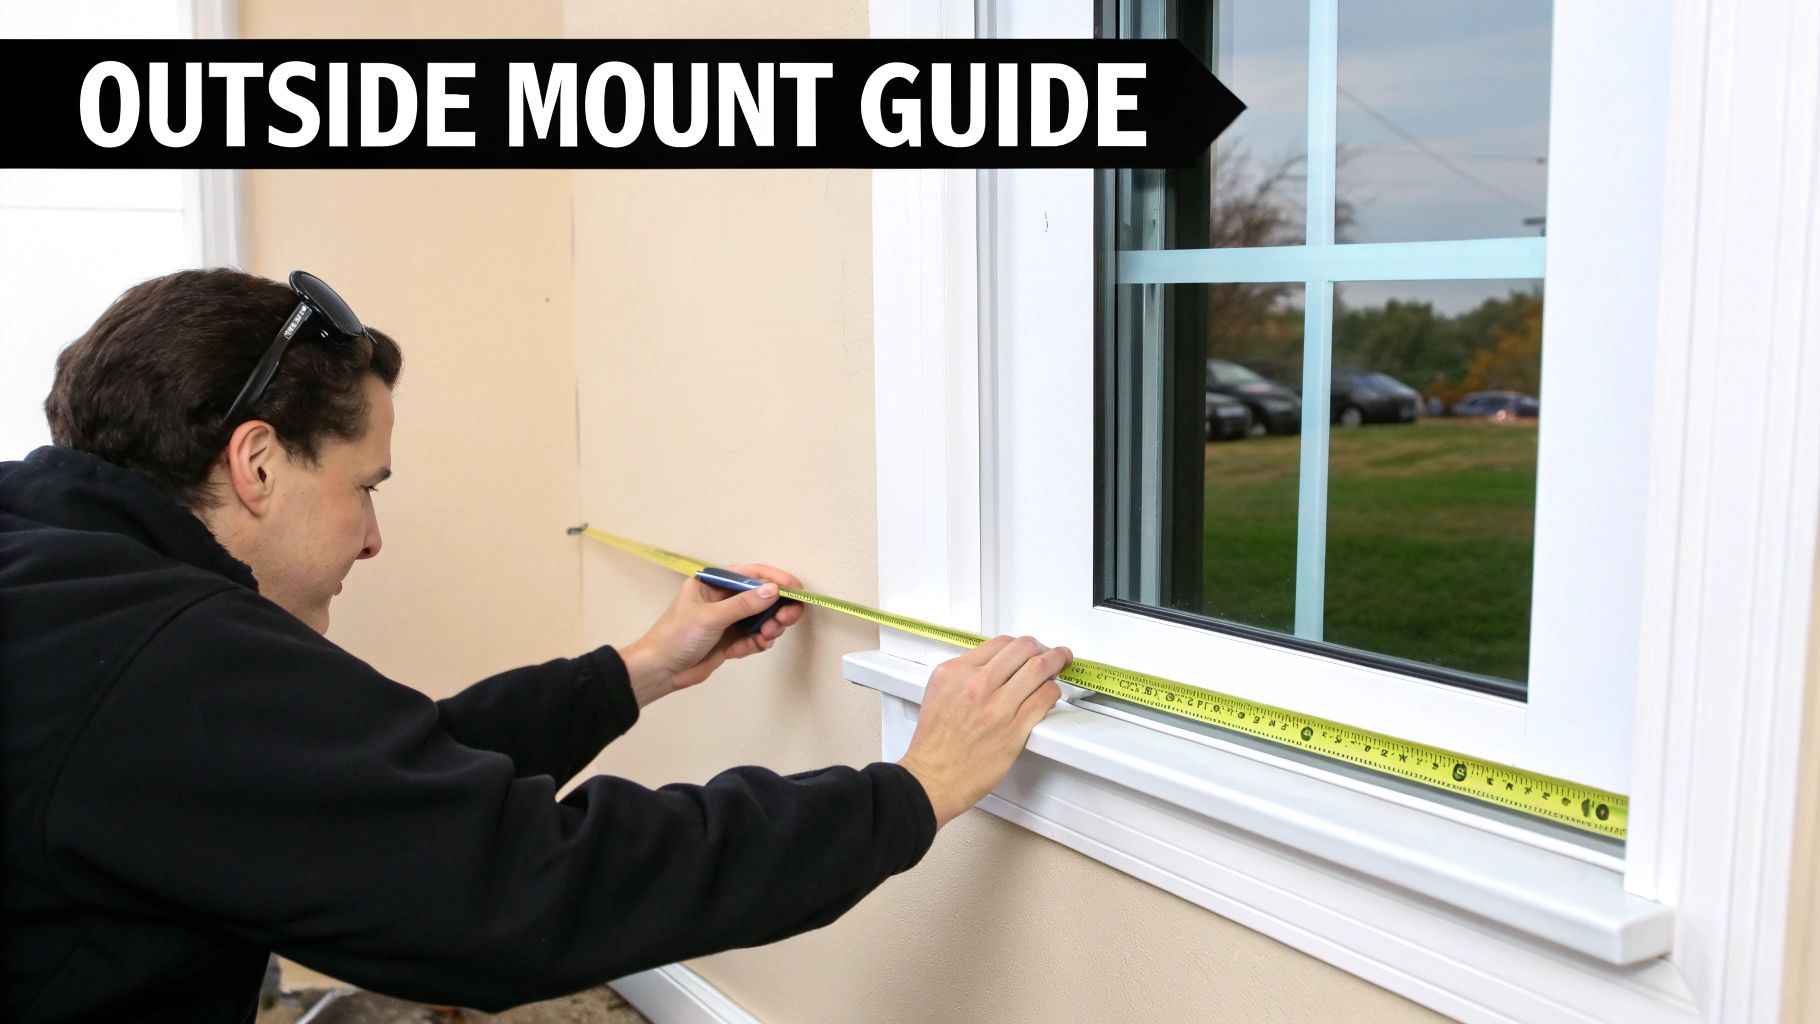
An outside mount is the perfect solution when a window frame is too shallow for an inside fit, or when you’re aiming for maximum light control and privacy. Instead of measuring within the frame, you’ll be adding to your window's dimensions to make it appear larger. This approach is fantastic for blocking out light, as the fabric covers the entire window frame and eliminates those pesky light gaps.
Calculating the Ideal Width for Overlap
The first step is deciding how much you want the shade to extend beyond the window frame on each side. We recommend adding a total of 3 to 4 inches to the overall width of your window. This gives you a 1.5 to 2-inch extension past the frame on both the left and right sides, which is plenty to minimize light leakage. Measure the full width of your window opening, including any trim you want to cover, then add your desired overlap.
Determining the Correct Height and Stack
For an outside mount, you must account for the “stack”—the space the folded fabric takes up when the shade is fully raised. To avoid blocking your view, plan to mount the shade at least 2 to 3 inches above the top of the window frame. This gives the stack enough room to rest above the glass.
With that mounting point in mind, measure from where you’ll install the headrail down to where you want the shade to end (usually the bottom of the windowsill).
Pro Tip: When deciding on your mounting height, think about the fabric. Heavier materials like lined linen or thick weaves will create a taller stack than lighter-weight fabrics. You can learn more about this from experts who explain how fabric width affects your shades on SpiffySpools.com.
Putting It All Together: A Practical Example
Let’s walk through a real-world scenario for a window in a Salisbury home.
Window Trim Width: 40 inches
Window Trim Height: 60 inches
Calculate Final Width: 40 inches + 3 inches overlap = 43 inches final width.
Determine Mounting Point: Install the headrail 3 inches above the top trim.
Calculate Final Height: 3 inches mounting space + 60 inches trim height = 63 inches final height.
Your final order dimensions would be 43" W x 63" H. Home Blinds & Floors offers a wide selection of custom blinds and shades in Delmarva, with expert installers who bring the showroom to your living room and handle these calculations for you.
Tackling Tricky Windows and Avoiding Common Mistakes
While many windows are straightforward rectangles, homes here on the Delmarva Peninsula often have unique architectural features like bay windows, French doors, or windows with crank handles. These are the spots where a tiny measurement error can mean the difference between a flawless look and shades that clash or hang crooked.
Measuring for Bay, Corner, and French Doors
Bay and Corner Windows: The main goal is making sure the shades can operate without their headrails bumping into each other at the angles. This requires careful deductions and expert placement.
French Doors: These almost always require a shallow-mount outside shade that won't get in the way of the door handles. You must measure the handle's projection to ensure clearance.
Arched or Angled Windows: These non-standard shapes require a custom approach. Our detailed guide on shades for angled windows offers deeper insight.
Common Measurement Mistakes to Sidestep
Mixing Up Width and Height: Always write your measurements as W x H.
Forgetting to Account for Hardware: Measure the full window opening for an inside mount, or the area you want to cover for an outside mount.
Only Measuring Once: Taking measurements at the top, middle, and bottom is your secret weapon against uneven frames.
Assuming All Windows Are Identical: Always measure every single window individually.
For a deeper dive, our guide on how to measure and install blinds in your Delmarva home offers even more great tips, but the easiest way to avoid mistakes is to leave it to the professionals at Home Blinds & Floors.
FAQ: Your Roman Shade Measurement Questions Answered
How much window depth do I need for an inside mount Roman shade?
This depends on the specific shade, but a good rule of thumb is to have at least 1 inch of flat, unobstructed surface inside your window frame for standard mounting. For a completely flush mount where the shade doesn't protrude at all, you will likely need up to 2.5 inches of depth.
Should I round my measurements up or down?
Neither! Precision is key for custom window treatments. Always measure to the nearest 1/8 of an inch. Rounding up or down can result in a poor fit, creating unsightly gaps or causing the shade to rub against the frame.
What’s the best way to measure really large or tall windows?
For oversized windows, we strongly recommend a professional measurement. An expert from Home Blinds & Floors will not only get the dimensions right but will also assess the need for extra support brackets to prevent sagging and can recommend motorization options for ease of use. If you're weighing options, our guide on roller shades vs. Roman shades can be helpful.
Do you offer professional measuring and installation near me?
Yes! Home Blinds & Floors proudly serves homeowners and businesses across the Delmarva Peninsula. Our team provides free in-home consultations and expert installation in Salisbury, Rehoboth Beach, Easton, and throughout Sussex, Wicomico, and Kent counties. Our guide to expert blind installation and repair on the Delmarva Peninsula explains our commitment to a perfect finish.
Your Local Delmarva Experts in Custom Window Treatments
In summary, while DIY measuring for Roman shades is possible, achieving a truly professional result requires precision and an eye for detail. Avoiding common mistakes with inside and outside mounts is crucial for a perfect fit. Home Blinds & Floors provides custom window treatments, expert advice, and in-home service to homes across the Delmarva Peninsula. From Rehoboth Beach to Easton, our team is here to help you choose the best shades, shutters, or blinds for your space. Schedule your free consultation today.


Comments