.avif)
.avif)
.avif)
Ultimate Guide to Roller Shades Installation in Your Delmarva Home
- Johann Reardon

- Jan 2
- 13 min read
TL;DR: Installing roller shades is a straightforward DIY project that transforms any room. The key steps are choosing between an inside or outside mount, taking precise measurements, gathering basic tools (tape measure, drill, level), and carefully installing the brackets. For a perfect, stress-free result, especially with motorized or hard-to-reach windows, the experts at Home Blinds & Floors offer professional installation across the Delmarva Peninsula.
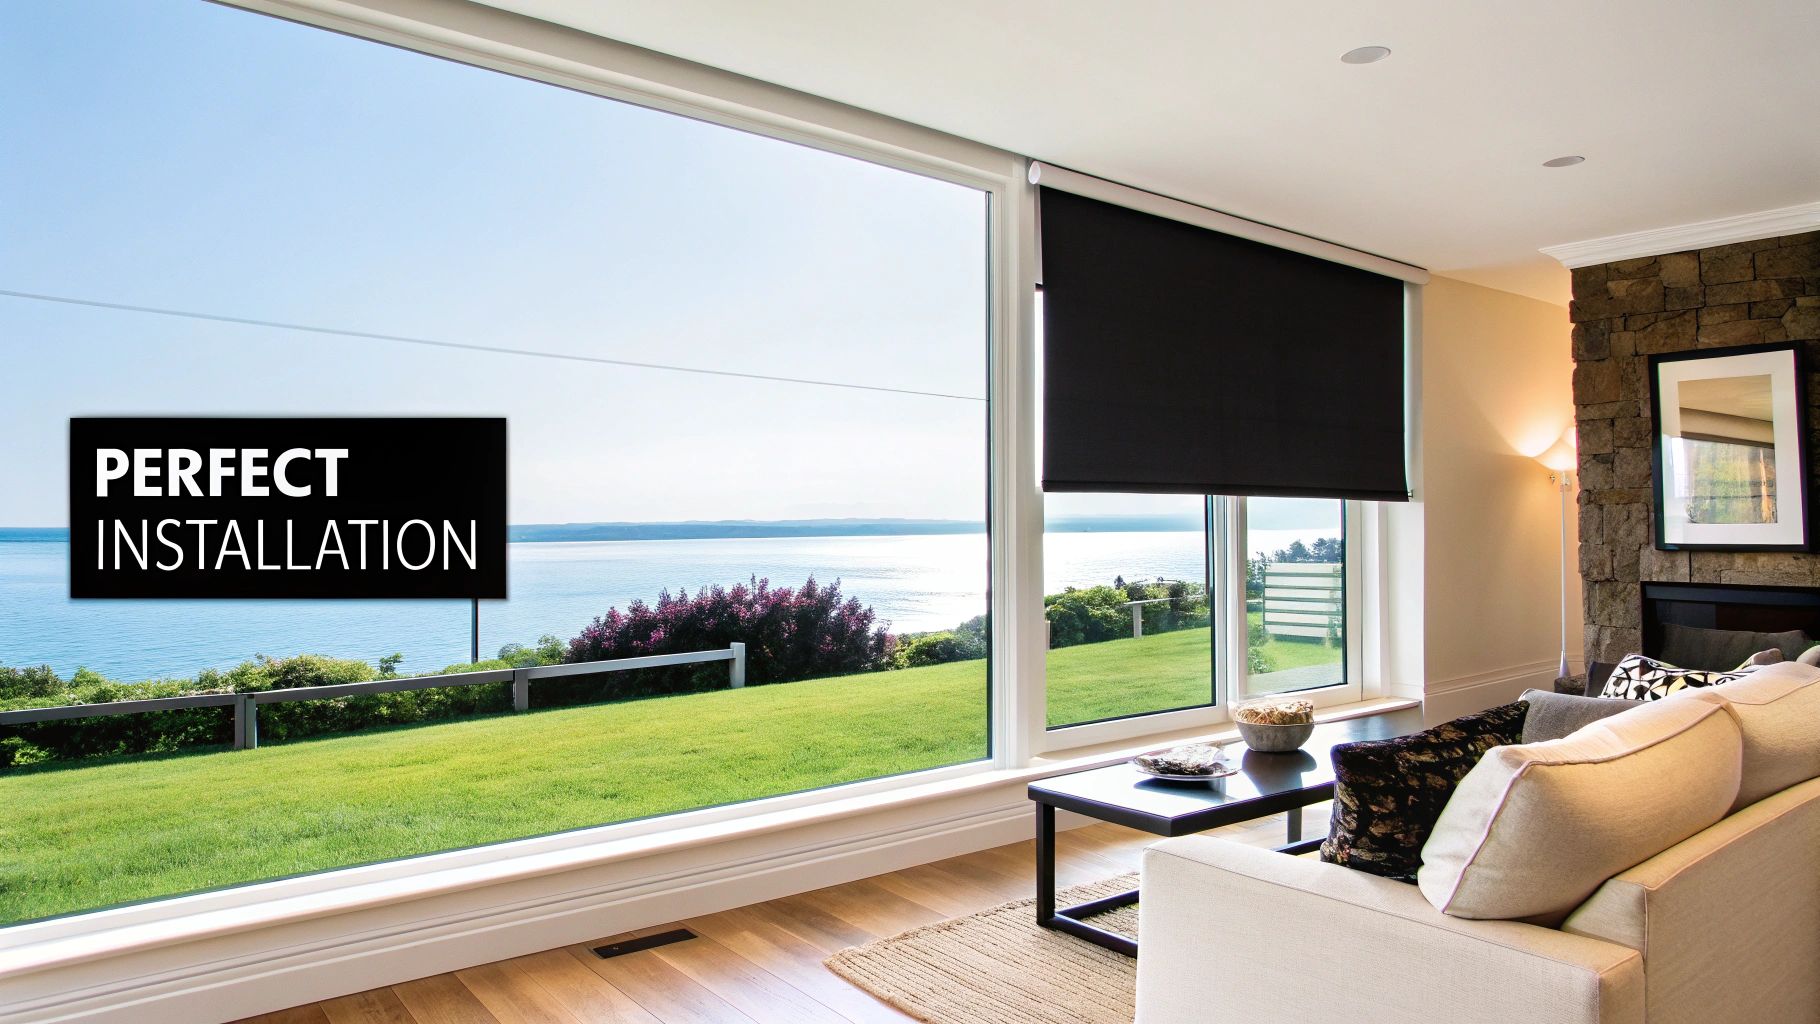
Ready to upgrade your window treatments but wondering if a DIY roller shades installation is the right move for your Delmarva home? At Home Blinds & Floors, we’ve helped countless homeowners figure this out, and the answer is almost always a big "yes." Roller shades have a minimalist feel that just works, whether it’s in a modern coastal home in Rehoth Beach or a classic colonial over in Easton.
Their popularity isn't just a local thing, either. Roller shades are a global favorite, holding a massive 27.40% share of the market for their product type. Why? They're incredibly versatile, look sharp, and give you fantastic control over light. Homeowners everywhere appreciate their compact design and how surprisingly simple they are to install.
This guide will walk you through the process, giving you the confidence to get a perfect installation every time. I’m going to share the same tips and tricks our professional installers use to make sure every shade hangs perfectly and operates like a dream.
Choosing the Right Mounting Style for Your Windows
Before you even think about grabbing a drill, you have a crucial decision to make: inside mount or outside mount. This choice changes everything—how you measure, how the shade functions, and the final look you'll achieve in your Eastern Shore home.
Inside Mount: This is my personal favorite for a clean, custom look. The shade fits neatly inside the window frame, showing off your beautiful trim. It’s perfect if you want a minimalist, built-in appearance.
Outside Mount: This is where the shade is mounted on the wall above the window or directly on the trim. It’s a great problem-solver for covering up less-than-perfect window frames or for when you want to block as much light as possible by overlapping the window opening.
As a local, family-run business, Home Blinds & Floors provides personal service, competitive pricing, and professional installation throughout Sussex, Wicomico, Kent, and beyond. We can help you decide which mount is best during a free in-home consultation.
Pro Tip: If your window casing is shallow—I'm talking less than 2 inches deep—an outside mount is often your only real choice. It gives the roller mechanism the space it needs to work without hitting the glass.
Inside Mount vs Outside Mount at a Glance
Choosing the right mounting style is your first critical decision. This table breaks down the key differences to help you select the best option for your windows and aesthetic goals. For instance, a historic home in Salisbury with shallow frames is a perfect candidate for an outside mount, while a modern Ocean City condo with deep-set windows will look fantastic with an inside mount.
Feature | Inside Mount | Outside Mount |
|---|---|---|
Aesthetic | Clean, minimalist, and built-in. | Creates a larger visual appearance for the window. |
Light Control | Allows small light gaps on the sides. | Offers superior light blockage and privacy. |
Window Trim | Beautifully showcases decorative trim. | Covers the window frame and trim. |
Measurement | Requires precise width, height, and depth. | More forgiving measurements are needed. |
Best For | Deep window casings and a streamlined look. | Shallow windows or achieving a blackout effect. |
Getting this one detail right is the first step toward a perfect roller shades installation. For a deeper look into what makes these shades so popular, check out our guide on what roller shades are and why Delmarva homeowners love them.
Prepping for a Flawless Roller Shades Installation
Any successful roller shade installation really comes down to what you do before a single bracket ever touches the wall. Getting the prep work right—from having the right tools on hand to taking dead-on accurate measurements—is the secret to a professional-looking result. If you rush this part, you're setting yourself up for failure.
Think of it this way: the care you take now directly impacts how well your shade operates and how clean it looks. A few extra minutes double-checking your numbers can save you from a world of frustration, like a shade that rolls up crooked, annoying light gaps, or one that just plain doesn't fit.
This quick visual breaks down the pre-installation workflow into three simple, but absolutely critical, actions.
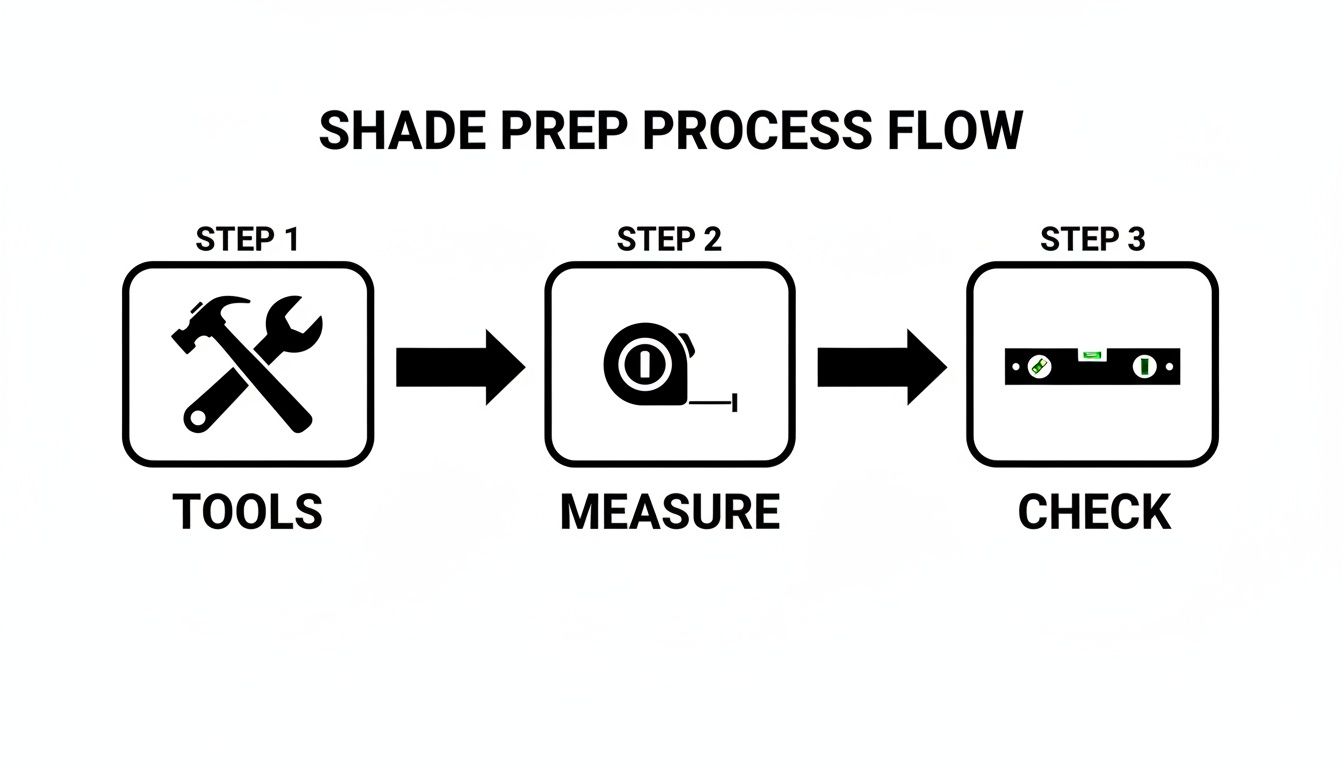
As you can see, a great installation is just a chain of these simple steps: gather your gear, measure accurately, and always double-check with a level.
Your Essential Toolkit for Installation
Before you even think about drilling, get all your tools laid out and ready. Trust me, you don’t want to be fumbling for a level while trying to hold a bracket steady. The good news is, most roller shade jobs only require a few basic tools you probably already have in your garage.
Here's a quick checklist of what you'll need:
Steel Tape Measure: This is non-negotiable. A fabric or plastic measuring tape can stretch and throw off your numbers. For this job, only steel will do.
Pencil: Simple, but essential for marking your bracket spots clearly.
Level: A 24-inch level is perfect for making sure your brackets are perfectly horizontal. A slightly unlevel installation is the number one reason shades get cranky and roll up unevenly.
Drill with Drill Bits: A cordless drill is your best friend here. Make sure you have the right bits for drilling pilot holes and a Phillips head bit for driving the screws.
Screws and Anchors: Your shade will come with screws, but they aren’t always the best for your specific wall type. It’s always smart to have some drywall anchors on hand, just in case you're not drilling into a solid wood stud.
From free in-home consultations to flawless installation, Home Blinds & Floors takes the stress out of selecting window treatments. Our experts show up with every tool needed to guarantee a perfect fit for your Delmarva home, whether you're in Salisbury or Easton. To see how this level of preparation applies to other home projects, check out this complete DIY guide for ceiling fan installation.
Taking Measurements for an Inside Mount
When you’re going for an inside mount—where the shade fits snugly inside the window frame—precision is absolutely everything. You need to measure the width of the window's interior at three separate points: across the top, middle, and bottom. Especially in older Eastern Shore homes, you'll find that windows are rarely perfectly square.
Once you have your three numbers, write down the narrowest of the three width measurements. This is the magic number you'll use to order your shade. Why the narrowest? Because the shade’s hardware has to fit into the tightest part of that opening, no exceptions.
Next up is the height. Measure it in three places as well—left, middle, and right. This time, you'll use the longest height measurement to make sure the shade is long enough to cover the entire pane of glass when it's all the way down. Lastly, don't forget to measure the depth of the window casing to be sure it's deep enough for the mounting brackets.
We have a saying in this business: "Measure twice, drill once." There's no undo button after you've put holes in your window frame. Taking an extra 30 seconds to re-measure will save you from a costly mistake.
Taking Measurements for an Outside Mount
Measuring for an outside mount gives you a bit more wiggle room, but you still need to be careful. With this style, the shade is mounted on the wall or trim above the window, overlapping the opening to give you better light control and privacy.
First, you have to decide how much you want the fabric to overlap the window frame. We almost always recommend an overlap of at least 1.5 to 3 inches on the left, right, and top. This extra coverage is what kills that annoying "halo effect" of light leaking in around the edges.
To figure out your width, measure the full width of your window trim, then add your desired overlap to each side. For the height, measure from where you plan to mount the top bracket (usually 2-3 inches above the frame) down to where you want the shade to stop—typically the bottom of the windowsill. This gives you total coverage and a clean, balanced look. For a more detailed walkthrough, explore our guide on how to measure for blinds like an expert.
Securing the Brackets and Mounting the Shade
With your pilot holes ready, it's time to attach the brackets. Line them up over the holes and drive in the screws until they're snug. You don't need to go crazy here—overtightening can strip the wood or even damage the bracket itself. Just make sure they feel solid and don't wiggle.
Now for the main event. Pick up your roller shade. For a standard roll, you want the fabric to unspool from the back of the tube, closest to the window glass.
Insert the fixed end first. This is usually the side with the pull chain or a solid, non-moving pin.
Depress the spring-loaded end. On the other side, you'll find a pin that pushes in. Compress it, guide it into the bracket, and you should hear or feel a solid "click" as it pops into place.
Give it a gentle tug. Just a quick check to make sure the shade is seated firmly in both brackets and isn't going anywhere.
Home Blinds & Floors offers a wide selection of custom blinds and shades in Delmarva, with expert installers who bring the showroom to your living room.
Testing and Final Adjustments
Once the shade is up, it's time for a test run. Pull it down slowly, then let it retract. Keep an eye on the fabric as it rolls up—is it staying centered on the tube, or is it wandering off to one side?
If it's rolling crooked, don't panic. This is a really common issue and it's almost always an easy fix. It just means the brackets aren't perfectly level. You can correct this by placing a small shim—a folded piece of cardboard or a thin washer works great—between one of the brackets and the window frame to make a tiny adjustment.
The North American blinds and shades market is huge, holding a dominant 50.58% global market share. A lot of that is driven by renovations in the U.S.'s over 138 million older homes and a massive consumer demand for energy-efficient upgrades like roller shades. Their straightforward installation is a huge plus, allowing homeowners to get a professional-looking result with minimal fuss. You can read more about these market trends on Fortunebusinessinsights.com.
If you have a cordless shade, check the tension. If it doesn't retract smoothly or feels sluggish, check the manufacturer's instructions. There's usually a small adjustment dial or a specific rolling method to get it just right. The process is pretty straightforward and actually quite similar to other types of window treatments. If you're interested, feel free to check out our guide on how to install cellular shades in your Delmarva home.
Installing Modern Motorized Roller Shades
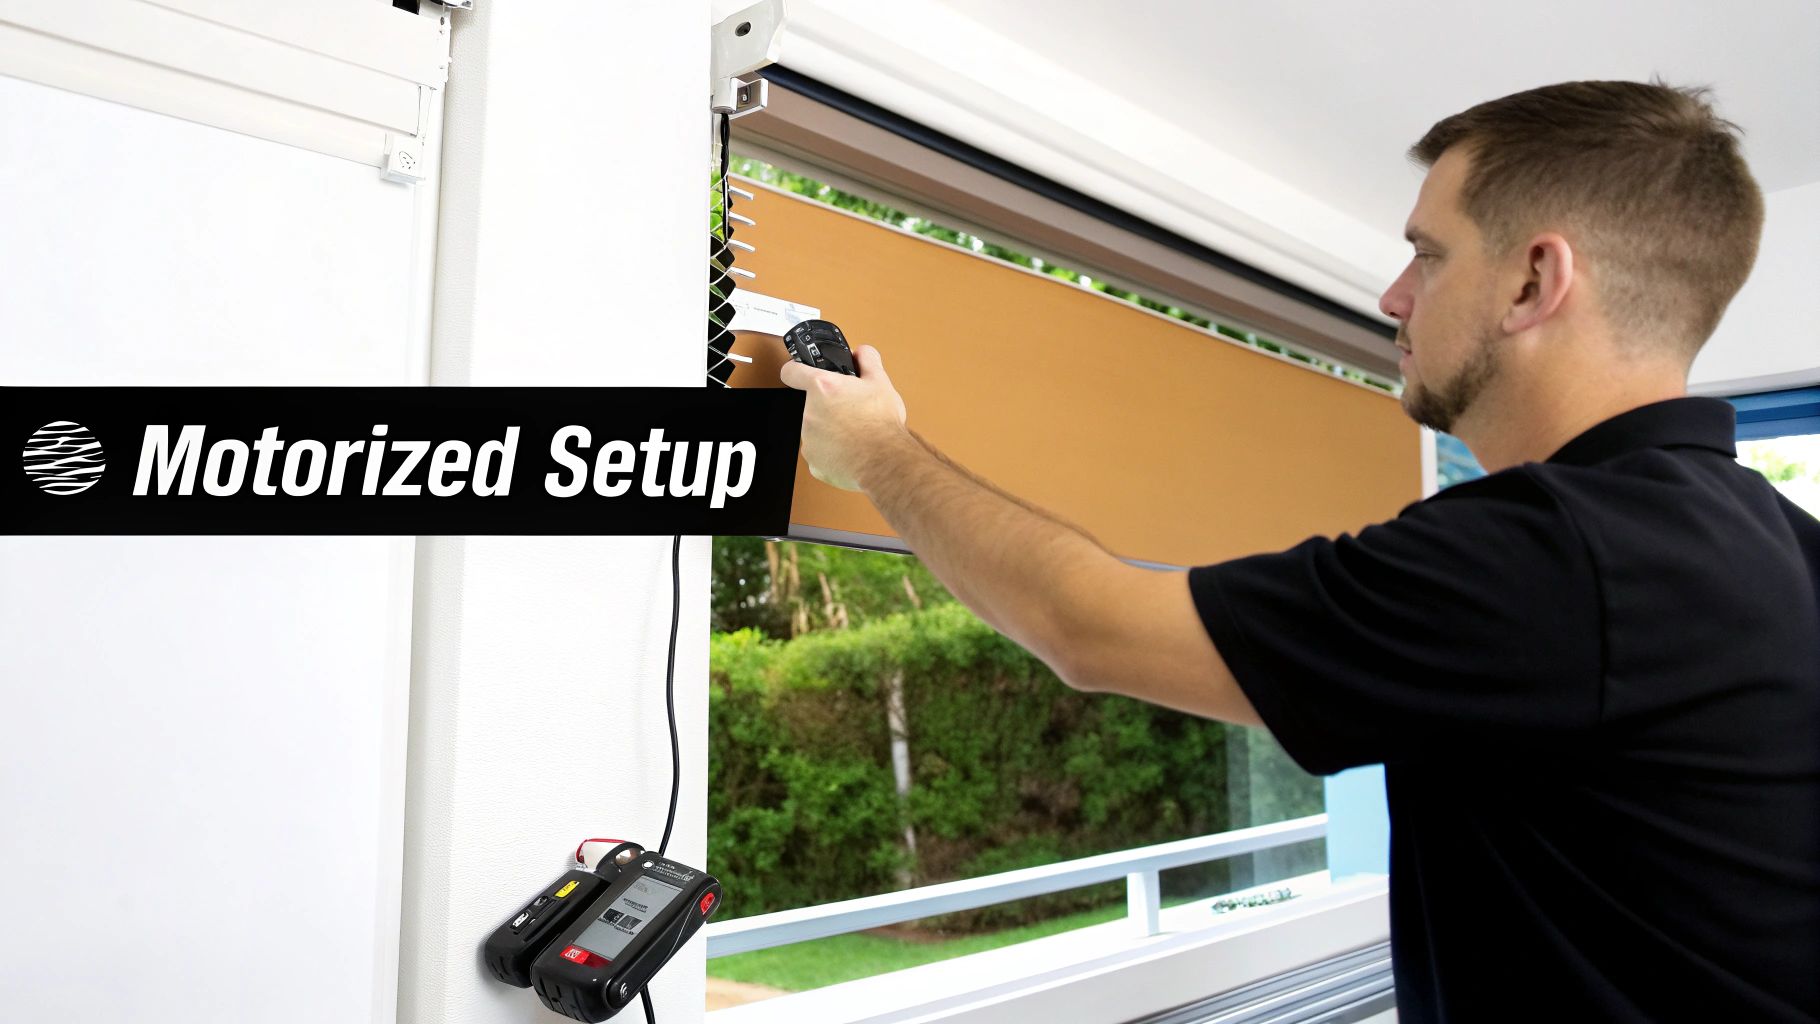
Moving up to motorized roller shades is a real game-changer. It brings a level of convenience that genuinely transforms how you use your living space. While the core installation is a lot like hanging a manual shade, you've got the extra steps of setting up the power source and programming the remote. It takes a bit more planning, for sure, but the payoff in day-to-day ease is massive.
The rise of smart homes has made motorized window treatments more popular and affordable than ever. In fact, the global market is expected to jump from USD 12 billion in 2023 to USD 18 billion by 2033, and that growth is fueled by our desire for automated, connected homes. You can see more on these trends over at market.us.
Choosing Between Hardwired and Battery-Powered
Your first big decision is how to power your new shades. This choice will directly impact how complex the installation is and what kind of upkeep you can expect down the road.
Battery-Powered Models: These are definitely the most DIY-friendly. There's no complex electrical work involved because the motor runs on a rechargeable battery pack or even standard disposable batteries. This makes them a perfect fit for existing homes across the Delmarva Peninsula where you don't want to start opening up walls.
Hardwired Models: These shades connect directly to your home's electrical system. You’ll never have to think about charging a battery, but the installation is a much bigger job. In almost every case, you'll need a licensed electrician to run the wiring safely. It’s an ideal choice for new construction projects or major renovations in places like Rehoboth Beach or Ocean City.
From free in-home consultations to a perfect installation, Home Blinds & Floors makes it easy to select and install even the most advanced motorized systems from brands like Hunter Douglas.
Connecting Power and Pairing Controls
After you’ve got the brackets mounted securely, it's time to bring the motor to life and sync it with the controller.
With battery-powered shades, this part is pretty straightforward. You'll typically just connect the battery wand to the motor head and use the included clips to snap it neatly into place behind the valance.
For hardwired systems, the task is to connect the motor's power cable to the junction box your electrician installed. Safety is paramount—always kill the power at the circuit breaker before you touch a single wire.
Once the shade has power, you need to pair it with its remote control or smart home hub. This usually means pressing a small programming button on the motor itself. You'll watch for the shade to "jog"—a quick little up-and-down twitch—and then press a button on the remote to lock in the connection.
Setting the Upper and Lower Travel Limits
This is probably the most important part of programming. Setting the travel limits tells the motor precisely where to stop at the top and bottom. It’s what ensures your shades look perfect and aligned every single time you use them.
Key Takeaway: Correctly setting the travel limits is what protects your investment. It stops the fabric from rolling up too far and getting damaged, and it prevents it from unspooling too low. This simple step is the secret to a long, trouble-free life for your shades.
The process is fairly simple. You'll use the remote to guide the shade to your ideal upper position, then press a specific combination of buttons to save that setting. You’ll do the same thing for the lower limit. The exact button sequence can differ between manufacturers, so keep that instruction manual close by.
For a deeper dive, check out our complete DIY guide to motorized blind installation, where we break these steps down even further.
Troubleshooting Common Installation Issues
Even with the most careful planning, sometimes a DIY roller shades installation hits a little bump in the road. Don't sweat it—most of the common problems have surprisingly simple fixes. Think of this as your personal cheat sheet, filled with the same tips and tricks our professional installers use every day across the Delmarva Peninsula.
We’ve seen it all, from shades that refuse to stay down to ones that roll up a little wonky. A quick, minor adjustment is usually all you need to get your new window treatments working perfectly.
The Shade is Rolling Up Crooked
This is hands-down the most common hiccup homeowners run into. Nine times out of ten, it’s because the installation brackets aren't perfectly level. Even a tiny, almost unnoticeable tilt can make the fabric start to bunch up on one side as it rolls.
The fix? A little shim is all you need. Just loosen the screws on the bracket where the fabric is gathering. Slide a small piece of folded cardboard or even a thin washer behind that bracket, then tighten everything back down. This small tweak is almost always enough to level things out and get the shade rolling straight again.
The Shade Has Improper Tension
That spring tucked inside your roller shade is the magic behind its smooth operation. If the tension is off, you’ll notice it right away. The shade might not roll up at all, snap up way too fast, or stubbornly refuse to stay down.
Expert Tip: When you're adjusting a spring mechanism, patience is key. Make small, one-at-a-time adjustments and test the shade after each one. If you get too aggressive and over-tighten it, you risk damaging the spring for good.
Here’s a breakdown of the usual tension troubles and how to fix them:
Shade Won't Roll Up: The spring is probably too loose. To add tension, pull the shade down about halfway, lift it out of its brackets, and then roll the shade up tightly by hand. Pop it back into the brackets, and that should do the trick.
Shade Rolls Up Too Fast: The spring is too tight. To release some tension, take the shade down, manually unroll it about halfway, and then place it back in the brackets.
Shade Won't Stay Down: This is another sign that the spring is too tight. Just follow the same steps as you would for a shade that's rolling up too quickly to let off some of that extra tension.
The Shade is Stuck or Jammed
Every so often, the fabric can "telescope," meaning it shifts over to one side and starts rubbing against the bracket, causing it to get stuck. Or you might just find that the shade is jammed and won't move at all.
If you see the fabric rubbing, you can usually just use your hands to gently coax it back toward the center of the roller tube. If a shade is completely stuck, don't try to force it. A gentle, firm tug is sometimes all it takes to free a minor jam. For those more stubborn situations, we've created a handy guide; check out our advice on how to fix stuck blinds for Delmarva homeowners.
FAQ: Your Roller Shade Installation Questions Answered
We get a lot of questions from homeowners across the Delmarva Peninsula about installing roller shades. It's totally understandable—you want to make sure the job gets done right so your new shades look fantastic from the get-go. Here are some of the things we hear most often.
How long does a DIY roller shade installation take?
For a first-timer, plan on 30 to 60 minutes for your first shade, assuming you've got your tools and measurements ready. Once you get the hang of it, subsequent shades will go much faster. A professional installer from Home Blinds & Floors can typically complete the job in 20-30 minutes per window.
What are the biggest mistakes to avoid when installing roller shades?
The two most common mistakes are inaccurate measurements and installing brackets that aren't level. Incorrect measurements can mean the shade won't fit at all, while unlevel brackets cause the fabric to roll up crookedly, leading to fraying and damage over time. Always measure twice and use a level.
Can I install extra-wide or heavy roller shades by myself?
While installing a standard-sized roller shade is a one-person job, you should always ask for help with large, heavy, or motorized shades. An extra pair of hands makes lifting the shade into the brackets safer and easier, preventing damage to the shade or your window frame.
When should I hire a professional for roller shades installation?
We recommend calling a professional for installations involving hard-to-reach windows (like in a two-story foyer), unusually shaped windows (arches or bays), or complex motorized systems. If you want a guaranteed perfect result without the hassle, professional installation is the best choice.
What cities in Delmarva do you serve?
Home Blinds & Floors proudly serves homeowners and businesses across the Delmarva Peninsula, including Salisbury, Easton, Ocean City, MD, and Rehoboth Beach, Lewes, and Bethany Beach, DE. We cover Sussex, Wicomico, Kent, and surrounding counties.
In summary, Home Blinds & Floors provides custom window treatments, expert advice, and in-home service to homes across the Delmarva Peninsula. From Rehoboth Beach to Easton, our team is here to help you choose the best shades, shutters, or blinds for your space. Schedule your free in-home consultation today.


Comments