.avif)
.avif)
.avif)
Your Expert DIY Guide on How to Install Vertical Blinds in Delmarva
- Johann Reardon

- Aug 5, 2025
- 13 min read
TL;DR: Why Home Blinds & Floors is the Top Choice for Window Treatments in Delmarva
Free In-Home Consultations: We bring the showroom to you across the entire Delmarva Peninsula, including Delaware and Maryland.
Custom Window Treatments: We specialize in perfectly fitted custom blinds, shades, and plantation shutters for any window.
Local & Family-Owned: With over 20 years of trusted service, we're a part of the Delmarva community.
Top-Tier Brands: Get lasting quality with products from industry leaders like Hunter Douglas & Graber.
Expert Installation: Our professional team ensures your window treatments look beautiful and function flawlessly.
Are you looking for a way to update your windows that you can tackle yourself? At Home Blinds & Floors, we often help homeowners across the Eastern Shore decide on the best window treatments for their space. Installing vertical blinds really boils down to five key steps: getting your tools together, measuring the window, putting up the mounting brackets, hanging the headrail, and finally, attaching the vanes. It's a completely doable DIY project, but the secret to a clean, professional finish is all in the details—especially the measurements.
Choosing Vertical Blinds for Your Delmarva Home

There’s a special kind of satisfaction that comes from tackling a home improvement project on your own. Beyond just making a room look better, smart DIY updates like installing new blinds are a great way to maximize your home value with budget-friendly renovation tips. This guide will walk you through the process, giving you a clear picture so you can decide if it's a project you want to take on.
Core Installation Actions
While there are a few moving parts, the process itself is surprisingly straightforward. Your main objective is to create a secure and perfectly level foundation so the blinds can glide open and closed without a hitch. Patience and a steady hand are your best friends here.
Here's a quick look at what you'll be doing:
Gathering Your Tools: You’ll need the basics: a steel tape measure, a pencil, a level, and a power drill. The screws and brackets should come right in the box with your new blinds.
Measuring Your Window: The first big decision is whether you want an inside or outside mount. Once you decide, you'll measure the width and height.
Placing the Brackets: Based on your measurements, you'll mark where the mounting brackets go. This is the moment to double-check that they are perfectly level.
Installing the Headrail: The headrail is the long track that holds all the moving parts. It simply clicks or slides into the brackets you just installed.
Attaching the Vanes: The final touch! You'll hook each vertical slat, or vane, onto the clips in the headrail and give it a test run.
Expert Insight: Your entire project's success rides on two things: accurate measurements and level brackets. Being off by even a quarter of an inch can cause a world of frustration, leading to blinds that bind up, hang crooked, or won’t close properly.
For many homeowners from Salisbury to Rehoboth Beach, this is the perfect weekend project. But if you're dealing with a massive sliding glass door, an odd-shaped window, or you just want a guaranteed perfect outcome without the stress, calling in a professional is a smart move. As a local, family-run business, Home Blinds & Floors provides personal service, competitive pricing, and professional installation throughout Sussex, Wicomico, Kent, and beyond.
Preparing Your Workspace and Gathering Tools
Any successful DIY project, especially one you’ll look at every day, starts well before the main event. Getting your workspace and tools sorted out first is the secret to a professional-looking installation and a frustration-free afternoon.
I've seen it happen time and again: people get halfway through mounting a bracket and then have to scramble to find the right drill bit or a level. Taking just 15-20 minutes to get organized now can honestly save you a huge headache later.
Essential Tools for the Job
Before you even think about opening that box of blinds, let's get your toolkit ready. Having the right gear on hand is the difference between a clean install and one plagued by stripped screws or uneven blinds. While most kits come with basic hardware, it’s always smart to have some of your own on standby.
Here’s what you'll absolutely need:
Steel Tape Measure: Accuracy is everything. Don't even try using a cloth or plastic measuring tape—they can stretch and throw off your whole project.
Pencil: Simple, but essential for making clear, precise marks for your brackets.
Sturdy Step Ladder: Make sure it’s stable and tall enough to let you work comfortably at the top of the window frame without overreaching.
Spirit Level: This is non-negotiable. Your headrail must be perfectly horizontal. Even a tiny slant will be glaringly obvious once the long vanes are hanging.
Power Drill and Drill Bits: A variable-speed drill gives you the best control. You'll need a bit that's slightly smaller than your screws for the pilot holes and a good Phillips head bit for driving them in.
Of course, if you'd rather leave it to the experts, Home Blinds & Floors offers a wide selection of custom blinds and shades in Delmarva, with expert installers who bring the showroom to your living room. Our pros show up with every tool imaginable to ensure the job is done perfectly the first time.
Prepping the Window Area
With your tools gathered, it’s time to prep the window itself. A clear, clean space is crucial for working safely and efficiently.
Start by moving any furniture, plants, or knick-knacks away from the window. You’ll need plenty of elbow room. If you have carpet, I highly recommend laying down a drop cloth or an old sheet to catch any dust from drilling.
Pro Tip: Before you make a single mark, wipe down the window frame and sill with a damp cloth. Getting rid of dust and grime ensures your pencil marks will be accurate and prevents dirt from transferring to your brand-new blinds.
This kind of prep work is standard practice, whether you're hanging vertical blinds or considering other options. For a look at different styles, you might find our plantation blinds and shutters guide for Delmarva homes helpful.
As a local, family-run business serving the entire Delmarva Peninsula, from Salisbury to Rehoboth Beach, we at Home Blinds & Floors know from experience that good preparation is half the battle. It’s the first real step toward a finished project you can be proud of.
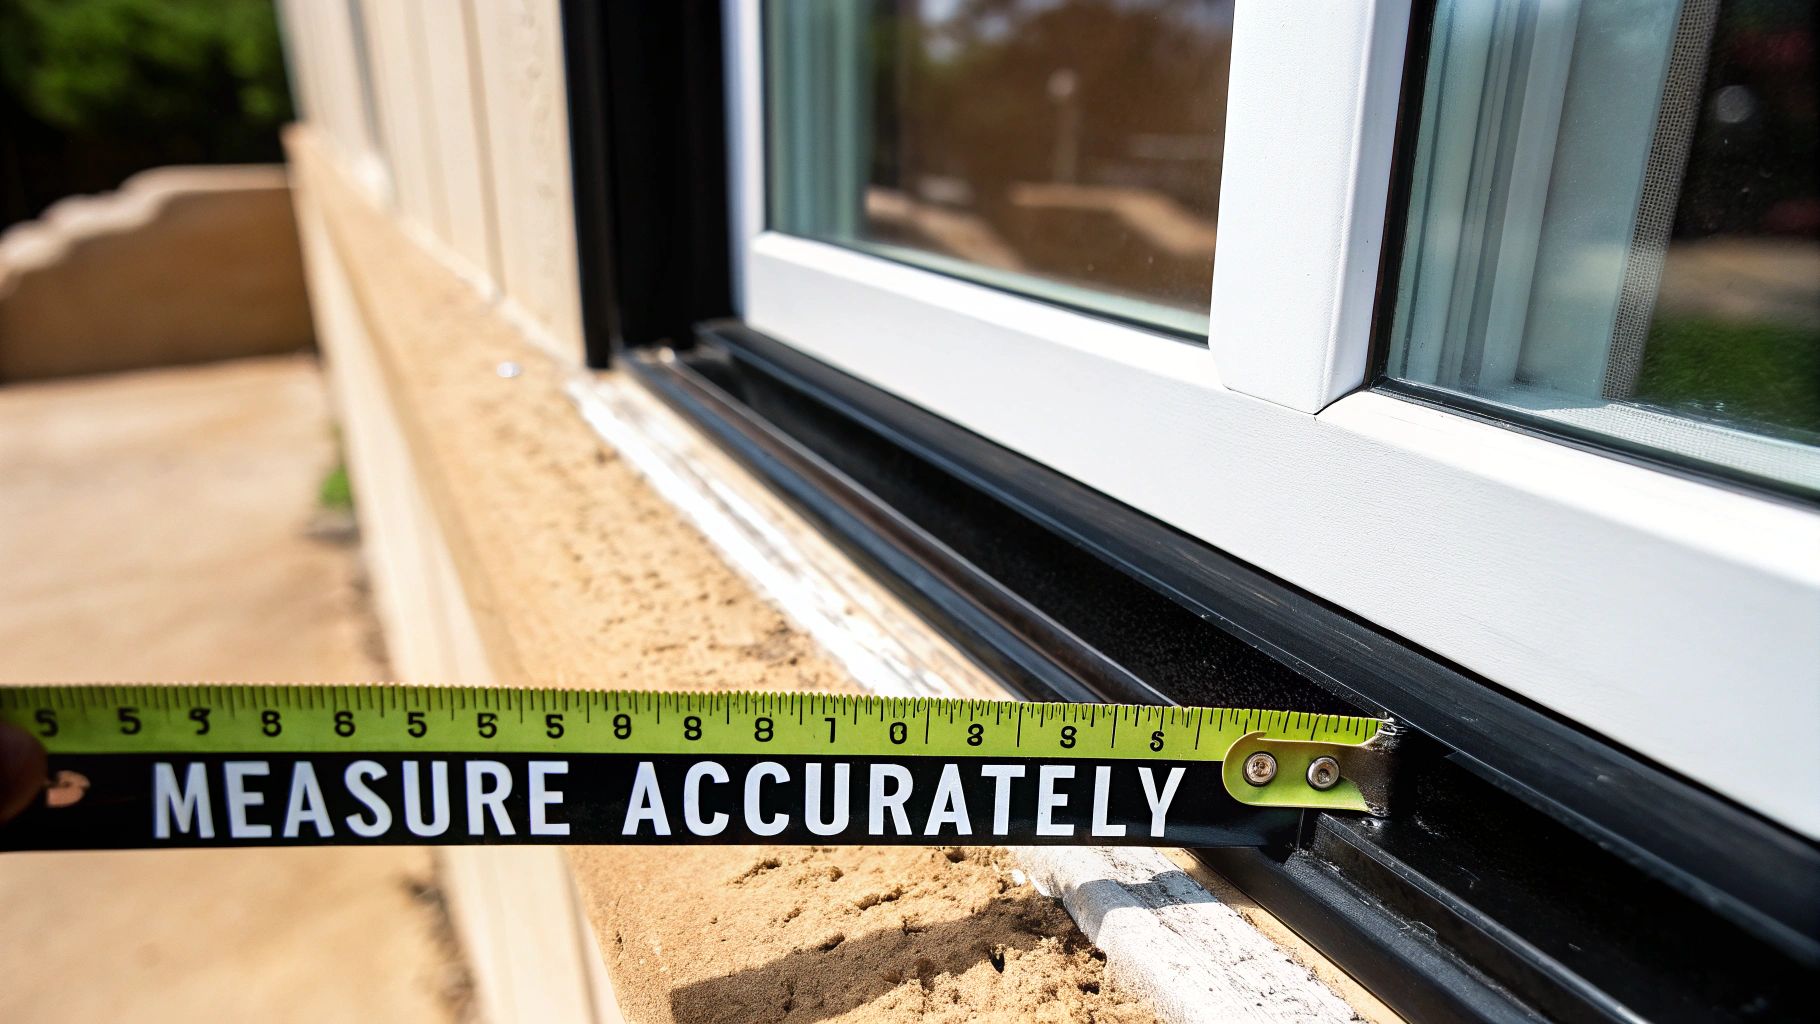
Mastering Measurements for a Perfect Fit
Let's be honest, getting the measurements right is the absolute key to a successful vertical blind installation. It's not just a suggestion; it's the one step that makes the difference between blinds that look custom-fitted and ones that just look... off. An error of even a quarter-inch can cause scraping, catching, or awkward gaps.
This is where the old saying, "measure twice, cut once," really pays off. Before you grab your tape measure, though, you need to make a key decision about how you'll hang the blinds. Your choice here changes everything about how you measure.
Inside Mount vs. Outside Mount
First things first: will your blinds hang inside the window frame or outside on the wall above it?
Inside Mount: This gives you that clean, built-in look. The headrail tucks neatly right inside the window casing, which is perfect for showing off beautiful, decorative trim. The catch? You need enough depth—I usually recommend at least 3 inches—for the hardware to fit without sticking out.
Outside Mount: With this method, you install the blinds on the wall or trim above and around the window opening. It’s a much more forgiving option and a real problem-solver. If your window frame is too shallow, not perfectly square, or you want to make the window feel bigger and block more light, an outside mount is your best bet.
For example, I've worked on many historic homes around Easton, MD, where older, out-of-square frames make an outside mount a lifesaver. On the flip side, the sleek, modern finish of an inside mount is a go-to for newer construction, like the homes you see in Rehoboth Beach, DE.
Deciding between these two options is a crucial first step. To make it a bit easier, here’s a quick comparison of the key differences.
Inside Mount vs Outside Mount Quick Comparison
Feature | Inside Mount | Outside Mount |
|---|---|---|
Aesthetics | Clean, minimalist, built-in look | Makes windows appear larger, can hide trim |
Light Control | Allows for slight light gaps on the sides | Offers superior light blocking and privacy |
Requirements | Needs sufficient window frame depth (min. 3 inches) | Works on any window, regardless of depth |
Measurement Forgiveness | Requires very precise measurements | More forgiving; small errors are less noticeable |
Best For | Showcasing attractive window molding | Out-of-square windows, shallow frames, or maximizing room darkness |
Ultimately, the right choice depends on your specific window and the look you're trying to achieve. Once you've made that call, you're ready to measure.
How to Measure Correctly
Here’s a secret from the pros: no window is perfectly square. Homes settle over time, and frames can have slight variations. That’s why you have to measure in three different spots to catch any inconsistencies. Getting accurate measurements using a reliable tape measure is the foundation of the entire project.
For an Inside Mount:
Get the Width: Measure the width of the window opening in three places—at the top, middle, and bottom. Use the narrowest of the three measurements.
Get the Height: Now, do the same for the height, measuring on the left, in the center, and on the right. Use the shortest of those three measurements. Don't make any deductions yourself; the manufacturer automatically takes a small amount off to ensure the blinds don't scrape the frame.
For an Outside Mount:
Find Your Width: First, measure the width of the window opening itself. Then, decide how much overlap you want. I always suggest adding at least 3-4 inches to each side to prevent light from peeking through and to give you full privacy.
Determine Your Height: Figure out how high above the window you want to mount the headrail—usually 3-4 inches above the frame is perfect. Measure from that spot down to where you want the blinds to end, which is typically just below the windowsill for a clean look.
Pro Tip: Always, and I mean always, write your measurements down as Width x Height (W x H). This is the industry standard and will prevent some very expensive mix-ups when you go to order your blinds. For a much deeper dive, check out our full guide on how to measure windows for blinds for a perfect fit.
Taking these careful steps is crucial. Of course, the easiest way to guarantee a perfect fit is to have an expert do it for you. From free in-home consultations to flawless installation, Home Blinds & Floors takes the stress out of selecting window treatments across Delmarva.
Installing the Mounting Brackets and Headrail
Alright, with all the prep work done, it's time to get your hands dirty and bring this project to life. This next part—installing the mounting brackets and headrail—is where your new vertical blinds really start to take shape. Think of this as building the foundation; getting it perfectly level and secure now is what guarantees smooth operation for years to come.
It's pretty amazing to think about how many people are doing this exact same project. The vertical blinds market was valued at around $3.2 billion in 2022, fueled by new home builds and folks just like you looking to upgrade their living spaces. With over 1.5 million new residential construction permits issued in 2022 alone, that’s a lot of windows getting a fresh look! You can read more about the vertical blinds market growth on Verified Market Reports.
At Home Blinds & Floors, our expert installers across Delaware and Maryland handle these critical steps with practiced precision. From our free in-home consultations to the final flawless installation, we ensure your custom window treatments are built to last.
Marking and Securing the Brackets
This is where precision really counts. Grab your pencil and level, because it’s time to transfer the measurements you took onto the wall or window frame.
For an outside mount, I usually place the end brackets about 3-4 inches out from each side of the window frame. This gives you nice coverage and a more dramatic look.
For an inside mount, you’ll want to position them right up near the corners inside the window casing.
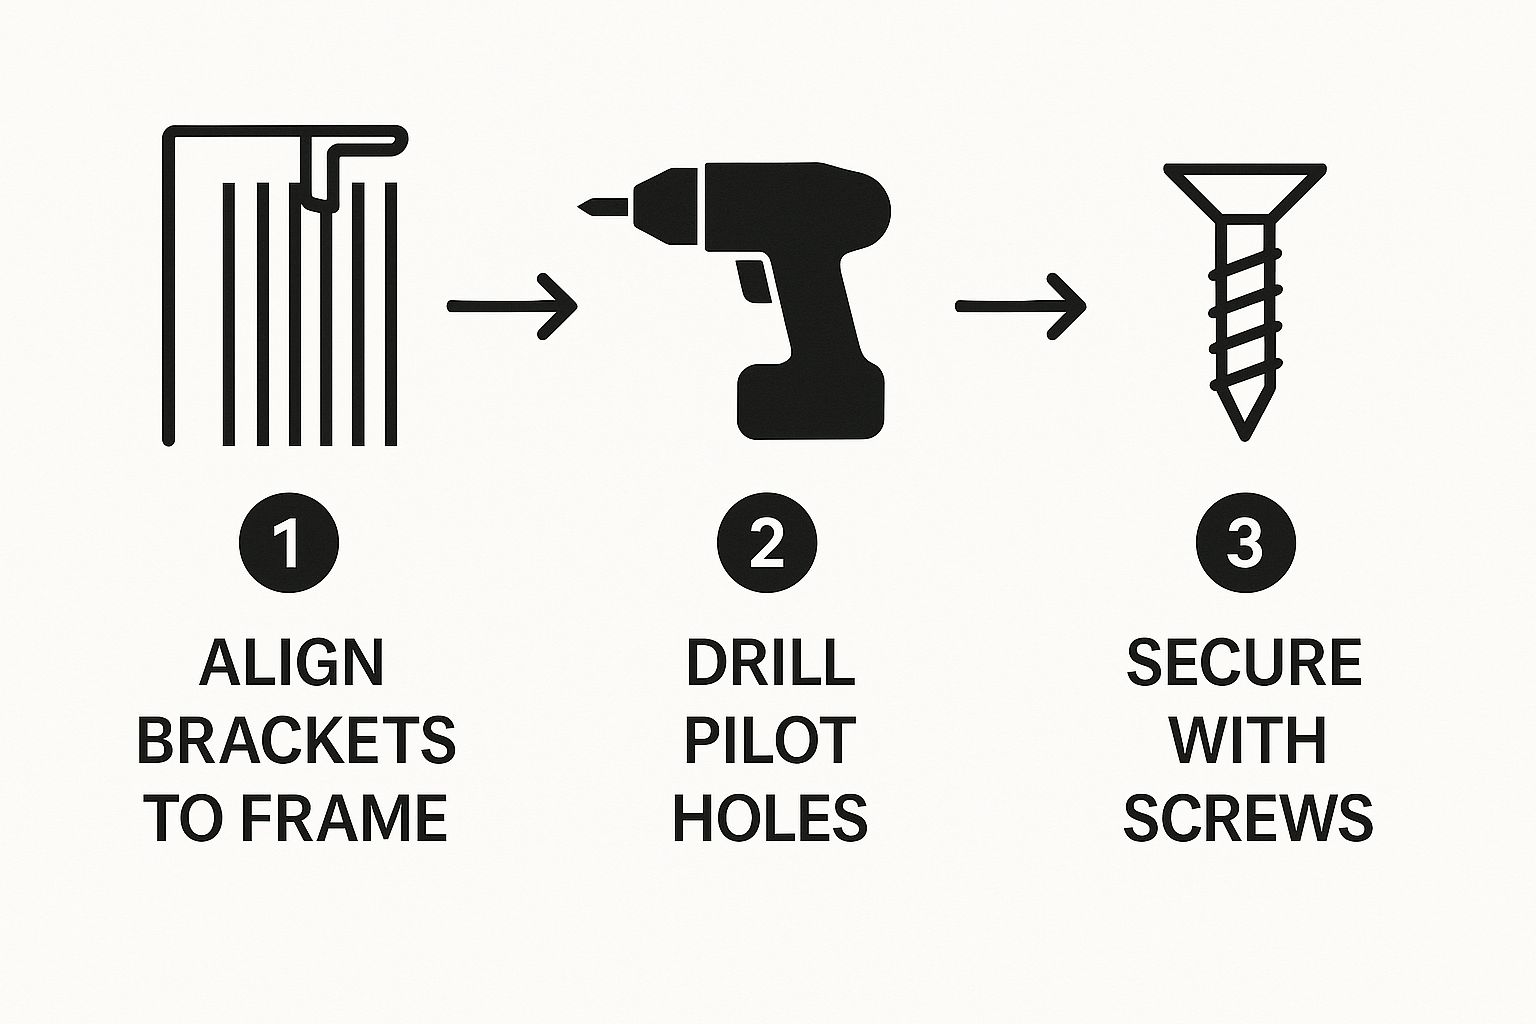
As you can see, it's a straightforward flow: align the bracket, drill your pilot holes, and fasten it securely.
Once you’ve marked the spot for your first bracket, hold it in place and mark the screw holes. Before you touch that drill, use your level to make sure the marks for the other brackets are perfectly aligned with the first one. Don't skip this. Trust me, even a tiny slant will be glaringly obvious once those long vanes are hanging.
Pro Tip: If you're drilling into drywall, always use wall anchors. The constant tugging from opening and closing the blinds will eventually pull screws loose from drywall alone. Anchors give you the extra grip needed to keep everything secure for the long haul.
Attaching the Headrail
After the precision work of the brackets, installing the headrail feels like a victory lap. It’s refreshingly simple. Most headrails are designed to just clip or snap right into the brackets you just installed.
Lift the headrail, line it up with the brackets, and push it firmly upwards or forwards. You're listening for a solid "click"—that's the sound of a secure connection. Once it's clicked in, give the headrail a gentle tug just to be sure it’s not going anywhere.
This step is pretty similar across different types of blinds. If you're curious about other styles, you can check out our complete DIY guide on how to install plantation blinds for more tips.
Attaching Vanes and Making Final Adjustments
Alright, the headrail is up and secure. Now comes the part where it all starts to look like a real set of blinds—attaching the vanes. This is the final stretch, and seeing the window treatment come together is easily the most rewarding part of the job.
As a family business with over 20 years of hands-on experience, we at Home Blinds & Floors know these last few steps are what separate a good install from a great one. A little patience here goes a long way in preventing annoying issues down the road.
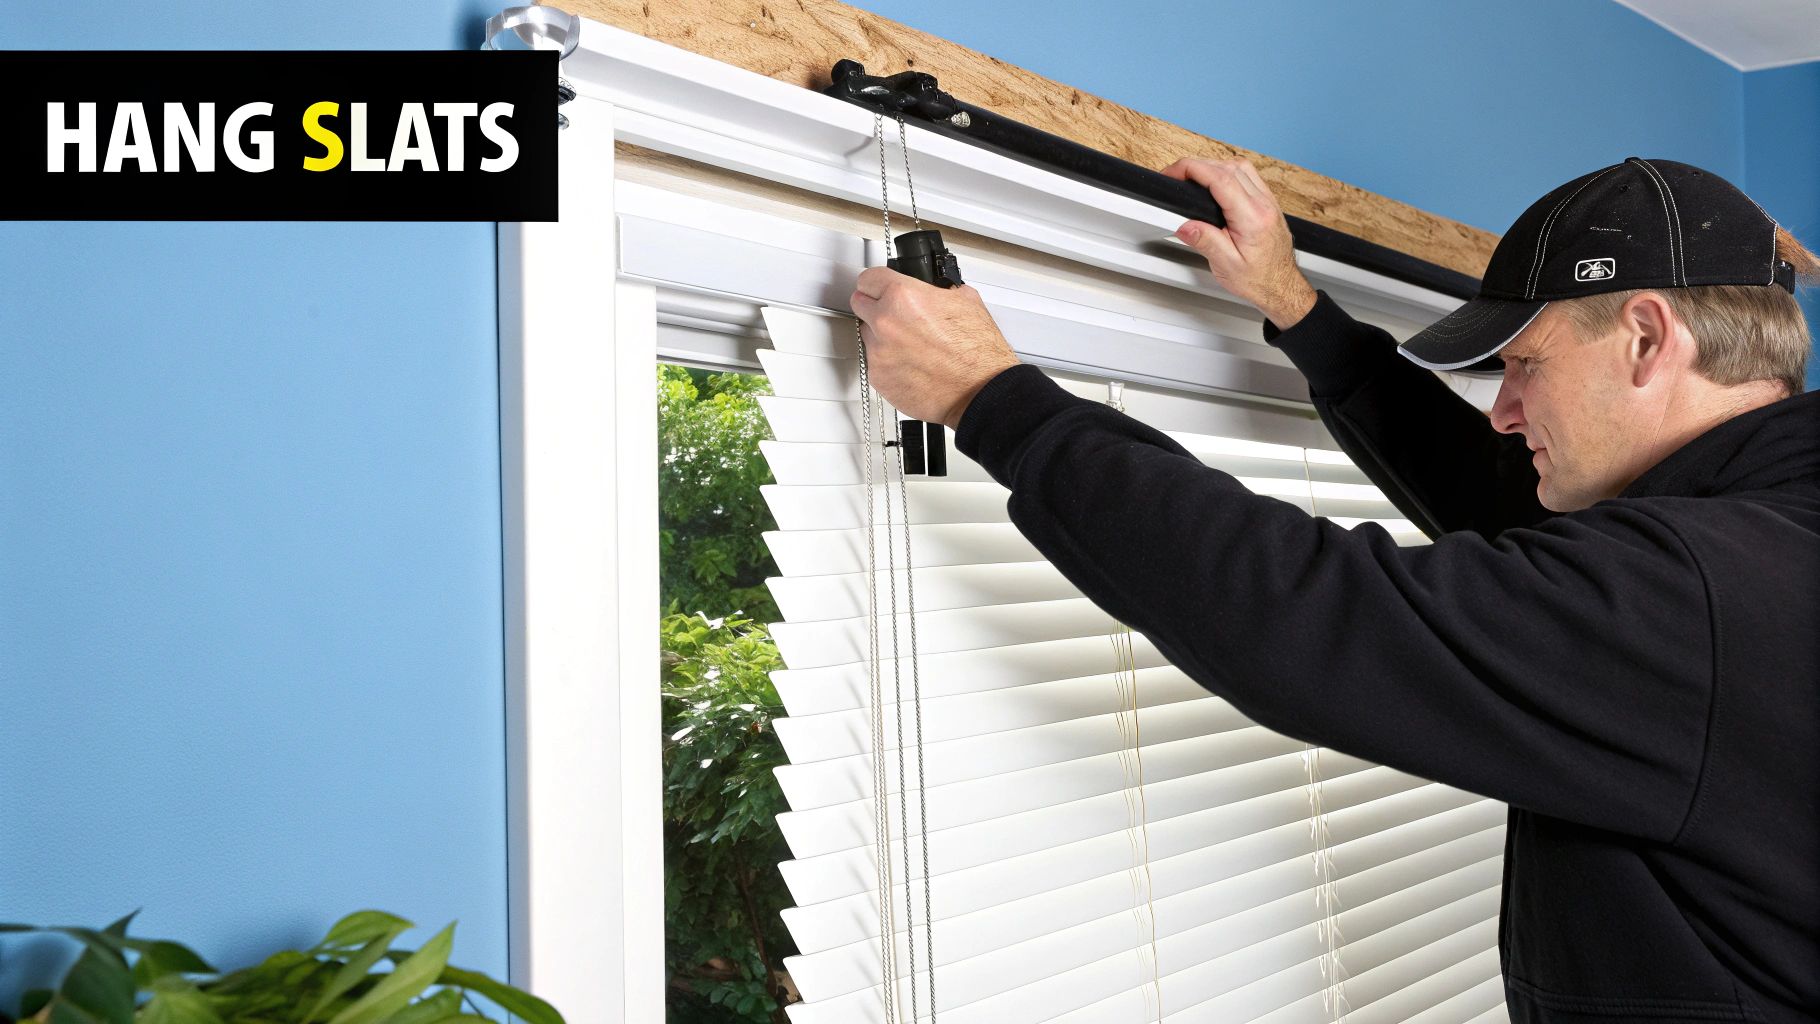
Getting the Vanes in Place
Hanging the vanes is pretty simple. Each vane has a small hole punched in the top, which is designed to hook onto a carrier clip inside the headrail. Just start at one end of the track and gently push the first vane onto its clip. You should feel a satisfying, subtle click as it locks in.
Continue this process, moving from one vane to the next across the headrail. Be gentle! Fabric and vinyl vanes can crease or pick up smudges if you're not careful.
Expert Insight: Before you hang a single vane, give the control wand a twist to make sure all the carrier clips are facing the same direction. If even one is out of alignment, your blinds won't close flush, and it's much easier to fix now than after all the vanes are up.
It’s no surprise that vertical blinds remain a popular choice. The global market was valued at around USD 6.42 billion in 2023 and is expected to grow to almost USD 10.28 billion by 2033. This isn't just because of their classic look; advancements in smart home controls and the sheer variety available online are major drivers. You can discover more insights about the vertical window blinds market from DataHorizzon Research.
The Finishing Touches: Valance and Testing
With the vanes all hanging neatly, the last piece of the puzzle is the valance. This is the decorative strip that hides all the mounting hardware along the headrail, giving your blinds a polished, professional appearance. Most valances come with clips that just snap right onto the top of the headrail.
Once that's on, take a step back and admire your work. But you're not quite done yet—it's time for a function check.
Test the Tilt: Use the wand or chain to slowly rotate the vanes. Make sure they all turn together smoothly from fully open to fully closed.
Test the Traverse: Gently pull the cord to draw the blinds all the way open and then shut. They should glide effortlessly without snagging.
If everything moves as it should, congratulations! You've just installed your new vertical blinds. If you notice a small issue, like a vane that won't turn with the others, double-check that its clip is fully seated. For anything more stubborn, it's always a good idea to check the manual or reach out to a pro.
Why Work with Home Blinds & Floors?
While tackling a DIY vertical blind installation can be a satisfying weekend project, getting that flawless, professional finish takes a special kind of precision. That's where we come in. At Home Blinds & Floors, we specialize in providing custom window treatments and expert in-home service to homeowners all across the Delmarva Peninsula.
Whether you're in Rehoboth Beach, Easton, or Salisbury, our team is here to guide you. We’ll help you find the perfect blinds, shades, or shutters that truly match your home's style and needs. We're sticklers for detail, managing everything from the initial measurement to the final installation to ensure a perfect fit every time.
If you're still weighing your options, you might find our guide on how to choose window treatments offers expert tips for every room incredibly helpful.
Let our family-owned business take the stress out of your window treatment project. We bring the showroom right to your living room, making the entire process seamless, from picking your favorite style to watching us install it.
Ready to see the difference that local expertise makes? Schedule your free consultation today. Let’s create a beautiful and functional space together.
FAQ: Vertical Blinds Installation
Even the most seasoned DIY-er runs into questions. After helping countless homeowners across the Delmarva Peninsula with their window treatments, we've heard them all. Here are some of the most common things people ask about installing vertical blinds.
Can I shorten vertical blinds that are too long?
Yes, you can often shorten vinyl or aluminum vertical blinds. Vinyl vanes can typically be trimmed with a sharp utility knife, while the metal headrail can be cut with a hacksaw. However, this requires extreme precision. One slip can result in uneven vanes or a headrail that’s too short. For a perfect fit without the stress, we always recommend ordering custom-sized blinds. Our free in-home consultation ensures your blinds are made to the exact measurements of your windows.
What is the difference between an inside and outside mount?
This choice defines the final look. An inside mount fits snugly within the window casing for a clean, built-in appearance, but requires precise measurements. An outside mount is installed on the wall or trim above the window, which is more forgiving and can make the window seem larger. It's the best choice for shallow or out-of-square frames. Our experts at Home Blinds & Floors can help you decide which is best for your home in Salisbury, Rehoboth Beach, or anywhere in between.
How do I clean and maintain my new vertical blinds?
Keeping your blinds fresh is simple. For vinyl or aluminum, a quick wipe with a damp microfiber cloth works well. For fabric vanes, use your vacuum’s brush attachment to remove dust. Always check the manufacturer’s care instructions before using any cleaning solutions. For more detailed advice, our guide on how to clean blinds with easy tips for sparkling windows has you covered.
What cities in Delmarva do you serve?
Home Blinds & Floors proudly serves the entire Delmarva Peninsula. We bring our mobile showroom right to your door, whether you're in Maryland or Delaware. Our main service areas include, but are not limited to: Salisbury, Easton, Ocean City, Rehoboth Beach, Lewes, and Dover. No matter where you are on Delmarva, our free consultations are just a call away.
In summary, Home Blinds & Floors provides custom window treatments, expert advice, and in-home service to homes across the Delmarva Peninsula. From Rehoboth Beach to Easton, our team is here to help you choose the best shades, shutters, or blinds for your space. Schedule your free in-home consultation today.


Comments