.avif)
.avif)
.avif)
How to Measure Windows for Blinds for a Perfect Fit
- Johann Reardon

- Jul 18, 2025
- 10 min read
Getting a precise window measurement is the single most important step for getting blinds that look great and work perfectly. Before you even start dreaming about styles or colors, accurate numbers ensure your new blinds will fit perfectly, operate smoothly, and give you the light control you're after.
Wondering how to measure for blinds to ensure a perfect fit? At Home Blinds & Floors, we specialize in helping homeowners find functional and stylish solutions, and it all starts with getting the right dimensions. Let's walk through exactly how to get those numbers right the first time.
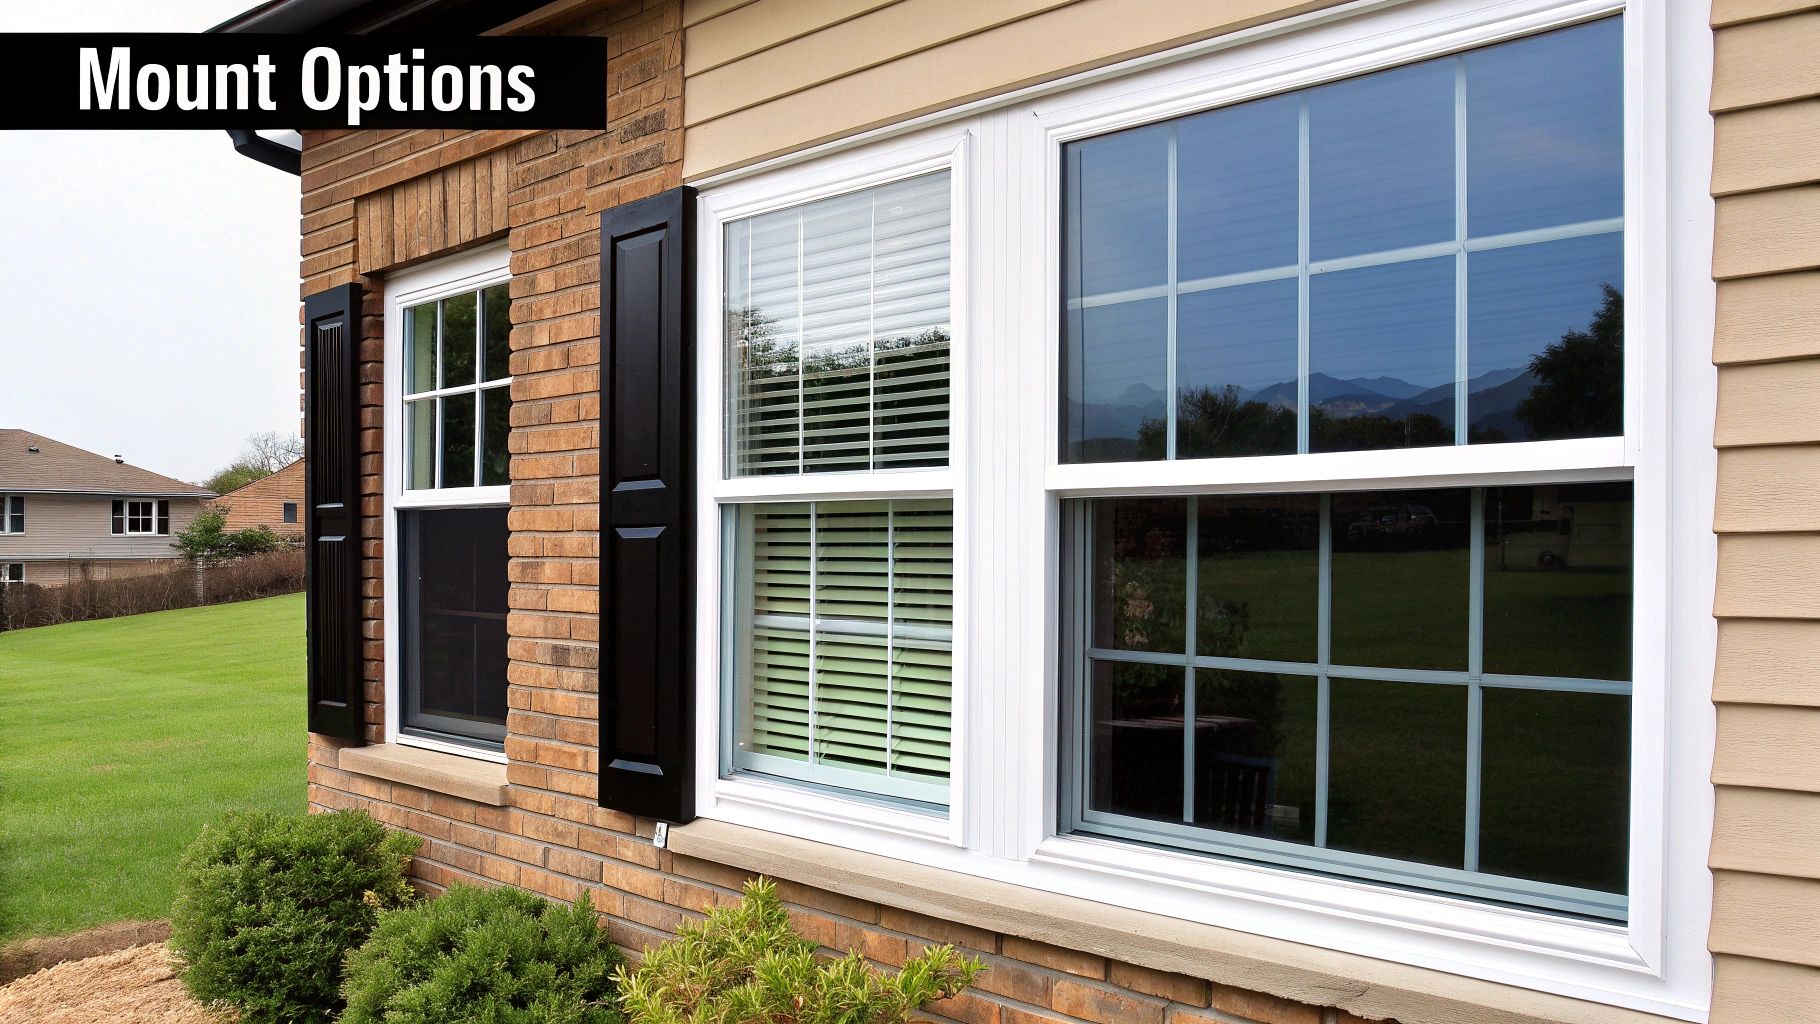
Inside Mount vs. Outside Mount At a Glance
Before you pull out the tape measure, you need to decide how you want your blinds to hang. This choice—inside or outside the window frame—dictates your entire measuring process. This table breaks down the key differences to help you choose.
Feature | Inside Mount | Outside Mount |
|---|---|---|
Aesthetic | Clean, built-in, minimalist | Creates a larger, more dramatic window appearance |
Light Control | Allows for minimal light gaps on the sides | Maximizes light blockage by covering the entire frame |
Best For | Showcasing attractive window trim and creating a sleek look | Hiding imperfect frames or when window depth is insufficient |
Measurement | Requires very precise width, height, and depth readings | More forgiving; measurements are taken on the wall or trim |
Choosing the right mount sets the stage for a flawless installation. An inside mount offers that custom, integrated feel, while an outside mount gives you more flexibility and better light control.
Getting Your Measurements Right the First Time
A perfect fit is about more than just aesthetics; it's about performance. The accuracy of your measurements directly impacts how well your blinds insulate. A snug-fitting blind can slash heat loss through windows by up to 30% in the winter, which you'll definitely notice on your energy bills.
Your first decision is between two primary installation styles:
Inside Mount: This is when the blind fits neatly inside the window casing. It gives you a clean, built-in look but demands very precise width, height, and depth measurements. There's no room for error here.
Outside Mount: With this style, the blind is installed on the wall or trim above and around the window. It’s a great choice for hiding less-than-perfect window frames or for maximizing light blockage.
The Measure Three Times Rule
You've probably heard it before, but the golden rule of any DIY project really applies here: measure everything three times. It’s a simple habit that catches those tiny mistakes that could otherwise turn into a major headache and a costly reorder. For a deeper dive, check out our comprehensive expert installation guide.
Think of this as your pre-flight checklist for a successful window treatment upgrade. While measuring isn't complicated, getting the numbers right from the very beginning makes all the difference. The same principles apply to other window treatments, too, and you can find great expert tips for measuring curtains to ensure a perfect fit that reinforce these fundamentals.
Ultimately, taking a few extra minutes to measure carefully empowers you to order with total confidence. Of course, if you're tackling a tricky window or just want that professional guarantee, the personalized service from Home Blinds & Floors always includes professional measuring to ensure flawless results every time.
The Simple Toolkit for Accurate Measurements
You don't need to roll up with a professional's entire truck of gear, but grabbing the right tools before you start will make measuring for new blinds so much easier—and far more accurate.
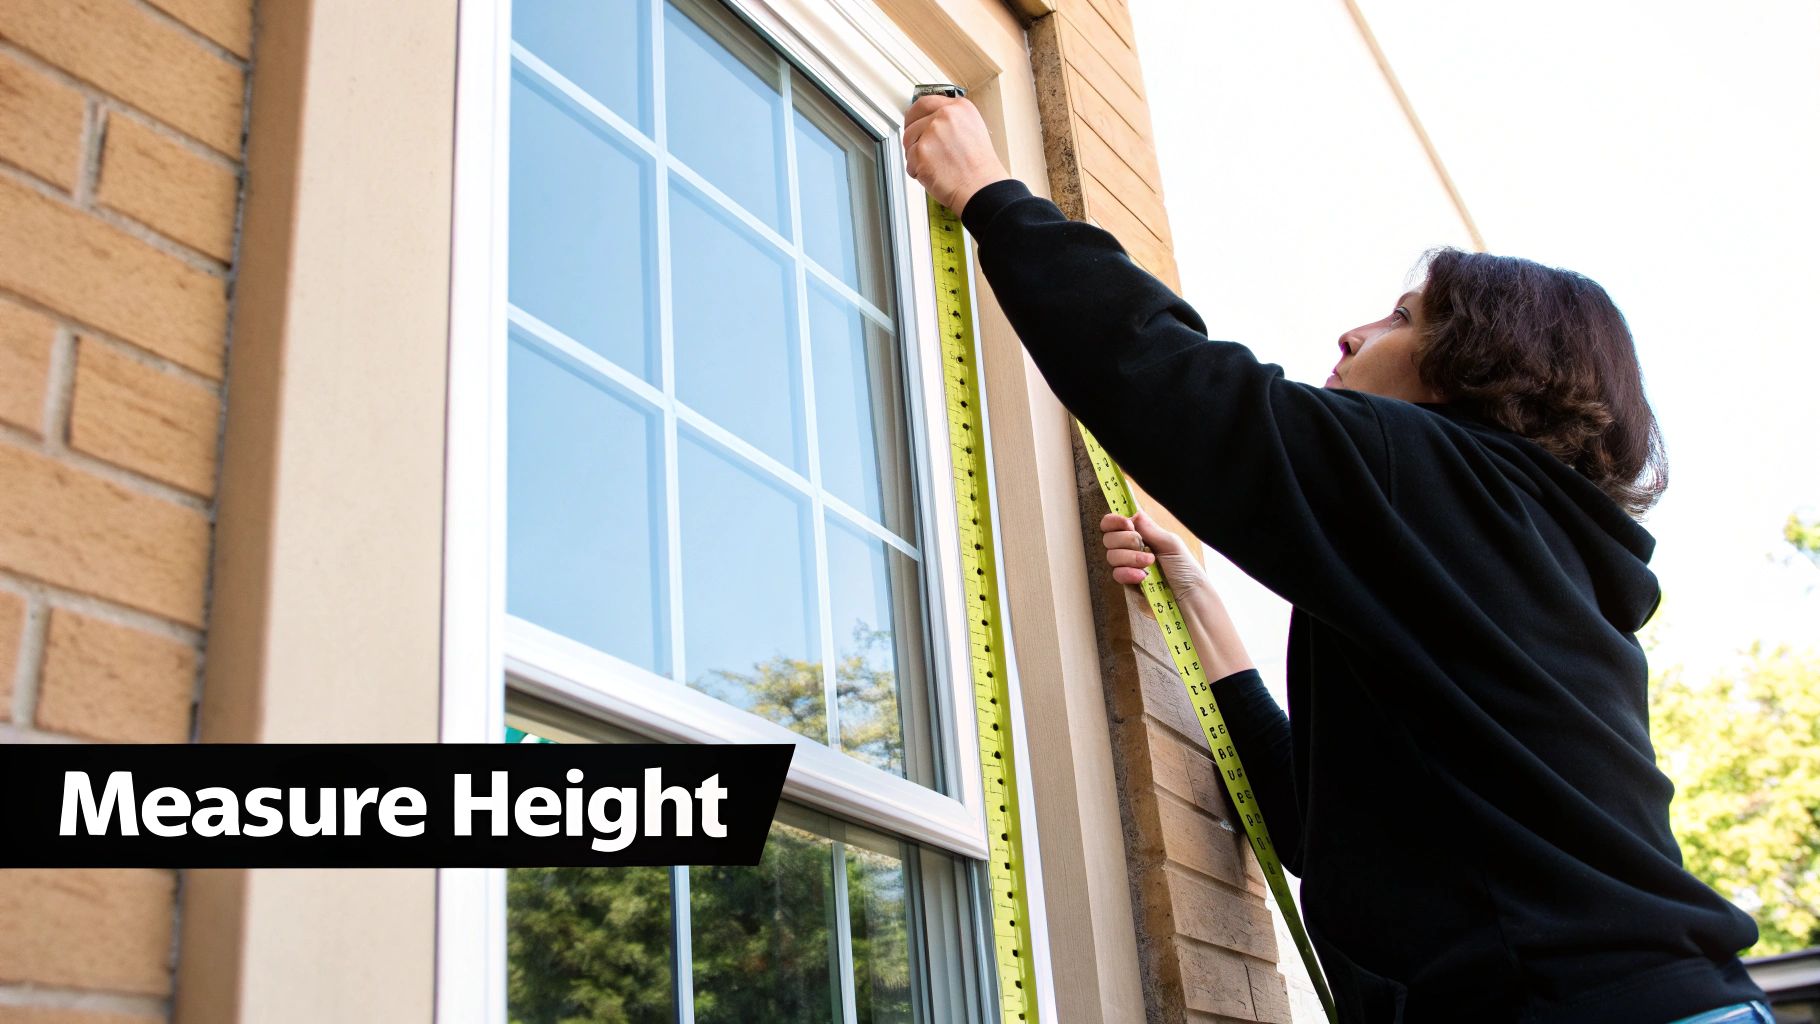
The single most important tool in your kit is a sturdy, steel measuring tape. Skip the flimsy fabric or plastic ones you might have in a sewing kit. Those can stretch or sag, throwing off your measurements just enough to cause a headache later. A steel tape gives you the rigid, straight line you need for precise readings, especially across wider windows.
You’ll also want a good old-fashioned pencil and a notepad to jot everything down clearly.
My Pro Tip: To avoid mix-ups when you're ready to order, always write down your measurements in the same format. A simple system like W (Width) x H (Height) for each window is a lifesaver. It keeps everything organized and prevents any confusion.
A Few Extras to Make the Job Go Smoothly
While the tape measure is the star of the show, a couple of other items can make the process practically foolproof.
A Step Ladder: Unless you're seven feet tall, you'll need this for safely reaching the top of your windows without stretching or guessing.
A Level: This little tool is your secret weapon. You’d be surprised how many window frames aren't perfectly square, especially in older homes. A quick check with a level will tell you if you need to account for any slight angles, which can really affect the final look of an inside-mount blind.
Gathering these simple items beforehand really does streamline the whole process. And while measuring yourself is totally doable, don't forget that the personalized service from Home Blinds & Floors includes an expert team that can handle all of this for you.
If you're looking for some inspiration on what styles might be the perfect fit for your home, check out our guide to the [must-have window blinds for year-round comfort](https://www.homeblindsandfloors.com/post/5-must-have-window-blinds-for-year-round-comfort-your-ultimate-guide-to-all-season-style-in-2024).
How to Measure for Inside Mount Blinds
An inside mount gives you that clean, built-in look that so many homeowners love. By sitting neatly inside the window frame, it lets you show off beautiful trim and keeps your space feeling uncluttered. But getting that sophisticated appearance hinges on very precise measurements. There’s almost no wiggle room, but don’t worry—getting it right is simpler than you think.
The golden rule here is to find the narrowest point of your window frame. I can tell you from experience that very few window frames are perfectly square. To account for this, you need to measure the width in three different spots: once across the top, once in the middle, and once more at the bottom. Always use the narrowest of these three numbers for your final width. Trust me, this single step prevents the most common headache: blinds that scrape, jam, or just don't fit at all.
This infographic lays out the simple process for measuring width, which is the most critical step for an inside mount.

As you can see, taking multiple measurements isn’t just a suggestion—it's essential for getting that seamless, professional look you’re after.
Finalizing Your Height and Depth
Once you have your width nailed down, you'll use a similar approach for the height. Measure your window's height on the left, in the middle, and on the right side. This time, however, you’ll want to use the longest of the three measurements. This ensures your blinds are long enough to provide complete coverage, leaving no awkward gaps at the bottom.
The last, and often overlooked, measurement is the depth of your window sill. Measure from the front edge of the frame all the way back to the glass or any other obstruction, like a crank handle. This tells you if the blind's headrail will fit comfortably inside without sticking out. The industry standard is to measure width at three points (using the narrowest) and height at three points (using the longest). You can find more insights on this common practice in market research on blinds and shades.
A Crucial Note: Never make your own deductions or round your numbers. Give the manufacturer the exact measurements you took. They will automatically make a small adjustment to the size to ensure a perfect, non-scraping fit.
For homeowners looking for custom blinds and shades in San Diego, this is a detail our expert installation crews at Home Blinds & Floors double-check during every free in-home consultation, guaranteeing a flawless outcome every time.
How to Measure for Outside Mount Blinds
An outside mount is the perfect workaround when your window frame is too shallow for a standard blind, isn't perfectly square, or if you simply want to achieve maximum darkness. I often recommend this approach to clients who want a blackout effect in a bedroom. The blind is mounted on the wall or trim around the window, creating a handsome, frame-like look that can make a window feel larger and more dramatic.
While this method is more forgiving than an inside mount, getting it right still requires some careful thought. The first step is to decide exactly how much of the wall or trim you want the blind to cover. This is really the key to a successful outside mount installation.
Getting the Width and Height Just Right
For the width, you’ll measure the entire area you want the blind to conceal. Here's a pro tip: I always recommend adding at least 2 to 3 inches of overlap to each side of the window opening. This extra coverage is the secret to getting rid of those frustrating slivers of light that sneak in around the edges of a blind.
When it comes to the height, you’ll measure from where you plan to install the headrail down to the point where you want the blind to end.
Top Placement: You need to mount the headrail at least 2 inches above the window frame. This gives you a solid, flat surface to securely install the mounting brackets. Don't eyeball this—make sure you have the space.
Bottom Placement: Measure down to the bottom of the windowsill. For a more polished, complete look, I often suggest going slightly lower than the sill.
This technique is also my go-to for window treatments for sliding glass doors. With large glass doors, achieving total coverage is crucial for both privacy and light control, and an outside mount delivers every time.
A huge advantage of an outside mount is its ability to disguise architectural quirks. If you live in an older home with less-than-perfect window frames, mounting your blinds on the outside gives you a clean, uniform appearance that hides any imperfections.
The added coverage and flexibility make an outside mount a fantastic choice in so many situations. If you're thinking about adding smart home features, many motorized window treatments are perfectly suited for this installation style.
Common Mistakes to Avoid When Measuring Windows
Of all the DIY projects out there, measuring for blinds seems simple enough. But I’ve seen small, easy-to-miss mistakes turn into big headaches more times than I can count. Getting it right the first time is all about knowing what to watch out for.
One of the most common slip-ups? Forgetting about obstructions. Before you even think about writing down your final numbers, do a quick scan for window cranks, locks, or even those little security alarm sensors. Anything that sticks out can stop your blinds from working smoothly, so you absolutely have to measure around them.
Another classic error is mixing up your width and height. It happens to the best of us. A simple habit I’ve developed is to always, always write my measurements down as W x H (Width x Height). It's a small trick, but it will save you from the frustration of ordering a tall, skinny blind for a short, wide window.
Don't Take Shortcuts or "Guesstimate"
It might seem like a clever shortcut to just measure your old blinds. Please don't. You have no idea if the original installer measured correctly, and you could just be copying someone else's mistake. Always measure the window opening itself.
Finally, fight the urge to round your numbers. Your job is to be precise. Grab that tape measure and record every dimension to the nearest 1/8 inch. This isn’t just about being picky—even a tiny inaccuracy can lead to blinds that jam, look crooked, or let in frustrating gaps of light. The data backs this up, with research on the global window blinds market highlighting how critical proper fit is for performance.
Important Takeaway: The manufacturer will make all the necessary deductions for a perfect fit based on the exact numbers you provide. Your only task is accuracy.
This level of detail isn't just about looks; a perfectly fitted blind is also a safer one. If you have kids or pets, you know how important that is. For more on that, take a look at our guide to [child-proof window blinds and safety solutions](https://www.homeblindsandfloors.com/post/child-proof-window-blinds-smart-safety-solutions-that-work).
Your Window Measurement Questions Answered (FAQ)
Even with the best instructions, measuring windows can throw you a curveball. It’s totally normal to have a few questions pop up, especially when you run into a tricky situation. Here are answers to the most common questions we hear.
What if my window frame isn’t perfectly square?
This is one of the most common issues, especially in older homes. If your width or height measurements differ by more than a quarter-inch, an outside mount is your best solution. Trying to force an inside mount into a crooked frame will lead to uneven light gaps and can cause the blind to scrape or bind. An outside mount conceals the imperfection and ensures smooth operation.
Do I need to make deductions for an inside mount?
Absolutely not. Your only job is to provide the exact, tightest measurement of the window opening, down to the nearest 1/8 inch. The manufacturer will automatically make the small deductions (usually 1/4 to 1/2 inch) needed for the blind to fit inside the frame without catching on the sides.
How much depth do I need for an inside mount?
This depends on the specific product. A 2-inch faux wood blind might need 3 inches of depth to sit completely flush, while a slim cellular shade needs less. Always check the "product specifications" on the retailer's website before ordering. If you're unsure, a free in-home consultation with an expert from Home Blinds & Floors can confirm if your windows can accommodate the style you love.
Can I measure for specialty-shaped windows myself?
We don't recommend it. Arches, angled windows, and complex bay windows require expert precision. One small miscalculation can result in a costly custom blind that you can't use or return. For these unique windows, it's always best to call in a professional to guarantee a perfect fit and save you the potential headache. The same goes for outdoor installations, which have their own set of challenges—you can learn more in our article about the [surprising benefits of motorized and non-motorized porch blinds](https://www.homeblindsandfloors.com/post/transform-your-outdoor-space-the-surprising-benefits-of-motorized-and-non-motorized-porch-blinds).
Summary: Your Path to Perfectly Measured Blinds
In summary, measuring for blinds is a straightforward process when you follow these key steps: choose between an inside or outside mount, use a steel tape measure, and take multiple measurements to account for any imperfections. For inside mounts, use the narrowest width and longest height; for outside mounts, add overlap for better light control. By avoiding common mistakes like forgetting obstructions and rounding numbers, you can order with confidence.
Ready to find the perfect window treatments but want to be 100% sure your measurements are flawless? Let the pros at Home Blinds & Floors take it from here. We offer free in-home consultations where our team provides precise measurements and helps you find the perfect look for your home.
[Schedule Your Free Consultation Today](https://www.homeblindsandfloors.com/)


Comments