.avif)
.avif)
.avif)
How to Remove Window Blinds in Your Delmarva Home: A DIY Guide
- Johann Reardon

- Nov 20, 2025
- 13 min read
Updated: Dec 4, 2025
TL;DR: To remove window blinds, you must release the headrail from its mounting brackets. For horizontal blinds, use a flathead screwdriver to open the hinged covers on the box brackets. For roller shades, push the shade toward the spring-loaded end to release it. For vertical blinds, remove the vanes first, then unclip the headrail. Always use a stepladder, and for motorized blinds, disconnect the power source first. Once removed, patch any screw holes before installing new window treatments.
Are you wondering how to remove old window blinds to make way for a fresh look? At Home Blinds & Floors, we help homeowners across the Delmarva Peninsula tackle home improvement projects, from DIY removal to professional installation of beautiful new custom window treatments. Getting the old blinds down is the first step, and with a few simple tools and a little know-how, it's a project you can handle with confidence.
Preparing to Remove Your Window Treatments
So, you're ready to take down those old blinds. Maybe you're giving the room a fresh coat of paint, doing a deep clean, or making way for a beautiful upgrade. Whatever the reason, getting the old window treatments out of the way is your first move. While the specifics can change from one blind to the next, the basic idea is always the same: free the headrail from the brackets holding it up. Most folks here on the Delmarva Peninsula can get this done with a couple of common household tools. The trick is to figure out what kind of brackets you're dealing with before you start.
First, Figure Out Your Blind Type
Before you even think about grabbing a screwdriver, take a close look at the top of your window treatment. Are you seeing horizontal slats? Long vertical vanes? Or is it a single roll of fabric? Each one has a slightly different mechanism holding it in place. If you're curious about all the different styles out there, our ultimate guide to custom window blinds in Delmarva is a great resource.
To help you get started right away, I've put together a quick reference table. It covers the most common blind types we see in homes from Salisbury to Rehoth Beach and shows you exactly what to do.
Common Blind Removal Methods at a Glance
This table breaks down the typical removal actions for the most popular blind styles. It's a great cheat sheet to have handy.
Blind Type | Bracket Type | Primary Removal Action |
|---|---|---|
Horizontal (Wood/Faux Wood/Mini) | Box Bracket with a hinged front cover | Use a flathead screwdriver to gently pry open the front cover. |
Vertical Blinds | Clip Bracket holding the top rail | Insert a screwdriver into the clip or use your finger to push a release tab. |
Roller or Solar Shades | Open-ended bracket with a pin mechanism | Push the shade toward the spring-loaded end, then lift the other end out. |
Cordless Cellular/Pleated Shades | Small, discreet clip or pressure-fit bracket | Push the headrail firmly toward the window and rotate it down to release. |
Once you've identified your blind type in the table, you'll have a clear idea of what to expect. This simple step can save you a lot of time and frustration.
Essential Tools for Removing Window Blinds
Diving into a home project without the right gear can turn a quick job into a frustrating ordeal. Before you even think about climbing up to the window, let’s make sure you’ve got the right tools handy. Having everything you need nearby not only makes removing your blinds go smoothly but also keeps you safe. A little prep work goes a long way. It’s the difference between a clean removal and a headache involving stripped screws or scratched window frames. The good news? You probably don’t need a trip to the hardware store for this one.
Essential Tools for the Job
You won't need a massive toolbox to take down most blinds. In my experience, a handful of basic tools will get you through just about any situation you'll run into.
Stepladder: This is non-negotiable. Grab a sturdy stepladder and make sure it’s on solid, level ground before you step on it. Don't be tempted to use a wobbly chair—it's just not worth the risk.
Screwdrivers: Keep both a Phillips head and a flathead screwdriver in your pocket. The flathead is especially useful for prying open the little hinged doors on box brackets, which you see all the time on standard horizontal blinds.
Power Drill (Optional but Recommended): You can definitely get by with just a screwdriver, but a power drill makes quick work of removing bracket screws. If you're doing more than one window, you’ll be glad you have it.
Safety Goggles: It might seem like overkill, but it's a good habit. You never know when dust, debris, or a tiny screw might fall right toward your eyes.
This simple infographic is a great starting point, helping you identify what kind of blinds you're working with so you know what type of bracket to expect.
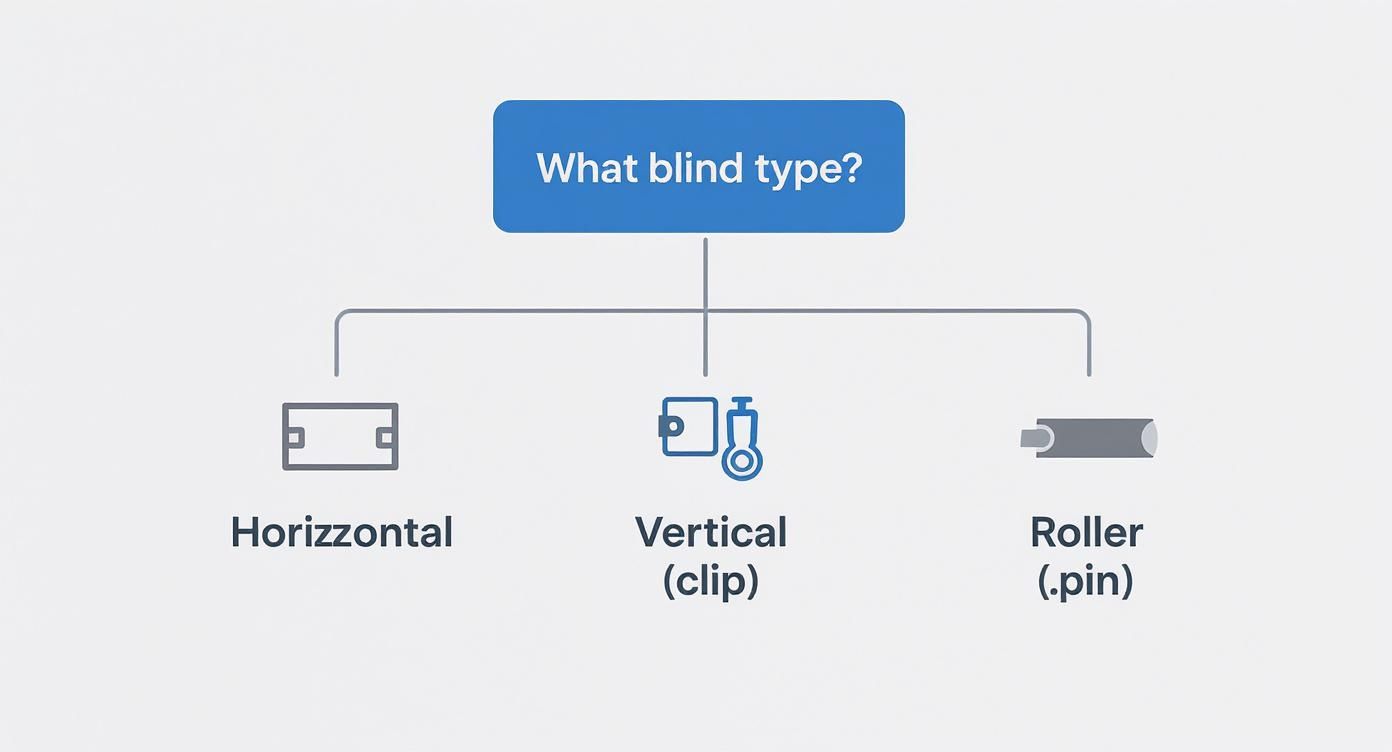
As you can see, knowing whether you have horizontal, vertical, or roller shades is the first step, as it tells you exactly what kind of bracket mechanism you'll need to release.
Safety First Important Considerations
Beyond your tools, a little common sense goes a long way. If you’re dealing with larger, heavier treatments—like those big, beautiful wood blinds common in many Delmarva homes—grab a helper. Having someone to support the weight as you unclip it from the brackets prevents it from crashing down.
For those of us in older homes, particularly ones built before 1978, be cautious of the paint around the window frames. If you see chipping or flaking paint where the brackets are mounted, it could contain lead, so be sure to handle it with care.
Pro Tip: If a blind just won’t budge, resist the urge to yank on it. Step back and take a closer look at the bracket. Often, it’s just a small, hidden release tab or a bit of dried paint that's causing the problem.
And once the old blinds are down, safety should be top of mind for what comes next. If your goal is to make your home safer for little ones, take a look at our guide to child-proof window blinds and smart safety solutions. From free in-home consultations to flawless installation, Home Blinds & Floors takes the stress out of selecting window treatments.
Step-by-Step: How to Remove Standard Horizontal Blinds
Ready to swap out those old horizontal blinds? Whether they’re classic wood, sturdy faux wood, or the lightweight aluminum kind you see everywhere, learning how to take them down is a great DIY skill to have. The good news is that most of them are held up by the same simple piece of hardware: a "box bracket." All we have to do is pop that door open. It’s a straightforward job, but a few little tricks can save you from a lot of frustration and keep your window frames from getting scuffed up.
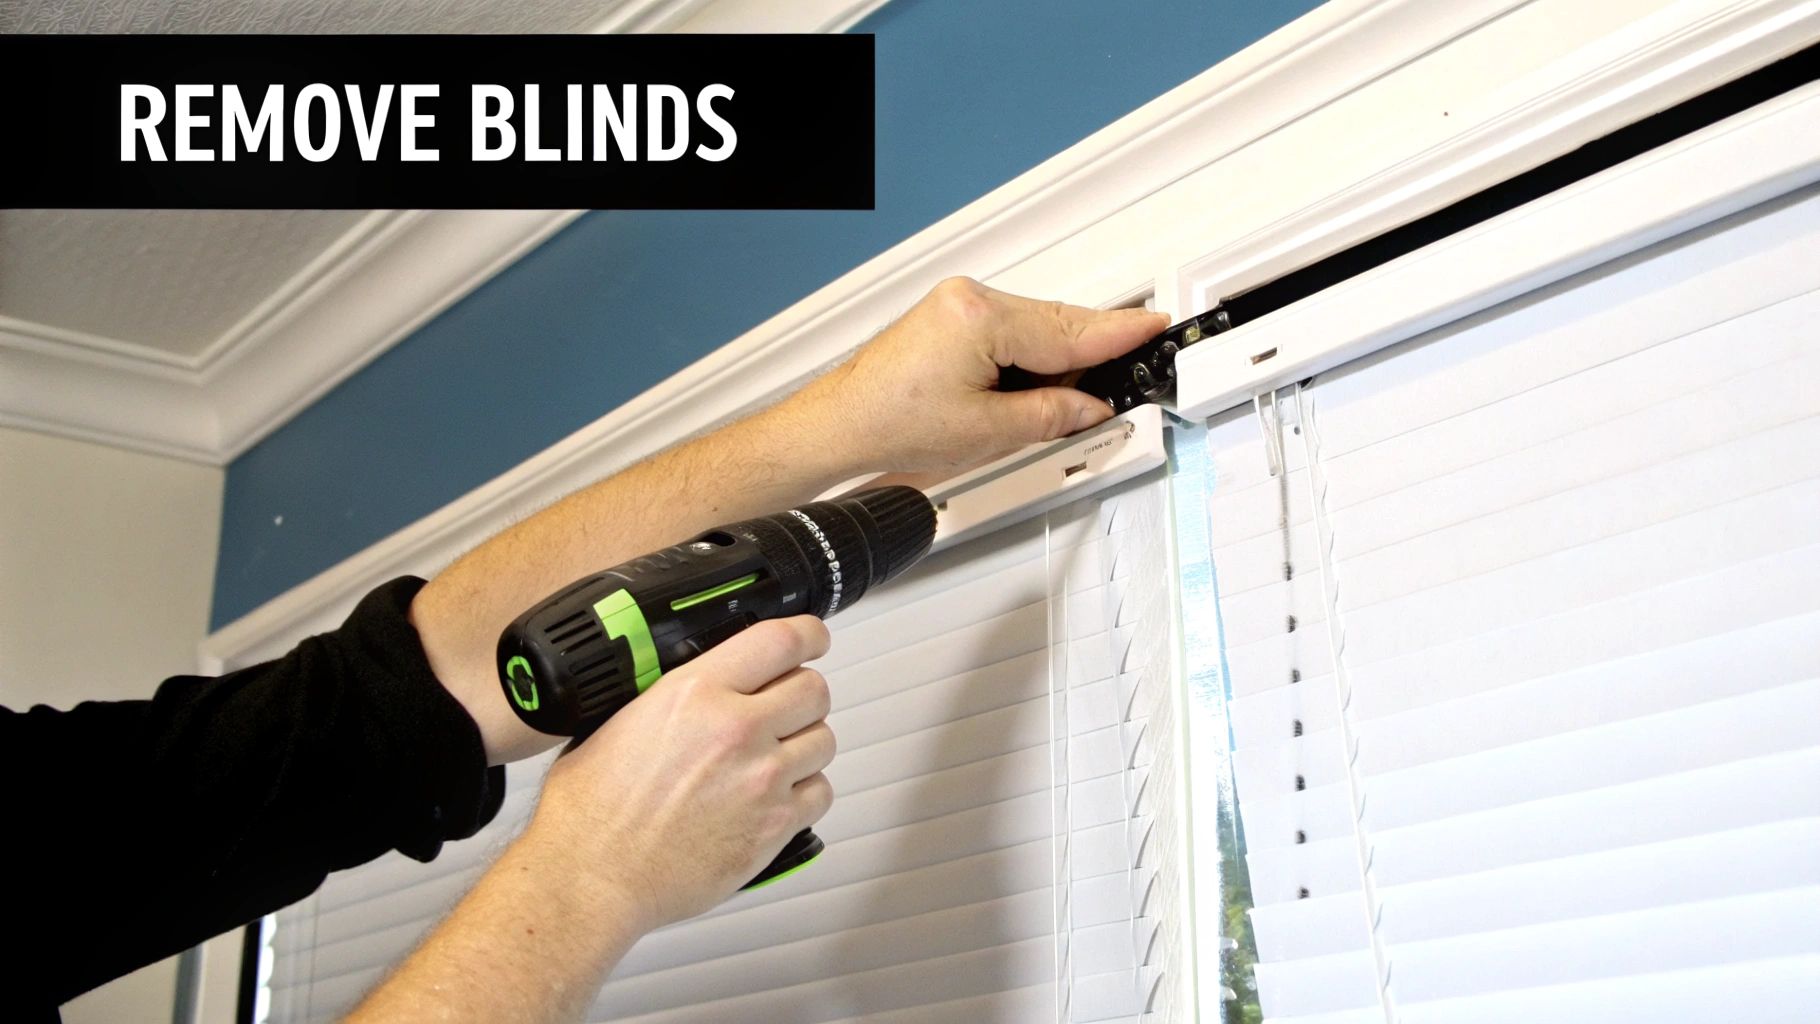
Opening the Box Brackets
First thing's first: pull the cord to raise the slats all the way to the top and lock them. This bunches everything up neatly out of your way and makes the headrail much lighter to handle. Now, grab your stepladder and get into a comfortable position. You'll see a box bracket at each end of the headrail. Your target is the small hinged flap on the front of each one.
This is where a flathead screwdriver becomes your best friend.
Wiggle the tip of the screwdriver into the small gap between the hinged cover and the main body of the bracket.
Gently pry outward, away from the blind.
You should hear or feel a little "pop" as the cover swings open. Think of it like a tiny door.
Repeat this on the other side. Don't be surprised if the covers are a bit stubborn, especially on older blinds. A little bit of steady pressure is all it takes.
Lifting the Headrail Free
With both bracket covers open, the headrail is now loose. Gently tilt the front edge of the headrail up toward the ceiling as you pull it forward, toward yourself. This little upward lift helps it clear a small lip inside the bracket. The whole blind assembly should slide right out. If you're working on a wide window, it's a good idea to have a helper support the other end so it doesn't fall or bend the headrail.
As a local, family-run business, Home Blinds & Floors provides personal service, competitive pricing, and professional installation throughout Sussex, Wicomico, Kent, and beyond. We've seen it all, and if a bracket seems impossible to open, it's often because it has been painted shut over the years.
What to Do When Brackets Are Stuck
We see this all the time, especially in older homes here on the Eastern Shore. After a few coats of paint, that little hinged door on the bracket can get sealed shut. If you think paint is the culprit, grab a utility knife. Carefully run the blade along the seam where the hinged cover meets the bracket. This will break the paint's seal, and you should be able to pop it open with your screwdriver.
Once the headrail is down, the last step is to simply unscrew the empty brackets from the window frame with your screwdriver or drill. The global blinds market is projected to grow to USD 24.63 billion by 2030, and retrofit installations are expected to make up over 57% of revenue in 2024. It just goes to show how many homeowners are swapping out old window treatments for newer, more efficient styles. You can explore more about market trends and see the big push for better window coverings.
A Practical Guide to Removing Specialty Blinds
While most of us have dealt with standard horizontal blinds, many homes across the Delmarva Peninsula feature different styles. From the sleek look of roller shades to the classic folds of Roman shades, each type has its own little trick to getting it off the wall. But don't let the word "specialty" scare you off. It doesn't mean complicated. Let’s walk through the specifics for some of the most common types you’ll run into.
Handling Vertical Blinds
At first glance, vertical blinds look like a huge pain to remove, especially on a big sliding glass door. The secret? Lighten the load. Start by unhooking each individual vane. A gentle push upward and a slight twist is usually all it takes to pop one free. Once the vanes are gone, the headrail is surprisingly light. It’s typically held up by a few spring-loaded clips. Grab a flathead screwdriver and press the release tab on each clip to free the rail. This is one of those jobs where having a helper is a really good idea.
Releasing Roller and Solar Shades
Roller and solar shades are loved for their minimalist design, and thankfully, taking them down is just as straightforward. First, roll the shade all the way up. One end will have a stationary hook or slot. The other will have a retractable pin. To get the shade out, just push the entire tube horizontally toward the spring-loaded end. This compresses the pin, giving you just enough wiggle room to lift the other end up and out of its bracket.
Taking Down Roman and Woven Wood Shades
Roman shades and their woven wood cousins often use the exact same mounting hardware as standard horizontal blinds: the classic box bracket. Raise the shade completely so the fabric is stacked tightly at the top. This should give you a clear shot at the headrail and the brackets holding it. Just like with wood blinds, you’ll use a flathead screwdriver to carefully pop open the hinged front cover on each bracket. Tilt the front of the headrail up and pull it toward you.
Crucial Safety Steps for Motorized Blinds
Motorized blinds add one critical element to the removal process: electricity. Before you even think about taking one down, you must disconnect its power source.
Battery-Powered: Unplug the wire connecting the battery wand to the motor.
Plug-In: Unplug the transformer from the wall outlet.
Hardwired: This is where you need to be extremely careful. We strongly recommend calling a professional electrician or a window treatment expert. If you are experienced, you must go to your main electrical panel and turn off the correct breaker to kill the power completely.
Only after you are 100% sure the power is off should you start removing the headrail. The global window coverings market was valued at USD 34.50 billion in 2023, with a huge part of its growth coming from smart home motorization. You can discover more insights about this trend.
Home Blinds & Floors offers a wide selection of custom blinds and shades in Delmarva, with expert installers who bring the showroom to your living room. Our team is fully trained to handle any project, including complex motorized systems in homes from Easton to Lewes.
If you're dealing with a specific brand like Hunter Douglas, their unique mounting systems often require a different approach. For detailed instructions on their products, check out our guide on how to remove Hunter Douglas blinds.
Troubleshooting Common Blind Removal Problems
Even the simplest home project can throw you a curveball. When you're removing old window blinds, you might discover that years of paint, stubborn hardware, or just general wear and tear have other plans. But don't worry, and definitely don't reach for a crowbar. Most of these hang-ups have a pretty straightforward fix. Let's walk through the most common headaches we see in homes across the Delmarva Peninsula.
Dealing with Stuck or Painted Brackets
This is a big one, especially in older homes from Easton to Lewes. A box bracket gets painted shut, and the hinged cover feels like it's been welded to the frame. Instead of trying to force it with a screwdriver, grab a sharp utility knife. Carefully and lightly score the paint right along the seam where the hinged door meets the main body of the bracket. Breaking that paint seal is often all it takes to get the cover to pop open.
Managing Stripped or Stubborn Screws
You’ve finally wrestled the headrail free, but now the empty brackets are stuck to the wall because the screws are completely stripped. When your Phillips head screwdriver can't get any grip, you've got a couple of solid options. First, try the rubber band trick. Place a wide rubber band flat over the screw head and then press your screwdriver into it. The rubber often provides just enough extra friction to grab the stripped screw and turn it.
When the Headrail Just Won't Release
Sometimes, the headrail feels completely locked into its clips. This happens a lot with vertical blinds or cordless cellular shades. The problem is usually a little rust, built-up grime, or a clip that’s just slightly bent. First, double-check that you're applying pressure in the right direction. You usually need to push the headrail firmly toward the window glass and then rotate it down and out. Vertical blinds are notorious for stubborn parts; our guide on how to fix broken vertical blinds has some extra insights on how those mechanisms work.
Our Pro Tip: Sometimes, a blind is just old, and its plastic or metal parts are brittle. If you find yourself having to use a lot of force, stop. It's much better to pause and re-evaluate than to break a bracket or the headrail, which will only make the job harder and could damage your window frame.
From free in-home consultations to a perfect installation, Home Blinds & Floors is here to take all the stress out of getting new window treatments. If you hit a removal problem that feels like too much, our team is always ready to step in and help.
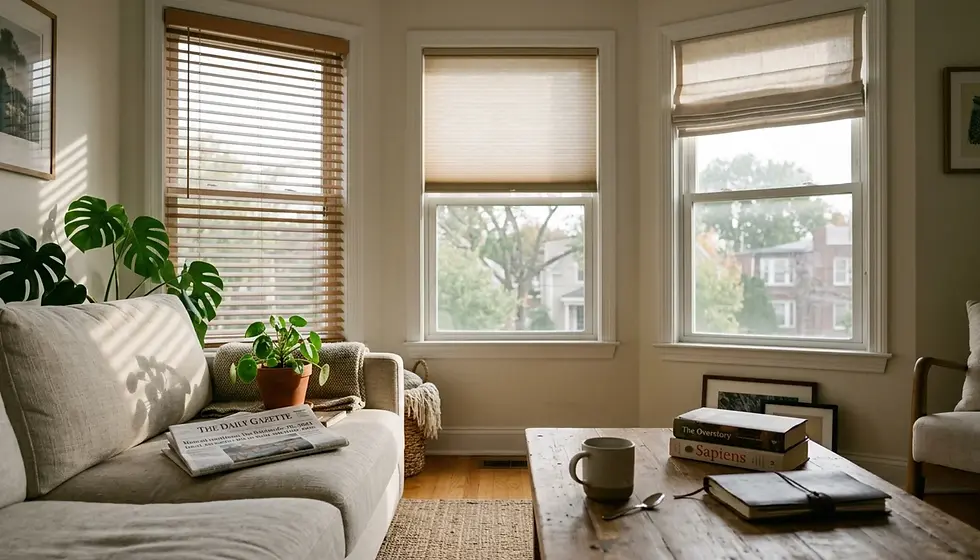
After the Blinds Are Down: Prepping for New Window Treatments

Alright, the old blinds are finally off the wall. You're on the home stretch! But don't rush to put the new ones up just yet. Taking a few extra minutes now is what separates an okay DIY job from a truly professional-looking result. This is the perfect time to prep the window frame for whatever comes next, whether that’s a fresh coat of paint or your beautiful new window treatments.
Patching and Prepping the Surface
Chances are, your old brackets left behind a few small screw holes. Filling these in is a simple but critical step, especially if you're painting or if the new brackets will be in a different spot.
Grab a small container of spackle or wood putty and a flexible putty knife.
Dab a small amount of spackle over each hole, pressing it in firmly.
Scrape the putty knife flat against the wall or frame to create a smooth, level surface.
Let it dry completely, then give it a quick, light sanding with fine-grit sandpaper until it’s perfectly smooth.
With the holes patched, your window frame is a clean slate. This little bit of prep work is key before you measure and install new blinds in your Delmarva home.
As a local, family-run business, Home Blinds & Floors provides personal service, competitive pricing, and professional installation throughout Sussex, Wicomico, and Kent. We handle every detail, from removing the old treatments to the final, flawless installation of your new custom ones.
How to Dispose of Your Old Blinds
Last but not least, what do you do with the old blinds? You could just toss them in the trash, but there are often better, more responsible ways to handle it. Aluminum mini blinds are usually recyclable; just check with your local Delmarva waste management provider. For most vinyl or faux wood blinds, proper disposal is typically the only option, as they aren't widely recycled. Taking a moment to check your local rules ensures you're doing it right.
FAQ: Your Blind Removal Questions Answered
Over the years, we've helped countless homeowners across Delmarva with their window treatments. Along the way, we've heard just about every question there is when it comes to taking down old blinds. Here are the answers to the ones that pop up most often.
What are the absolute essential tools for removing blinds?
Honestly, you don't need a whole workshop for this. Most of the time, you can get the job done with just two things: a reliable stepladder and a multi-bit screwdriver with both flathead and Phillips head options. That said, if you have a power drill with a screwdriver bit, you'll thank yourself later. It can make backing out old, stubborn bracket screws a much faster and less strenuous task.
How do I remove blinds with no visible bracket screws?
This is a common one, especially with newer cordless and cellular shades. If you're looking at the bracket and see no screws or hinged doors, you're almost certainly dealing with hidden, spring-loaded clips. The trick is to apply gentle but firm pressure. Push the entire headrail straight back, toward the window pane. While holding it there, tilt the back of the headrail down and away from the top of the window frame. That motion should pop it right out of the tension clips.
Can I remove long vertical blinds by myself?
You technically can, but we wouldn't recommend it. It's much safer and easier with a helper. Those long headrails are incredibly awkward. Lighten the load first: before you even touch the headrail, unclip each vertical vane from its carrier on the track. Removing all the vanes first dramatically cuts down the weight, making the headrail far less cumbersome to handle.
What cities in Delmarva do you serve?
Home Blinds & Floors is proud to be a local Delmarva business. Our team provides in-home consultations and professional installation for our neighbors all across Maryland's Eastern Shore and Delaware. We're regularly in communities like Salisbury, Ocean City, Easton, Rehoboth Beach, Lewes, and all the towns in between!
In summary, Home Blinds & Floors provides custom window treatments, expert advice, and in-home service to homes across the Delmarva Peninsula. From Rehoboth Beach to Easton, our team is here to help you choose the best shades, shutters, or blinds for your space. Schedule your free in-home consultation today!


Comments