.avif)
.avif)
.avif)
How to Install Vertical Blinds: A Delmarva Homeowner's Guide
- Johann Reardon

- Aug 27, 2025
- 8 min read
TL;DR: Installing vertical blinds is a manageable DIY project that transforms a room. The key steps are accurate measurement, deciding between an inside or outside mount, securely installing level brackets, snapping in the headrail, and hanging the vanes. For a perfect, custom fit without the hassle, especially for tricky windows or sliding doors, homeowners in Salisbury, Rehoboth Beach, and across Delmarva can rely on Home Blinds & Floors for professional measurement and installation.
Struggling with how to properly install vertical blinds for a perfect, professional look on your sliding glass door or large window? At Home Blinds & Floors, we help homeowners across the Eastern Shore find the perfect balance of style, light control, and privacy with custom window treatments tailored to your space. This guide will walk you through the essential steps for a successful DIY installation.
Prepping for Vertical Blind Installation: Measurements & Tools
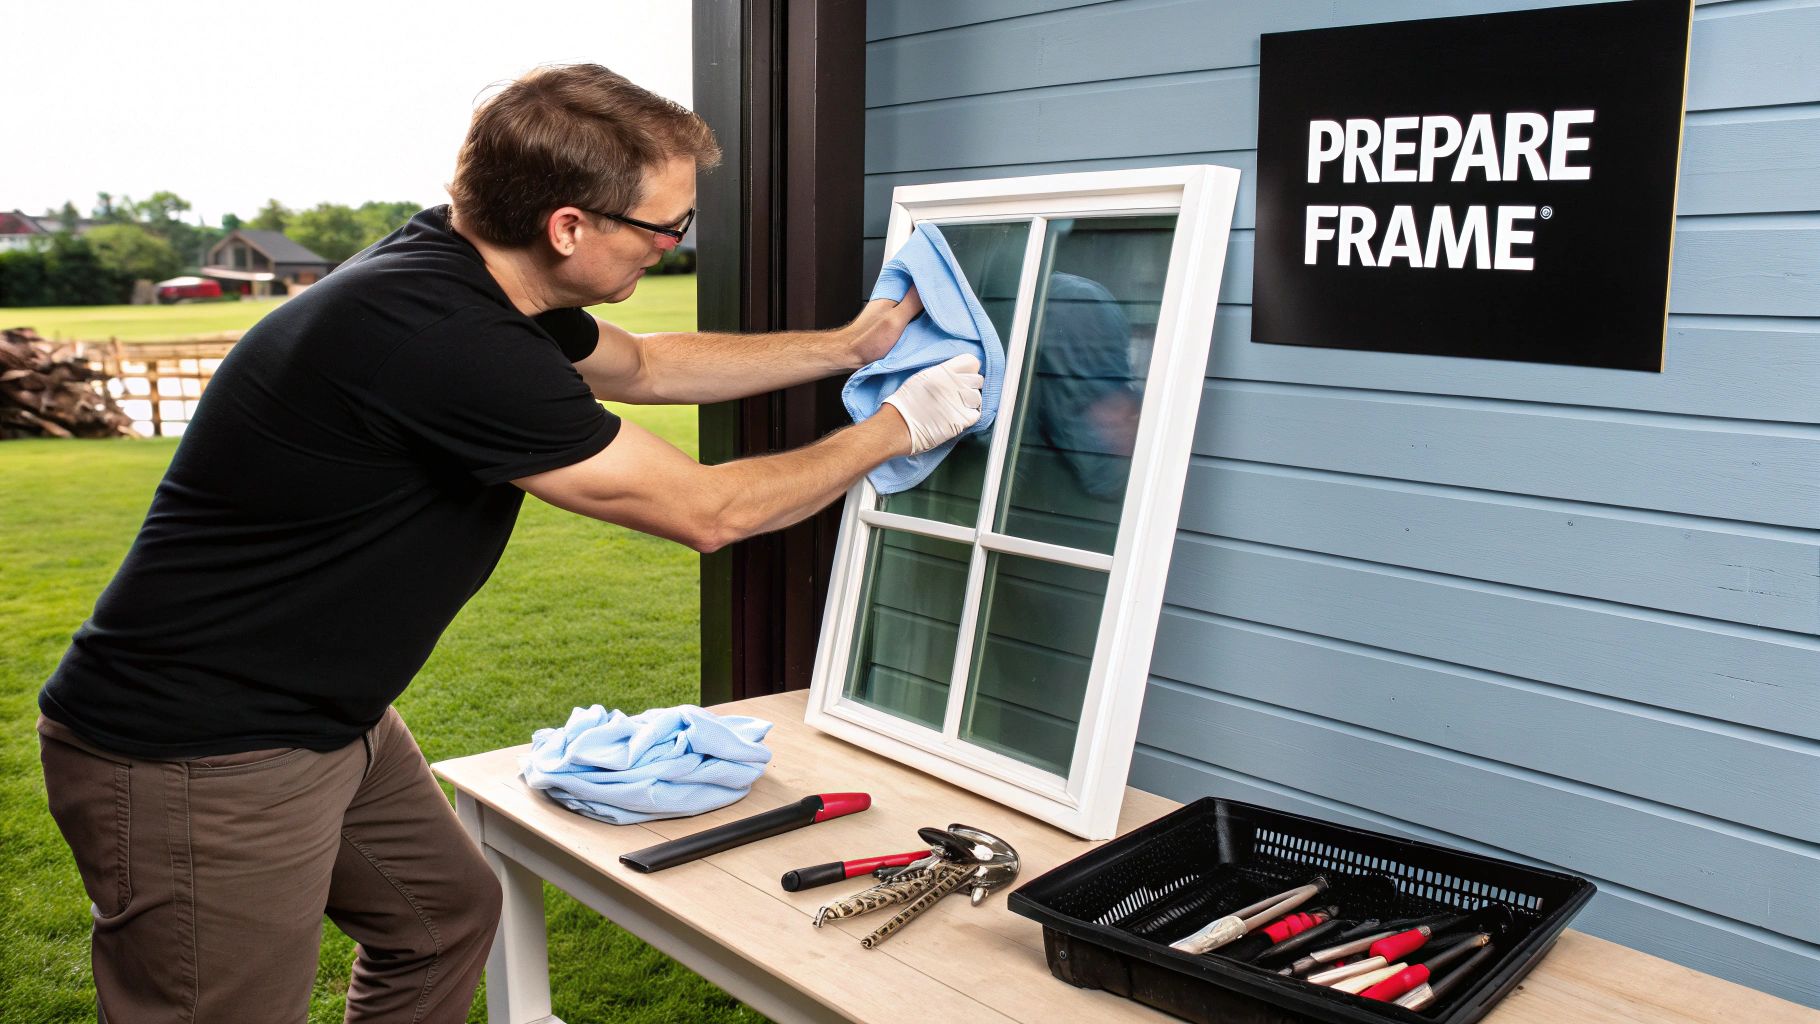
A perfect vertical blind installation doesn't start with a drill. It starts with a tape measure and a solid plan. Getting the prep work right is the single most important thing you can do to ensure your blinds fit perfectly and operate without a hitch for years to come.
It's a lot like any other home improvement project. Just as you’d follow detailed wallpaper installation and removal tips to avoid bubbles and mismatched seams, a few extra minutes of planning here will save you a world of frustration later. From free in-home consultations to flawless installation, Home Blinds & Floors takes the stress out of selecting window treatments.
Inside Mount or Outside Mount?
The first decision you'll make sets the stage for the entire look: where will the blinds be mounted? This choice impacts both aesthetics and function.
Inside Mount: This is where the blinds fit neatly inside the window frame. It offers a very clean, built-in look that lets your window molding shine. The one catch? You need enough depth in your window frame to accommodate the headrail, typically at least 3 inches.
Outside Mount: With this method, the blinds are mounted to the wall or trim above and outside the window opening. It's a very forgiving option that can make a window feel larger and is great for hiding less-than-perfect frames. This is also the go-to for most sliding glass doors.
Expert Insight: For sliding glass doors, I almost always recommend an outside mount. It guarantees the blinds will fully cover the glass for privacy and light control, and it allows the vanes to stack completely clear of the doorway when you want them open.
Getting Your Tools in Order
Before you even think about measuring, get all your tools together. Rounding everything up now means you won't have to stop mid-project to hunt for a screwdriver. You don't need a pro-level workshop, just the basics.
Your Installation Toolkit:
A steel tape measure (don't trust a cloth one for this).
A simple pencil and notepad.
A sturdy stepladder.
A drill with the right drill bits for your wall material.
A level—this is non-negotiable for a straight headrail.
A screwdriver that fits your bracket screws.
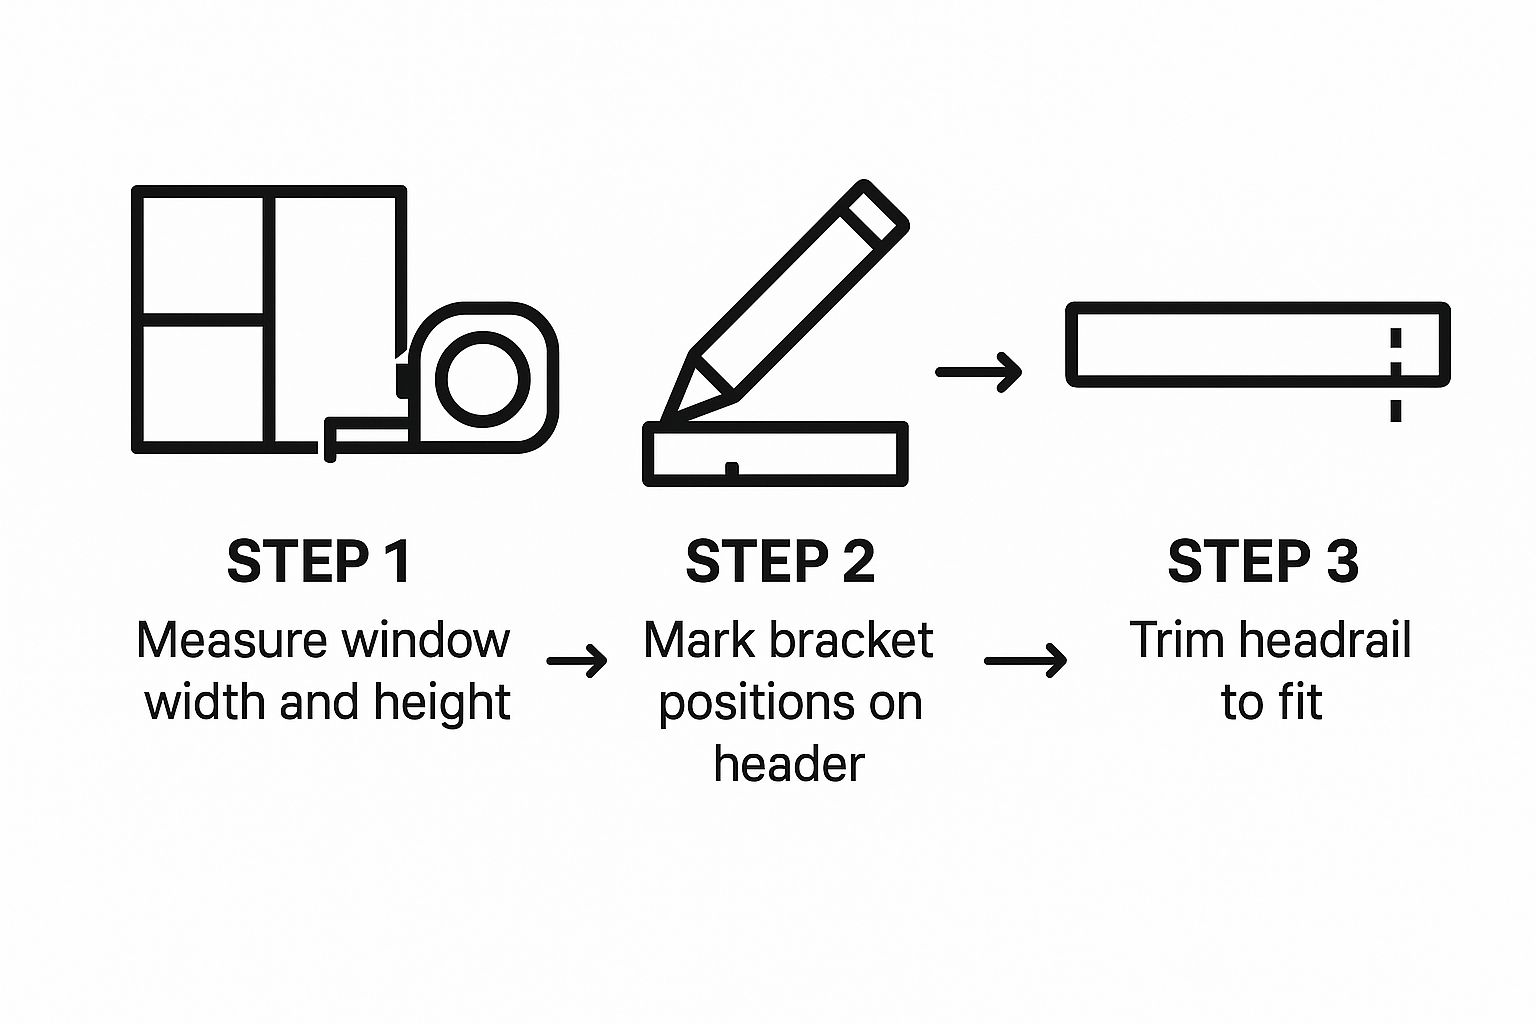
How to Measure Like a Pro
Precise measurements are the absolute bedrock of installing vertical blinds. It's the one step you can't afford to rush. If you want a more detailed breakdown, our guide on how to measure and install blinds in your Delmarva home is a great resource.
For an inside mount, you need to measure the width in three spots: top, middle, and bottom. Write down the narrowest of those three numbers—that's your width. Do the same for the height (left, middle, right) and use the shortest measurement. This ensures the blinds won't scrape or bind in a frame that isn't perfectly square.
If you’re doing an outside mount, first decide how wide you want the blinds to be. I usually recommend adding at least 3-4 inches to each side of the window frame to block light from seeping in around the edges. For the height, measure from where you want the top of the headrail to sit (usually a few inches above the frame) down to where you want the vanes to end.
Installing Brackets and Headrails in Delmarva Homes
Alright, with your measurements double-checked and your tools laid out, it's time to tackle the most important part of this whole project: getting the brackets and headrail up on the wall. Think of this as the foundation. If it’s not level and secure, your blinds will never operate smoothly or look right. It’s a step where a little extra care pays off big time.
The long-term stability of your new blinds comes down to how well these brackets are anchored. For a lot of the homes here on the Delmarva Peninsula, that means drilling into drywall or even older plaster. Doing it right is key to avoiding headaches later on.
Marking and Drilling with Precision
Grab your level and a pencil. Whether you’re mounting inside or outside the window frame, hold your first bracket exactly where you want it. Place your level on top and get it perfectly horizontal, then mark the screw holes. Now, do the same for the other bracket, but this time, use the level to make sure your new marks line up perfectly with the first set.
I can't stress this enough: never assume your window frame is level. Your level is the only thing you should trust here. It's a classic rookie mistake.
Once everything is marked, you're ready to drill. You'll want to use a drill bit that’s just a tad smaller than your screw to create a pilot hole at each pencil mark. This small step is a game-changer; it keeps the wood from splitting and makes driving the screws in so much easier.
A Pro Tip for Drywall: If you drill and don't hit a solid wood stud, you absolutely must use wall anchors. A screw directly into drywall has zero holding power and won't support the weight. Just tap the anchor into your pilot hole until it sits flush with the wall. Now, when you drive the screw in, it’ll have a rock-solid grip.
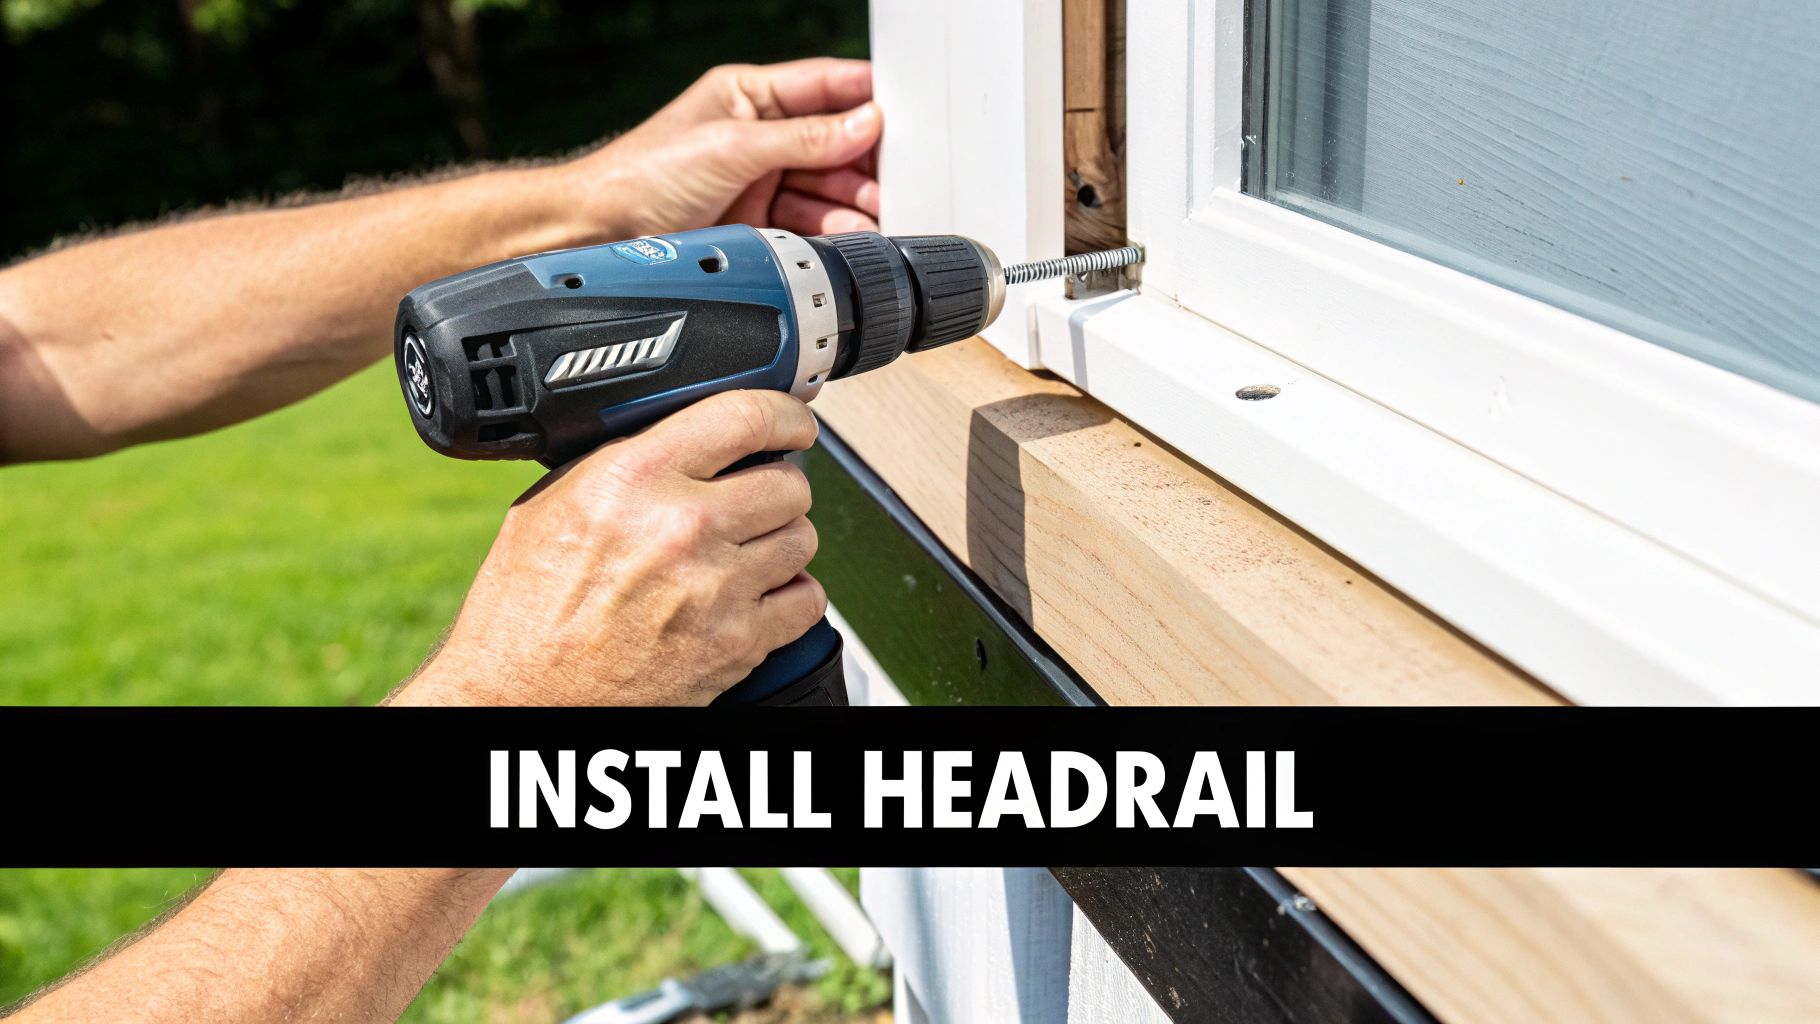
Attaching the Brackets and Headrail
With the pilot holes ready, go ahead and drive the screws into the brackets until they're snug, but don't crank them down all the way just yet. Lay your level across the brackets one last time for a final check. Once you’re positive they're dead-on level, give the screws a final tightening.
This whole process of careful measuring and marking is pretty universal for window treatments. If you've got shutters on your project list, you’ll find our guide on how to install plantation blinds follows a very similar, precision-first approach.
Now for the fun part. Lift the headrail, hook the front edge onto the brackets, and then push the back of the headrail up firmly. You’re listening for a satisfying "click" – that's the sound of the headrail locking securely into place.
As a local, family-run business, Home Blinds & Floors provides personal service, competitive pricing, and professional installation throughout Sussex, Wicomico, Kent, and beyond. We know the ins and outs of Delmarva homes and make sure every job is done right.
Finishing Your Vertical Blind Installation
Alright, the headrail is mounted and solid. Now for the fun part—seeing your new blinds actually take shape. This is where you'll hang the individual vanes on the headrail, turning that simple track into a finished window treatment. Be gentle with the vanes at this stage; you don't want to accidentally put a permanent crease in one before you even get it hung.
Home Blinds & Floors offers a wide selection of custom blinds and shades in Delmarva, with expert installers who bring the showroom to your living room.
Attaching Each Vane Correctly
Grab your first vane and start at one end of the headrail. Give the vane a slight curve and slip the hole at the top over the little plastic clip on the carrier stem. You’ll hear or feel a satisfying click as it snaps securely into place.
Here’s a common mistake I see all the time: people hang the vanes facing different directions. Before you even start, double-check that the curve on every vane is oriented the same way. This simple step ensures they all rotate together and stack cleanly.
Pro Tip: Try to handle the vanes by their edges. This helps prevent fingerprints and smudges, which is especially important for fabric vanes. Vinyl and PVC are a bit more forgiving, but it’s a good habit to get into.
Just keep working your way down the track, hanging one vane after another. It's a bit repetitive, but patience here means you won't have to backtrack and fix anything later.
Installing the Valance for a Polished Look
The valance is that finishing piece that hides the headrail mechanism, giving the whole setup a clean, professional look. Most valances use simple plastic clips that just snap right onto the headrail.
Attach the Valance Clips: First, space the clips evenly along the front of the headrail. They should slide or click into place without much fuss.
Secure the Valance: Line up the valance with the clips you just installed and press it on firmly. You'll feel it snap into place.
This last step really is what makes an installation look truly finished. It conceals all the hardware and provides that seamless appearance we aim for with all our clients, from Salisbury to Lewes.
Testing and Fine-Tuning the Operation
Time to give your new blinds a test run. Use the wand or cord to slowly open and close them completely. The movement should feel smooth, with no snagging or catching. Next, test the tilt. Twist the wand and watch the vanes rotate open and closed. They should all move as one. If one vane is out of sync, you can often just gently twist it by hand until it realigns with the others.
The global vertical blinds market was valued at around USD 2.3 billion in 2024 and is expected to keep growing, thanks to homeowners wanting solutions that are both stylish and practical. You can discover more insights about this growing market trend and see exactly why people all over the Delmarva Peninsula appreciate their versatility.
Frequently Asked Questions About Installing Vertical Blinds
Over the years, we've helped countless homeowners across the Delmarva Peninsula with their vertical blinds. Here are the answers to some of the questions we get asked the most.
What are the best vertical blinds for sliding glass doors?
For sliding glass doors, especially in coastal areas like Ocean City or Rehoboth Beach, we highly recommend PVC or vinyl vertical blinds. They are extremely durable, moisture-resistant, and incredibly easy to clean. An outside mount is almost always the best choice to ensure the blinds clear the door handle and provide full light coverage.
Can I shorten vertical blinds myself?
While it's technically possible, shortening vertical blind vanes and, more importantly, the headrail, is a tricky job that requires special tools. One wrong cut can ruin the entire mechanism. To avoid the risk and guarantee a perfect fit, we recommend ordering custom-sized blinds. Home Blinds & Floors provides a free in-home consultation where we take precise measurements for you.
How do you fix vertical blinds that won't rotate?
If some vanes aren't turning with the others, it usually means their internal carrier stems are out of sync. First, try gently turning the misaligned vane by hand to match the others. If that doesn't work, use the controls to rotate all the vanes fully in one direction, then all the way back. This action often resets the mechanism and gets everything working together again.
What cities in Delmarva do you serve?
Home Blinds & Floors proudly serves homeowners and businesses across the entire Delmarva Peninsula. Our service areas include Salisbury, Ocean City, and Berlin in Maryland, as well as Rehoboth Beach, Lewes, Georgetown, and all of Sussex County in Delaware. We bring our mobile showroom directly to you.
Why should I choose professional installation over DIY?
While this guide makes DIY feasible, professional installation from a team like Home Blinds & Floors guarantees a perfect, level fit without any of the potential frustration. We handle the precise measurements, ensure the brackets are securely mounted into any wall type, and make sure the final product operates flawlessly. It saves you time and ensures your investment looks beautiful for years.
Your Local Vertical Blind Experts in Delmarva
In summary, Home Blinds & Floors provides custom window treatments, expert advice, and in-home service to homes across the Delmarva Peninsula. While DIY installation is an option, our professional team ensures a flawless fit every time, saving you the hassle. From Rehoboth Beach to Easton, our team is here to help you choose the best shades, shutters, or blinds for your space. Schedule your free consultation today.


Comments