.avif)
.avif)
.avif)
A DIY Guide to Installing Roman Shades in Your Delmarva Home
- Johann Reardon

- Oct 29, 2025
- 11 min read
TL;DR: Installing Roman shades is a rewarding DIY project that involves gathering the right tools (tape measure, level, drill), choosing between an inside or outside mount, measuring your windows precisely, and securely installing the mounting brackets. The final steps include hanging the shade, adjusting the cords, and attaching the valance for a polished look. For complex windows or a guaranteed perfect fit, professional installation from a local expert like Home Blinds & Floors is recommended.
Struggling to figure out how to install Roman shades for that perfect, custom look? It's a common challenge for homeowners, but getting it right can completely transform a room's aesthetic. At Home Blinds & Floors, we help homeowners across the Delmarva Peninsula find the perfect balance of style, light control, and privacy with custom window treatments tailored to your space. This guide will walk you through the process step-by-step, ensuring a flawless, professional-looking result.
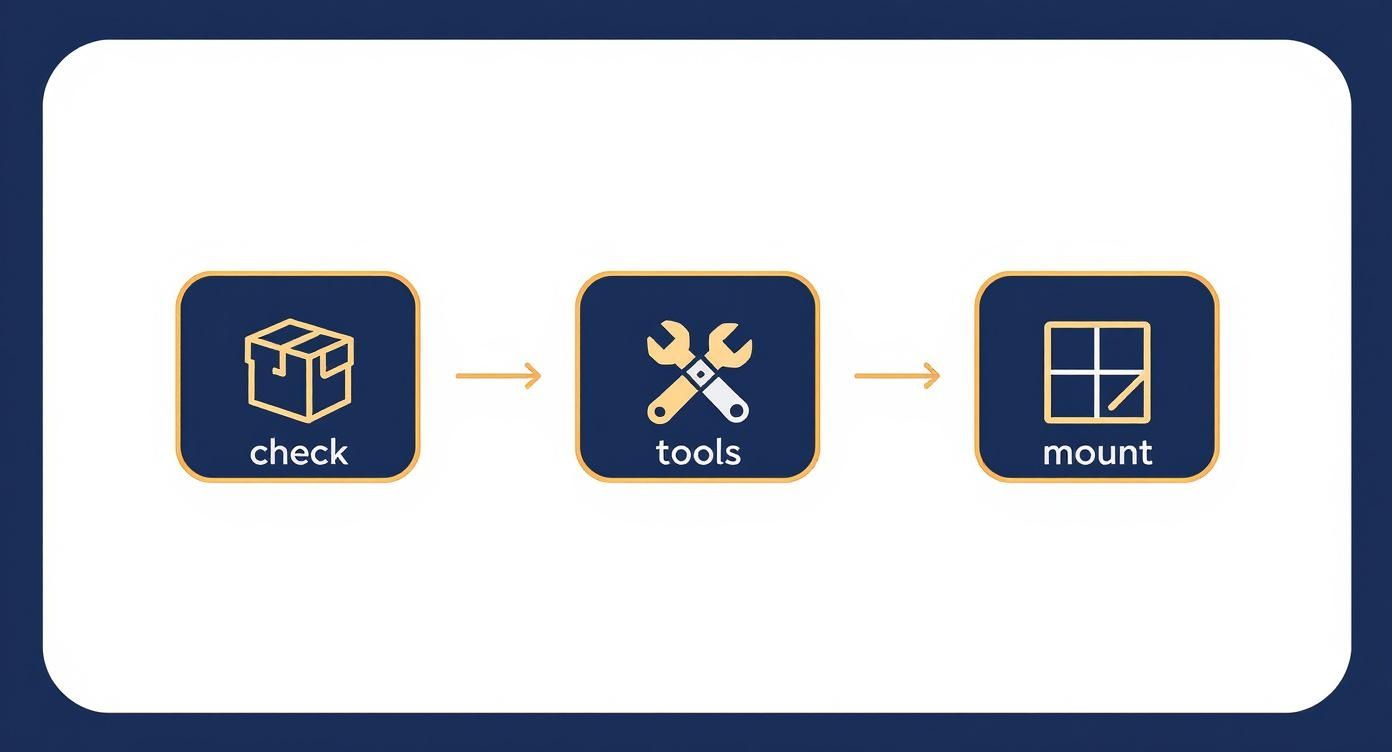
Preparing for Your Roman Shade Installation
A successful Roman shade installation is all about the prep work. Taking a few minutes to get organized now will save you a massive headache later. This is your pre-installation game plan, making sure you have everything you need before you even think about picking up a drill.
Gathering Your Tools and Inspecting Your Shades
Before you start any project, getting your tools and materials in order is the first real step toward a pro-level finish. When it comes to installing Roman shades, this is more than just grabbing a drill—it's about having the right tools for the job and confirming your beautiful new shades are flawless.
First things first, carefully unbox your new shades and lay them out on a clean, flat surface. Give the fabric a good look-over to check for any scuffs or damage that might have happened during shipping. Then, do a quick inventory of all the parts—brackets, screws, and any other little pieces of hardware. It’s a lot easier to find a missing screw now than when you're halfway up a ladder.
Next, let's get your toolkit ready. You don't need a full-blown workshop, but a few items are absolutely essential for a secure, level installation.
Steel Tape Measure: Precision is key. Don't eyeball it.
Pencil: For clear, easy-to-see marks.
Level: This is non-negotiable. You want your shades to hang straight, not tilted.
Drill with the Right Bits: Make sure you have the correct bits for your wall material, whether it's wood, drywall, or plaster.
Screwdriver: A Phillips head will usually do the trick for the screws that come in the box.
As you get your gear together for this project, you might just catch the home improvement bug. If you start dreaming bigger, this guide on how to plan a home renovation from start to finish is a fantastic resource for organizing those larger ambitions.
From the historic homes you see in Easton to the modern coastal houses in Rehoboth Beach, picking the right mounting style is a critical decision. It impacts not just how your shades look but also how they function day-to-day.
Inside Mount vs. Outside Mount: What's Right For You?
Deciding between an inside and outside mount can feel tricky, but it really comes down to your windows and what you're trying to achieve. An inside mount offers a clean, built-in look, while an outside mount can make a window feel larger and provide better light blockage. This table should help you figure out which is best for you.
Consideration | Inside Mount | Outside Mount |
|---|---|---|
Aesthetic | Clean, minimalist, built-in appearance. | Creates a taller, wider look for the window. |
Window Frame | Requires sufficient frame depth. | Works on any window, even shallow ones. |
Light Control | Allows small light gaps on the sides. | Offers superior light blockage and privacy. |
Obstructions | Not suitable for windows with cranks or locks. | Easily clears any obstructions in the frame. |
Best For | Showcasing attractive window molding. | Hiding imperfect frames or maximizing darkness. |
Ultimately, both options look fantastic when done correctly. The key is to match the mounting style to your specific needs and the unique character of your windows.
The appeal of Roman shades is huge. The global blinds and shades market hit an impressive USD 6.78 billion in 2024, with North America being a major player. Whether you mount them inside or outside the window frame, the installation requires careful adjustment to get those classic, crisp fabric folds working perfectly.
For a deeper look into all the different styles available, our guide on custom shades is a great place to explore what will work best in your home. Making the right choice now is what leads to that polished, seamless look that truly elevates a room.
Why Precise Window Measurements Are Non-Negotiable
Getting your window measurements right is the most critical part of installing Roman shades. Honestly, being off by even a fraction of an inch can mean the difference between that high-end, custom look and a shade that just looks… wrong. Think of it as the foundation of your project—if it's not solid, the whole thing will be shaky.
As a local, family-run business, Home Blinds & Floors provides personal service, competitive pricing, and professional installation throughout Sussex, Wicomico, Kent, and beyond. We guarantee perfect measurements every time, but if you're taking this on yourself, you absolutely have to embrace the "measure twice, cut once" philosophy. There are no shortcuts here.
Taking Measurements for an Inside Mount
For an inside mount, where the shade fits neatly inside the window frame, precision is everything. You'll need to measure the width and height in three separate places. This is crucial because it accounts for any imperfections in the window casing—and trust me, they're more common than you'd think, even in newer homes.
For the Width: Measure the inside of the window frame at the top, middle, and bottom. Write down all three numbers.
For the Height: Do the same for the height. Measure from the top of the frame down to the sill on the left, middle, and right.
Your Final Numbers: For the width, you’ll use the narrowest of the three measurements. For the height, go with the longest one. This simple step ensures the shade will move freely without snagging on the sides.
Taking Measurements for an Outside Mount
An outside mount is definitely more forgiving, but it requires a different strategy altogether. Here, you're placing the shade on the wall or trim above the window, so you want to create a deliberate overlap. This is a key step for achieving the best privacy and light control—a common goal for homeowners from Salisbury to Sussex County.
A good rule of thumb is to add at least 1.5 to 3 inches to each side of the window frame's measurement. That overlap is what stops light from seeping in around the edges and creates a more dramatic, finished look. For the height, measure from the spot above the window where you'll hang the headrail down to the sill.
Pro Tip: If you discover your window isn't perfectly square (you can check by measuring diagonally both ways), an outside mount is often the perfect fix. It cleverly hides those imperfections and can even make the window seem larger and more symmetrical.
For a deeper dive into measuring techniques for all kinds of window treatments, you can check out our detailed expert guide on how to measure for blinds. Putting in this attention to detail at the start is what separates a frustrating DIY headache from a flawless, professional-looking result.
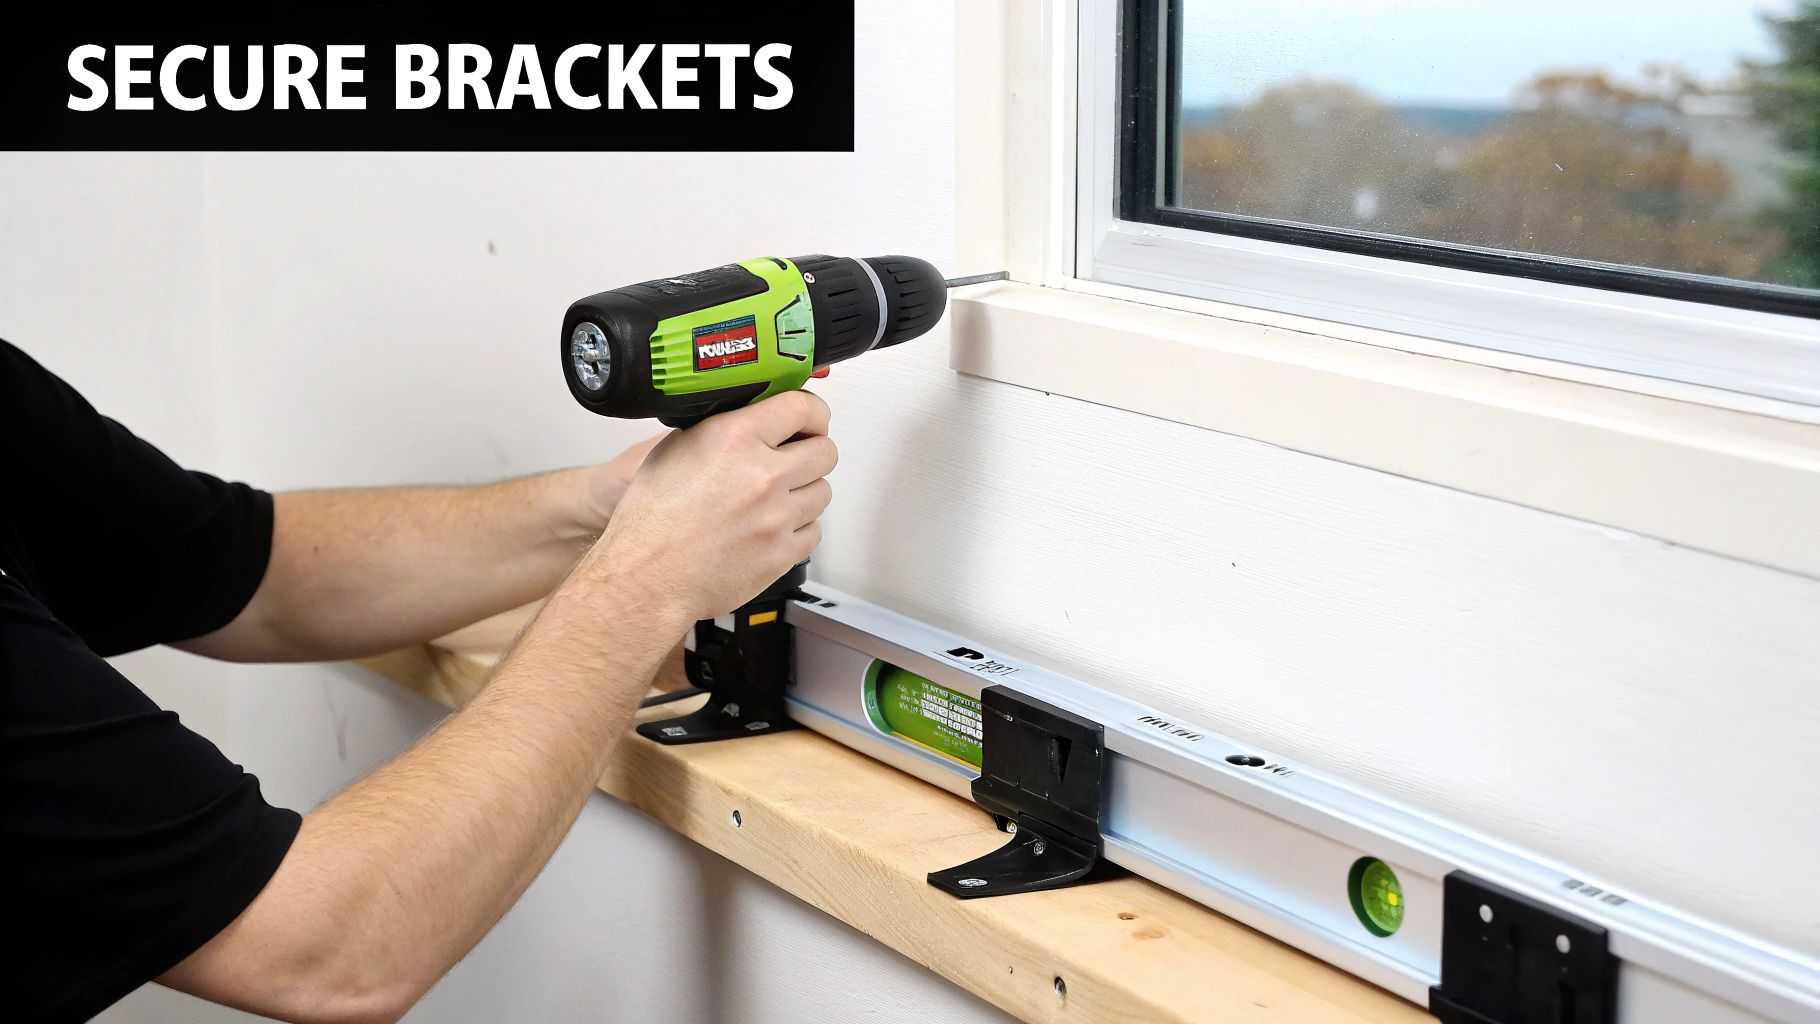
How to Mount Your Brackets Securely
Alright, you've got your measurements, so now it's time for the most hands-on part: installing the mounting brackets. This is where the magic really happens. Getting these brackets perfectly secure and level is the difference between a shade that works flawlessly for years and one that constantly looks a little off or starts to sag.
From free in-home consultations to flawless installation, Home Blinds & Floors takes the stress out of selecting window treatments. Our professional installers do this day in and day out for homes across the Delmarva Peninsula, but you can absolutely get that same professional result on your own.
Marking Your Bracket Placement
First things first, grab a pencil and a level. Your level is your best friend here—even a pencil mark that's just a hair off can make the entire shade look crooked once it's hung. Hold your first bracket up where you plan to install it. For an outside mount, this will be on the wall or trim above the window. For an inside mount, you'll be marking the top of the window frame itself. Use your pencil to mark the screw holes.
Expert Tip: Don't put your brackets right at the very edge of the headrail. You'll get much better support by placing the end brackets about 2-3 inches in from each side. This keeps the headrail from bowing. If you have a particularly wide shade, you’ll definitely need a center support bracket, too.
Drilling and Anchoring for Stability
With your spots marked and double-checked for level, it's time to drill. I always recommend drilling small pilot holes before driving in the screws. This is a simple step that prevents the wood from splitting—a real lifesaver when you're working with nice window trim.
Now, if your brackets are going into drywall, this next part is non-negotiable: you have to use wall anchors.
Why Anchors are Crucial: Drywall is basically just compressed powder. A screw by itself has nothing to bite into and will eventually pull right out from the shade's weight. Trust me, you don't want to wake up to a fallen blind.
How They Work: Those little plastic sleeves expand behind the drywall as the screw goes in, creating a super-secure anchor point.
Just pick an anchor that's sized for the screws that came with your shades. Tap it gently into the pilot hole until it's flush with the wall. Now you can position your bracket and drive the screw straight into the anchor. You'll feel it tighten up for a rock-solid hold. With the brackets firmly in place, you're ready for the fun part—actually hanging the shade.
Getting Your New Roman Shades Hung and Adjusted
Alright, this is the best part—the moment of truth when you finally see your new Roman shades hanging in the window. With the brackets firmly in place, all that's left is to hang the headrail and make a few small tweaks to get that perfect, custom-fit look. It's incredibly satisfying to see it all come together.
Attaching the headrail itself is usually pretty simple. Depending on the design, it will either slide or snap right into the brackets you just installed. Listen for a solid "click" or feel it lock in—that's your cue that it's secure and not going anywhere.
With the shade up, go ahead and test the lift mechanism. Pull the cord, lift the cordless rail, or hit the button on your remote a few times. You're looking for a smooth, even movement as the shade goes up and down. It shouldn't catch, snag, or feel like it's struggling.
Fine-Tuning for That Polished Look
Even when you've done everything right, you might find the shade hangs a little crooked or the fabric folds aren’t stacking quite perfectly. Don't worry, this is completely normal and usually just requires a few simple adjustments to get it looking just right.
For instance, if one side hangs lower than the other, take a peek at the back of the shade. You'll see cords running through a series of guide rings. Often, all you need to do is adjust the tension on these cords. A quick tweak can level out the bottom rail and get those folds to stack beautifully. It’s these small details that give Roman shades their classic, elegant appearance.
It’s no surprise that high-quality window treatments are a smart investment. The Roman blinds market hit a value of about $3.1 billion in 2024 and is still on the rise. They do more than just look good; they're a huge player in energy efficiency. In fact, the U.S. Department of Energy estimates that roughly 30% of a home's heating and cooling energy is lost through its windows. Well-fitted shades can make a real difference. You can read more about Roman blinds market trends to see why they're so popular.
Working with a Motorized System?
Motorized shades are a fantastic convenience, but they do have their own set of adjustments. Once you've hung a motorized shade, the next step is usually to program its upper and lower limits. Essentially, you're teaching the motor where to stop when the shade is all the way up and all the way down.
This is typically done with the remote control and is more straightforward than it sounds. Setting these limits correctly prevents the motor from overworking and ensures your shade stops at the perfect spot every time. If you want a deeper dive, our motorized blinds DIY complete installation guide walks you through the entire process.
For homeowners here in Delmarva looking to upgrade, Home Blinds & Floors has a huge selection of custom motorized shades. Our team brings the showroom right to your home and handles all the technical details, so you don't have to.
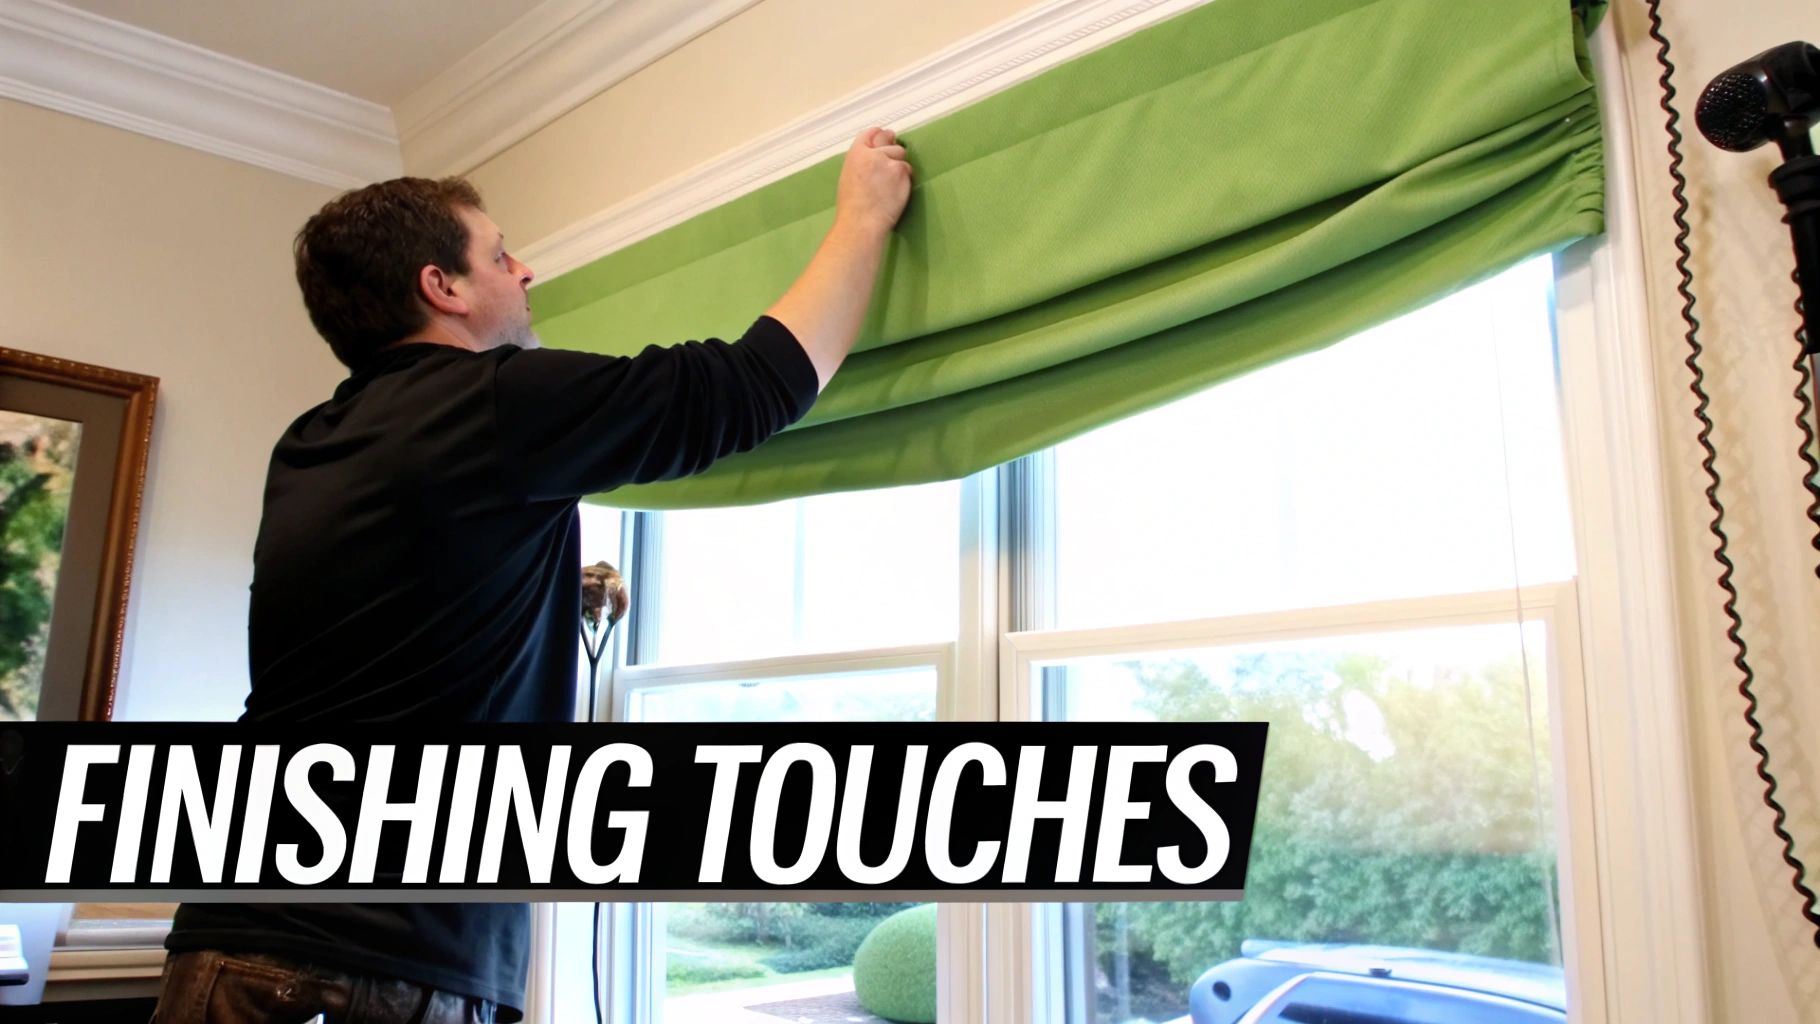
Adding the Final Touches for a Professional Look
You've done the hard part—the shade is up and secure. Now it's time for the little details that really separate a DIY job from a professional installation. These final steps are what give your new Roman shades that polished, finished appearance.
Home Blinds & Floors offers a wide selection of custom blinds and shades in Delmarva, with expert installers who bring the showroom to your living room. We know that the small finishing touches are just as crucial as the initial measurements.
Attaching the Valance and Securing Cords
First up is the valance. This is the decorative fabric piece that slides or clips right onto the front of the headrail. Its whole purpose is to hide the mounting hardware, giving you a clean, seamless look. It’s a quick step, but it makes a huge difference.
Next, you'll want to install the cord cleat—this is an absolute must, especially if you have children or pets running around.
Find a Safe Height: Mount the cleat on the wall or window frame, high enough so it's completely out of reach of little hands.
Install Securely: Use the screws that came with it to attach the cleat firmly. You don't want it coming loose.
Wrap Excess Cord: Every time you adjust the shade, just wrap the leftover cord around the cleat in a simple figure-eight pattern.
This isn't just for looks; it's a critical safety feature. Keeping the cords neatly wrapped prevents them from forming dangerous loops, giving families across the Delmarva Peninsula genuine peace of mind.
How to Dress Your Roman Shades
The last thing to do is "dress" the shade. This just means training the fabric to create those perfect, crisp folds Roman shades are known for. Right out of the box, the material can be a little stiff from shipping.
As you slowly raise the shade for the first time, use your hands to gently guide the fabric along its seams, encouraging it into neat folds. Do this a few times, and the fabric will develop a "memory," learning to stack perfectly every time. This one little action is the secret to getting that classic, tailored style.
Looking for more inspiration? Check out some of our favorite top window design ideas for your Delmarva home in 2025. Taking a few extra minutes for these finishing touches will ensure your new shades look absolutely flawless from day one.
FAQ: Your Roman Shade Installation Questions
Over the years, our team at Home Blinds & Floors has helped countless homeowners across the Delmarva Peninsula. Here are some of the questions we hear most often about getting Roman shades installed just right.
Can I install Roman shades myself?
Absolutely. If you're comfortable with basic tools like a drill and level, installing Roman shades in a standard window is a very manageable DIY project. However, for specialty windows like bay or arched windows, or for any motorized shades, we recommend professional installation to ensure a perfect fit and flawless operation.
What is the difference between an inside and outside mount?
An inside mount fits snugly within the window frame for a clean, built-in look that showcases your trim. An outside mount is installed on the wall or trim above the window, which can make the window appear larger and provides better light blockage. It's also the best solution for windows without enough frame depth for an inside mount.
How do I keep my new Roman shades clean?
For regular maintenance, a light dusting or a gentle pass with your vacuum's brush attachment is usually all that’s needed. For spills, always check the manufacturer’s instructions. Some fabrics may require professional cleaning to prevent damage.
What cities in Delmarva do you serve?
Home Blinds & Floors proudly serves the entire Delmarva Peninsula. Our service areas include Salisbury, Ocean City, and Easton in Maryland, as well as Rehoboth Beach, Lewes, Dover, and all of Sussex and Kent counties in Delaware. We bring our mobile showroom directly to you.
Your Delmarva Window Treatment Experts
In summary, Home Blinds & Floors provides custom window treatments, expert advice, and in-home service to homes and businesses across the Delmarva Peninsula. From Rehoboth Beach to Easton, our team is here to help you choose the best shades, shutters, or blinds for your space. Whether you're a DIY pro or prefer a professional touch for trickier installations like bay windows or motorized systems, we ensure a perfect result every time. schedule a free in-home consultation today.


Comments