.avif)
.avif)
.avif)
How to Install Roller Shades: A Delmarva Homeowner's Guide
- Максим Пархоменко
- Feb 14
- 10 min read

TL;DR: Installing roller shades is a straightforward DIY project. The process involves deciding between an inside or outside mount, taking precise measurements, securing brackets levelly, and snapping the shade into place. For custom sizes, motorized options, or a guaranteed perfect fit, consider a professional installation from a local expert.
Trying to figure out how to install roller shades for a clean, modern look in your Delmarva home? At Home Blinds & Floors, we help homeowners across the Eastern Shore find the perfect balance of style, light control, and privacy with custom window treatments tailored to your space. This guide will walk you through the DIY steps, so you can skip the frustration and get it done right the first time.
Choosing the Right Installation: Inside vs. Outside Mount
Choosing sleek, modern roller shades is a fantastic way to update the look and feel of a room. The first and most important decision is whether to use an inside mount or an outside mount. This choice affects how you measure, the overall look, and light control.
Inside Mount: Fits neatly within the window casing for a clean, built-in look. This is ideal for showing off attractive window trim but requires sufficient frame depth.
Outside Mount: Installed on the wall or trim above the window. This can make a window appear larger, hide imperfect trim, and provides better light blockage by overlapping the window opening.
The secret isn't some special skill; it's just about getting the fundamentals right before you even pick up a drill. A little planning here makes the actual installation a breeze.
From Measurement to Mount
When you break it down, a professional-looking installation really only depends on three things:
Accurate Measurement: This is the big one. Almost every installation problem starts with a bad measurement.
Correct Bracket Placement: Your brackets must be perfectly level and spaced correctly for the shade to operate smoothly.
Secure Fastening: Brackets must be anchored firmly to the window frame or wall to keep the shade from sagging and ensure it's safe.
From free in-home consultations to flawless installation, Home Blinds & Floors takes the stress out of selecting and installing window treatments. We guarantee a perfect fit for homes from Salisbury to Rehoboth Beach.
Preparing for a Flawless Roller Shade Installation
The secret to a professional-looking installation happens long before you pick up a drill. It’s the old "measure twice, cut once" rule, and when it comes to installing roller shades, that wisdom is the bedrock of a job you’ll be proud of for years.
Just like getting the prep work right for flawless results is non-negotiable for a perfect paint job, getting your window measurements exact is the most critical first step. Everything else in the installation hinges on these initial numbers.
Inside Mount vs. Outside Mount: Making the Right Call
First things first, you need to decide if you want an inside mount or an outside mount. The way you measure is completely different for each, so let's break it down.
For an Inside Mount: You'll need to measure the width inside the window frame in three spots—top, middle, and bottom. Always use the narrowest of these three numbers. For the height, do the same thing: measure the left, middle, and right, but this time, use the longest measurement. The most important tip here is to deduct 1/8 to 1/4 inch from the final width. This tiny adjustment is what ensures your shade rolls smoothly without scraping the sides.
For an Outside Mount: Here, you decide how much you want the shade to overlap the window opening. A good rule of thumb is adding 1.5 to 3 inches to each side of the frame's width. For the height, measure from where you plan to put the top of the headrail (usually 2-3 inches above the frame) down to the windowsill or wherever you want the shade to end.
As a local, family-run business, Home Blinds & Floors provides personal service, competitive pricing, and professional installation throughout Sussex, Wicomico, Kent, and beyond.
This simple diagram breaks down the entire process. It all starts with that crucial first step: measuring.
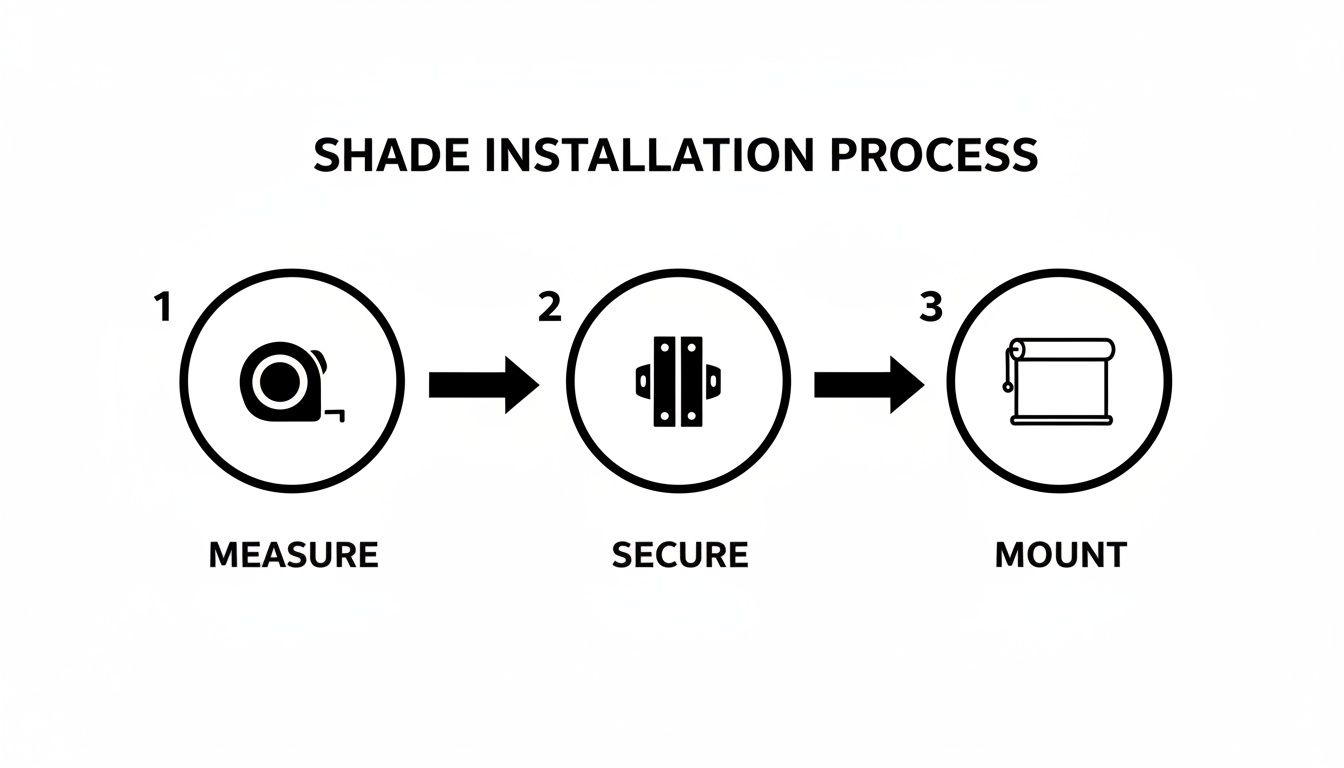
As you can see, each step builds on the last, which is why getting the measurement phase right is absolutely essential.
Essential Tools and Materials for Roller Shade Installation
Tool/Material | Purpose | Pro Tip |
|---|---|---|
Steel Tape Measure | For taking precise width and height measurements of your window. | Don't let the tape sag in the middle, especially on wide windows. A rigid, high-quality tape measure is your best friend here. |
Pencil | To mark bracket hole locations and guidelines. | A mechanical pencil gives you a fine, consistent line, which helps with drilling accuracy. |
Level | Ensures your brackets are perfectly horizontal for a balanced shade. | A 24-inch level is great for most windows, but a smaller torpedo level works well in tight spaces. |
Power Drill | To drill pilot holes and drive screws for the mounting brackets. | Make sure your drill is fully charged before you start! Having to stop and charge mid-install is a common rookie mistake. |
Drill Bits | Sized correctly for the included screws and your wall material. | Use a bit slightly smaller than your screw for pilot holes in wood. For drywall, use the bit size specified for your wall anchors. |
Screwdriver | For manually tightening screws or if a drill is too powerful. | A ratcheting screwdriver can save your wrist and speed things up if you're not using a power drill. |
Wall Anchors | For securing brackets in drywall where no stud is present. | Always use anchors if you're drilling into hollow drywall. The shade's weight will pull screws right out otherwise. |
Step Ladder | To safely and comfortably reach the top of the window frame. | Make sure it's on a stable, level surface. Never overreach—it's better to move the ladder than to risk a fall. |
Once your prep work is done, you're all set to begin the installation. If you're still looking for the perfect style, feel free to browse our wide selection of custom roller shades and other window treatments.
Installing Inside Mount Roller Shades
An inside mount is my go-to recommendation when a client wants that clean, built-in look. The shade fits snugly right inside the window frame, creating a seamless and minimalist aesthetic that’s incredibly popular here on Delmarva. It really makes the window treatment feel like a part of the home's architecture.

The whole game with an inside mount comes down to bracket placement. You're setting a perfectly level foundation that ensures your shade operates smoothly for years to come. It's these small details that separate a DIY-looking job from a professional one.
Marking and Placing Your Brackets
Alright, let's get started. Grab your pencil and tape measure. Take one of your mounting brackets and hold it up in a top corner of the window frame. Push it back so it's flush against the frame, then use your pencil to mark where you'll drill the screw holes. The goal here is to make sure that when the shade is installed, it won't rub against the glass or interfere with any window cranks.
Now, do the exact same thing on the other side. Before you reach for the drill, grab your level and place it across the two sets of marks. Are they perfectly level? This is the most common mistake I see, and an uneven installation will absolutely cause your shade to roll up crooked.
Drilling Pilot Holes and Securing Brackets
Once you're confident your marks are level, it’s time to drill. Pick a drill bit that’s just a little bit smaller than the screws that came with your shade. Drilling these pilot holes is non-negotiable, especially with wood frames, as it prevents the wood from splitting when you drive the screws in.
Carefully drill your pilot holes on each pencil mark you made. Now you can position the bracket over the holes and drive the screws in with your drill or a screwdriver. Give the brackets a little wiggle—they should feel completely solid.
Clicking the Shade Into Place
This is the fun part where it all comes together. Pick up your roller shade and find the spring-loaded pin end—it's the side that compresses when you push on it. Insert that end into its bracket first.
With the pin-end in place, guide the other side of the shade's headrail into the opposite bracket. You'll need to push it in firmly until you hear and feel a solid "click." That's the sound of success. Give the shade a gentle tug downward just to be sure it's locked in securely.
Finally, give it a test run. Roll the shade up and down a few times. Does it move smoothly? If so, congratulations—you've just completed a professional-looking inside mount installation! You can explore the stunning variety of roller shades we offer to see what’s possible.
Mastering the Outside Mount Installation
Sometimes, an inside mount just won't work. Maybe your window casing is too shallow, or maybe you want to create the illusion of a bigger, more dramatic window. In these cases, an outside mount is your go-to solution. By mounting the shade on the wall or trim above the window, you also get the bonus of blocking a lot more light from creeping in around the edges.
The real secret to a great-looking outside mount comes down to one thing: getting the brackets in exactly the right spot. You need them to be perfectly level and centered over the window frame.
Getting the Placement and Height Just Right
First things first, you have to decide how high to hang it. A good rule of thumb is to start about 2 to 3 inches above the top of the window trim.
Once you’ve picked your height, grab your tape measure and find the dead center of the window. Make a small, light pencil mark. Next, measure the total width of your roller shade's headrail. Divide that number by two. Now, from your center mark on the wall, measure out that half-width distance in both directions. Those two new marks are where the outside edges of your brackets will go.
Securing the Brackets for a Rock-Solid Fit
Okay, your spots are marked and you've double-checked that they're level. It's time to install. Just like with an inside mount, you'll want to pre-drill pilot holes to avoid splitting the trim or cracking the drywall.
And this is important: if you’re drilling into plain drywall with no stud behind it, you must use wall anchors. Don't skip this. The weight of the shade will eventually yank those screws right out of the wall. Once the anchors are in, screw the brackets in firmly until they're solid and have no wiggle. From there, the headrail should click right into place. Give it a few test runs to make sure everything is smooth.
This careful, step-by-step process is second nature to the expert installers at Home Blinds & Floors. We handle this kind of thing every day, guaranteeing a flawless finish for any window in Sussex, Wicomico, or Kent counties. You can find out more about our dedicated services for window shades in Easton and beyond.
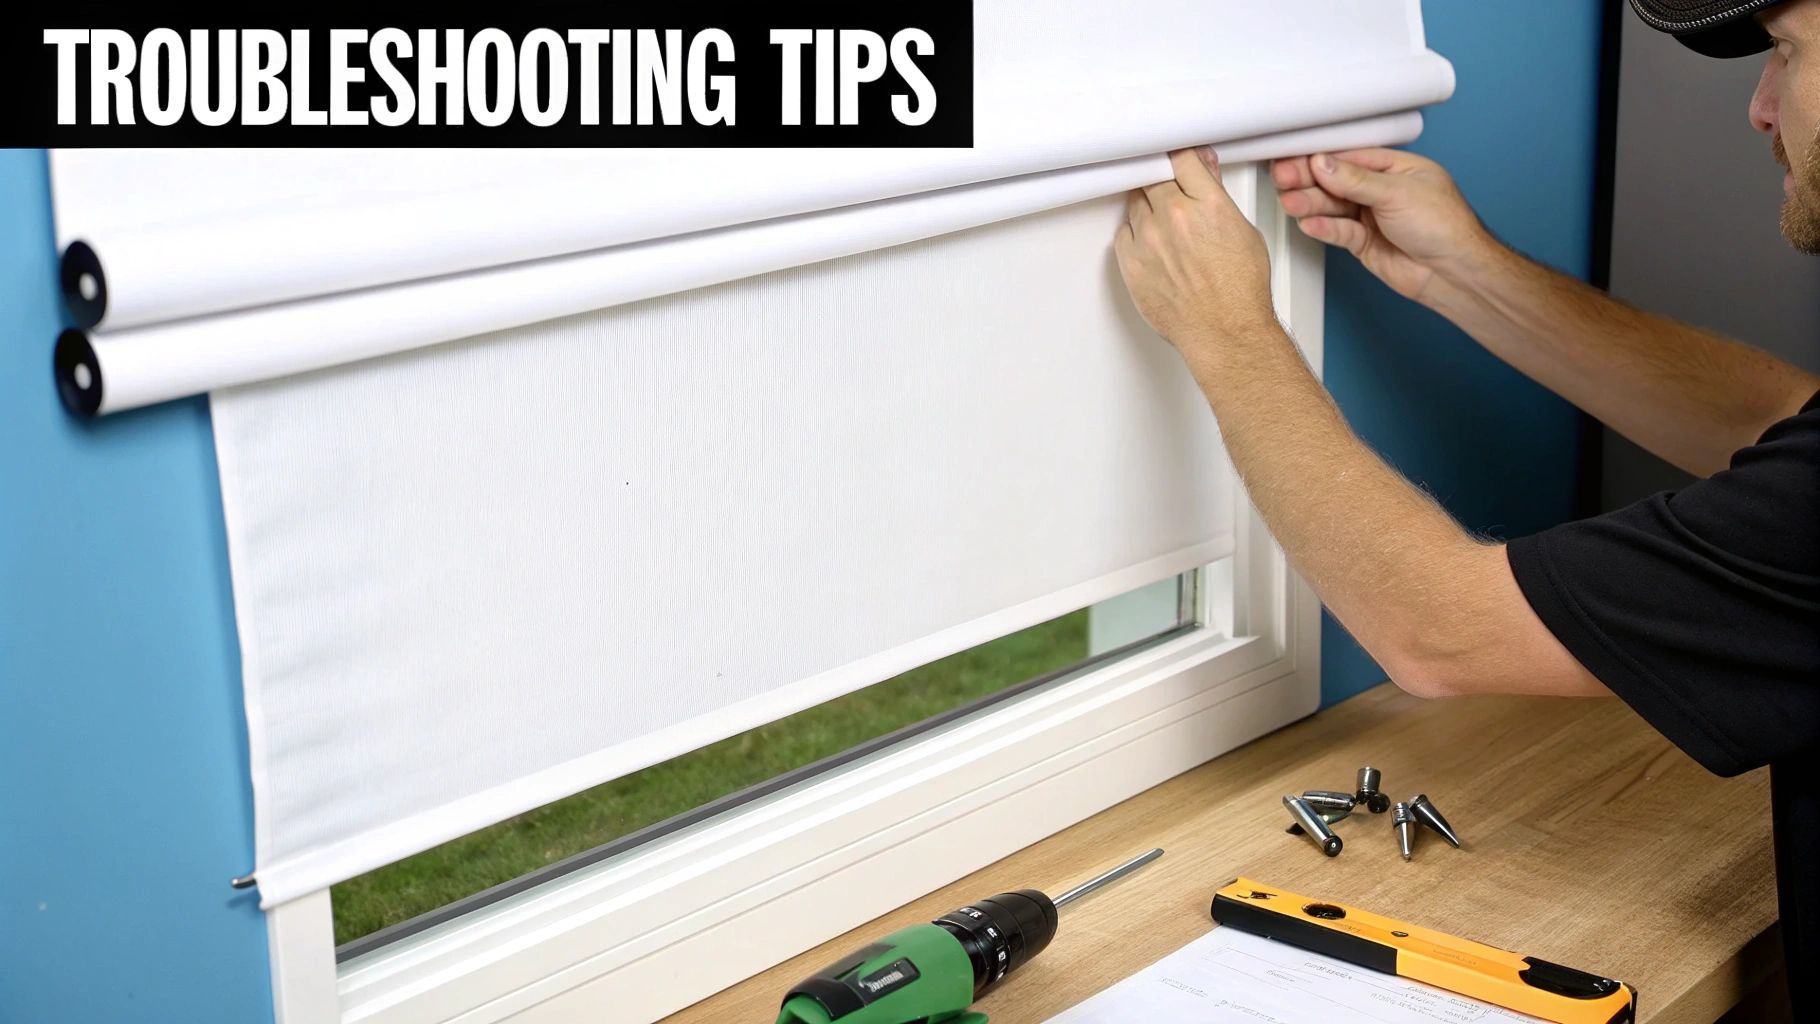
Troubleshooting Common Installation Issues
Even the most meticulous DIY project can hit a bump in the road. When you're installing roller shades for the first time, a small hiccup can feel like a major headache. But don't worry—most common problems are surprisingly easy to fix.
My Shade Rolls Up Unevenly or Looks Crooked
This is, without a doubt, the number one issue people run into. If you notice the fabric gathering to one side as you roll the shade up, it's almost always because your brackets aren't perfectly level.
Grab your level and rest it on the headrail or roller tube. Is the bubble centered? If it’s off, you’ll need to adjust one of the brackets up or down until it's perfectly horizontal.
If the brackets are level and the shade still won't roll straight, try "training" the fabric:
Lower the shade completely.
Place a small piece of painter's tape on the exposed roller tube on the side the fabric is bunching towards.
Roll the shade up slowly. The tape adds thickness, encouraging the fabric to realign.
The Brackets Feel Loose or Wobbly
Secure brackets are essential for safety and proper function. If a bracket wiggles, you probably missed the solid wood of the window frame or a wall stud. Drywall alone will never be strong enough.
The best solution is to remove the bracket, use a stud finder to locate solid wood, and re-secure it. If no stud is available, use high-quality drywall anchors rated to support the weight of your shade.
Why Work with Home Blinds & Floors?
Look, installing a standard roller shade is a totally doable weekend project. But let's be honest—some situations are just better left to a professional. Calling for help isn't admitting defeat; it's making a smart investment in getting the job done right. This is especially true for tricky installations like motorized shades, large picture windows, or hard-to-reach skylights. Knowing which DIY jobs you shouldn't attempt yourself can save you time and costly mistakes.
Massive or Awkward Windows: The size and weight of shades for large or custom windows require precision and strength to install correctly and safely.
Motorized Shade Systems: Integrating motorized shades with smart home systems like Alexa requires expert knowledge of wiring, programming, and syncing.
High and Hard-to-Reach Windows: Professionals have the proper equipment, like scaffolding and secure ladders, to safely install treatments in two-story foyers or on skylights.
Home Blinds & Floors offers a wide selection of custom blinds and shades in Delmarva, with expert installers who bring the showroom to your living room. We take the guesswork and stress out of the entire process, from the initial consultation right through to the final installation.
If you'd rather leave the heavy lifting to us, we're here to help. Schedule your free in-home consultation at https://www.homeblindsandfloors.com/contact and let our team handle it for you.
Frequently Asked Questions About Roller Shade Installation
Still have a few questions about getting your roller shades installed? Here are some of the most common things we hear from homeowners around the Delmarva Peninsula.
What are the best roller shades for privacy?
For maximum privacy, look for blackout or room-darkening roller shades. These are made from opaque fabrics that prevent light and shadows from passing through. When combined with an outside mount that overlaps the window frame, they provide excellent privacy for bedrooms and bathrooms.
How much do custom roller shades cost in Delmarva?
The cost of custom roller shades varies based on size, fabric choice, control type (manual vs. motorized), and brand. On average, you can expect to invest more than off-the-shelf options, but you gain a perfect fit, higher-quality materials, and a wider selection of styles. We provide a free in-home consultation and quote to give you an exact price for your specific windows.
Do you offer motorized shades that work with smart homes?
Yes! Home Blinds & Floors specializes in motorized window treatments that can be integrated with popular smart home systems like Amazon Alexa, Google Home, and more. You can control your shades with a remote, a smartphone app, or even your voice, adding convenience and a touch of modern luxury to your home.
Can I install roller shades myself?
Absolutely. For a standard-sized window with a simple wood frame, installing a roller shade is a manageable DIY project. However, for oversized windows, complex motorization, or tricky surfaces like brick or concrete, we highly recommend professional installation to ensure safety and perfect operation.
What cities in Delmarva do you serve?
We proudly serve homeowners and businesses across the entire Delmarva Peninsula, including major areas like Salisbury, Ocean City, and Easton in Maryland, as well as Rehoboth Beach, Lewes, Dover, and Sussex and Kent counties in Delaware.
Your Local Delmarva Window Treatment Experts
In summary, Home Blinds & Floors provides custom window treatments, expert advice, and in-home service to homes across the Delmarva Peninsula. From Rehoboth Beach to Easton, our team is here to help you choose the best shades, shutters, or blinds for your space. Properly installed roller shades enhance your home's style, privacy, and energy efficiency. While DIY is an option, our professional team ensures a flawless fit every time. Schedule your free consultation today.
Comments